

How do you service a camera Easy Steps to Keep It Working
Understanding the importance of camera maintenance is essential for any photographer. Keeping your equipment in top shape ensures it works well and captures stunning photos. Regular upkeep can prevent costly repairs and extend the lifespan of your gear. By investing time in proper care, photographers can enjoy a smoother experience during shoots.
Ignoring minor issues can lead to significant problems later on. Knowing when to perform maintenance and how to do it simplifies the process. This guide will provide insights into effective camera care, helping photographers avoid unexpected failures.
Whether you are an amateur or a seasoned professional, mastering the basics of camera maintenance will enhance your photography journey. Taking the right steps now will pay off in the long run, ensuring your equipment remains reliable for every shoot.
Key Takeaways
- Understanding camera maintenance is crucial for responsible photography.
- This guide covers the complete process from recognizing maintenance needs to basic care.
- Regular upkeep preserves image quality and performance.
- Proper care saves money on repairs and extends gear lifespan.
- A well-maintained camera produces sharp photos and reduces equipment failure risks.
- The article includes professional recommendations and DIY techniques tailored for humid climates.
- By the end, readers will have a clear roadmap for maintaining their camera.
Why Regular Camera Servicing Is Essential
Regular upkeep of your camera is vital for photographers seeking to maximize their gear’s potential. Consistent maintenance not only enhances the performance of your equipment but also prolongs its lifespan. By conducting routine checks and cleanings, photographers can ensure their cameras deliver the best quality images over the years.
Dust and moisture are two common threats that can lead to significant damage. Regular cleaning prevents dust from settling on the sensor and internal components, which can degrade image quality. This simple act of care keeps your camera in great shape and your photos looking sharp.
Ignoring maintenance can result in costly repairs and major issues. A camera that is not regularly serviced is more likely to suffer sudden mechanical failures, especially during critical photography assignments. By addressing minor issues early, photographers can avoid expensive repairs that take longer to resolve.
Professional servicing extends the overall lifespan of your equipment, protecting your financial investment. Moreover, regular maintenance enhances your entire photography experience. Knowing your camera is in good condition gives you the confidence to shoot in any environment.
In humid climates like Singapore, the need for regular servicing becomes even more critical. Moisture-related damage can occur faster than in drier environments, making it essential to keep your camera well-maintained.
Prioritizing camera servicing means spending less time dealing with equipment problems and more time capturing great images. This dedication to maintenance will ultimately lead to a more enjoyable and successful photography journey.
When Should You Service Your Camera?
Timely camera maintenance is crucial for optimal functionality and longevity. Knowing when to check your camera can greatly enhance its performance. Experts recommend that most photographers get their camera serviced at least once a year. This annual check-up helps catch potential issues early, ensuring that your equipment remains in top condition.
During these visits, technicians perform essential tasks such as cleaning and checking your camera. This proactive approach prevents larger problems from developing over time. If you notice any signs of trouble, it may be wise to seek maintenance sooner than the annual schedule.
Annual Service Recommendations
The industry standard is clear: get your camera serviced at least once per year. For professional photographers who shoot several times a week, servicing twice a year is advisable. This increased frequency compensates for the additional wear and tear that comes with heavy usage.
Signs Your Camera Needs Maintenance
Pay attention to the following indicators that your camera may require a check-up:
- Decreased image quality: Look for blurriness, dark spots, or other irregularities in your photos.
- Unusual noises: If you hear strange sounds, such as grinding or clicking, this could signal mechanical issues.
- Visible damage: Cracks, dents, or any physical impairment on the camera body or lens should prompt immediate assessment.
Factors Affecting Service Frequency
Several factors can influence how often you should have your camera serviced:
- Frequent travel exposes your gear to various weather conditions, increasing the likelihood of damage.
- Switching lenses often can allow dust to enter the camera, necessitating more regular cleaning.
- Improper storage, such as leaving your camera in direct sunlight or near electronics, can lead to accelerated wear.
By staying vigilant and recognizing these signs, photographers can ensure their gear remains reliable for every shoot. Regular maintenance not only preserves the functionality of your camera but also enhances your overall photography experience.
How do you service a camera? Understanding the Process
Understanding the process of camera maintenance can greatly enhance your photography experience. Regular upkeep is essential for ensuring your equipment remains in excellent working condition. This section will guide you through the key steps involved in servicing your camera.
First, a thorough inspection of the camera body and its components is crucial. Technicians check for physical damage, loose parts, and wear on external surfaces. This careful examination helps identify any issues that could affect performance.
Inspection of Camera Body and Components
During the inspection, the image sensor, mirror, and viewfinder are also evaluated. Technicians look for dust, scratches, or alignment problems that may compromise photo quality. Addressing these issues early can prevent more significant repairs down the line.
Cleaning the Sensor and Internal Parts
Next, cleaning the sensor and internal parts is a vital step. Internal cleaning removes accumulated dust and debris from sensitive areas that are hard to reach through at-home methods. This ensures your camera continues to produce clear, high-quality images.
Adjusting and Calibrating Focusing Systems
After cleaning, the focusing systems undergo adjustment and calibration. This process ensures autofocus accuracy across all focus points and shooting modes. A well-calibrated system enhances your ability to capture sharp images.
What to Expect from Professional Servicing
When you take your camera for professional servicing, expect a comprehensive check of all moving parts. This includes the shutter mechanism, lens mount, and hotshoe connections. Technicians will verify camera and lens communication, ensuring electronic contacts are clean and data transfers correctly.
Additionally, pixel mapping and firmware updates are often part of extensive service packages. These updates address dead pixels and improve overall camera performance. After professional servicing, you can anticipate noticeably sharper photos and a camera that feels responsive and reliable.
Basic Camera Maintenance You Can Do at Home
Maintaining your camera at home can significantly enhance its performance and longevity. Regular DIY care not only boosts the quality of your photos but also helps prevent issues before they arise. Here are some essential maintenance tasks you can easily perform.
Using a UV Filter for Lens Protection
Installing a quality UV filter on each lens provides an essential first line of defense against dust, scratches, and accidental impacts during everyday use. This simple addition can save you from costly repairs down the line.
A UV filter also blocks ultraviolet light that can create hazy images. This is particularly useful when shooting outdoors in bright Singapore sunlight. Choose a filter that matches your lens for optimal protection.
How to Clean Your Camera Sensor Safely
Dust and dirt on your camera’s sensor can ruin your photos. Cleaning it regularly is essential. Use a sensor cleaning kit designed for your specific camera model, following the manufacturer’s guide for safe cleaning.
Before attempting sensor cleaning, always use a rocket blower first. This removes loose dust particles without physically touching the delicate sensor surface. Regular cleaning every six months can keep your images sharp.
Calibrating Your Lenses for Sharper Images
Calibrating your lenses is crucial for at-home camera maintenance. This process ensures your autofocus system delivers tack-sharp photos with every shot. Use calibration tools or software to fine-tune the focus accuracy of each lens.
Performing lens calibration at least twice a year keeps your images consistently sharp. This reduces the frustration of soft focus ruining important photos.
Finally, keeping your camera gear organized in a proper bag with charged batteries and empty memory cards is a simple but effective maintenance habit. By following these steps, you can ensure your camera remains in top shape, ready for every photography adventure.
Common Camera Issues That Require Professional Service
Common camera issues can significantly hinder your photography experience. Two prevalent problems are slow shutter speeds and dust accumulation inside the camera. These issues can affect the quality of your photos and the overall performance of your equipment.
Slow shutter speeds can ruin your images, making them appear blurry or poorly exposed. Diagnosing shutter speed issues involves checking how long the shutter remains open. If it feels sluggish or stuck, immediate repair is necessary. Addressing this problem promptly prevents further complications and costly repairs.
Diagnosing and Fixing Slow Shutter Speeds
Slow shutter speeds that lag or feel inconsistent are a common mechanical issue that requires professional diagnosis and camera repair service. When the shutter mechanism begins to fail, it can produce uneven exposure across photos. Eventually, it may stop functioning entirely if left unaddressed.
Dealing with Dust and Debris Inside the Camera
Dust and debris inside the camera body accumulate over time, especially when lenses are changed frequently in outdoor or dusty environments. Visible spots on photos, particularly noticeable against bright backgrounds like the sky, are a telltale sign that dust debris has settled on the sensor.
Professional cleaning uses specialized tools and techniques to remove dust debris from internal parts without causing damage to sensitive components. Attempting to clean deep internal dust yourself can push dirt further into the camera, creating more serious problems than the original issue.
Addressing shutter problems and internal dust promptly prevents minor issues from escalating into major damage that requires expensive camera repair. Regular professional service is the most reliable way to keep internal parts clean and the shutter mechanism operating at factory specifications.
Essential Tools for Camera Maintenance and Repairs
Having the right tools is crucial for effective camera maintenance and repairs. Whether you’re a professional or a hobbyist, understanding the various tools available can significantly enhance your DIY repair skills. This knowledge helps keep your gear in top shape, ensuring optimal performance during shoots.
Basic tools are essential for everyday care. These tools can help you perform routine maintenance and minor repairs with ease. Let’s explore some of the must-have tools for camera upkeep.
Basic Tools for Everyday Care
- A rocket blower: This tool is vital for removing dust from lenses and the sensor area. A quick puff of air helps maintain clarity without risking scratches.
- Microfiber cleaning cloths: These are indispensable for wiping lens glass and camera body surfaces. They clean effectively without leaving scratches or lint behind.
- Pre-moistened lens wipes: Brands like Zeiss offer affordable options for cleaning glass elements. Their solution evaporates quickly, making them convenient for on-the-go cleaning.
- A lens pen: This tool features a retractable brush for dust removal and a soft cleaning tip for tackling smudges on lens surfaces.
For those looking to dive deeper into DIY repairs, intermediate and advanced tools can make a significant difference.
Intermediate and Advanced Tools for DIY Repairs
- Tweezers and small pliers: These allow for precise handling of tiny camera parts during more involved repairs.
- A lens spanner: This advanced tool is used for adjusting or removing lens elements. It should only be used by those with proper technical knowledge.
- Point lubricants: These are essential for addressing mechanical stiffness in moving parts, ensuring smooth operation.
- A soldering iron: This tool is useful for electrical fixes and should be handled with care.
Investing in the right tools for your skill level ensures that basic maintenance work is done safely. With the proper equipment, photographers can perform essential care without risking damage to delicate camera parts.
How to Choose a Professional Camera Service Provider
Selecting the right camera service provider is crucial for maintaining the quality of your photography gear. Many factors can influence your choice, such as the provider’s experience and service offerings. When making your decision, look closely at their service history. Choose providers with licensed technicians who understand cameras inside and out.
Customer feedback can reveal a lot about their reliability and service quality. Ensure they use high-quality parts and offer repair warranties. This demonstrates their commitment to keeping your camera functioning well.
Good camera services distinguish themselves in several ways. They should clearly communicate costs and estimated repair times. Understanding this helps you plan your photo shoots better. Having a clear idea of what to expect during service simplifies the process.
Evaluating Experience and Certification
When choosing a professional camera service provider, prioritize those with manufacturer certification or authorized partnerships with brands like Canon, Nikon, or Sony. This certification ensures that technicians are trained to handle specific camera models effectively.
Evaluating the experience level of technicians is also important. Seasoned professionals are more likely to diagnose and fix complex camera repair issues correctly the first time. Their expertise can save you time and money in the long run.
Understanding Service Offerings and Warranties
A reputable service provider offers clear information about their service offerings. This includes what is covered in standard versus extensive maintenance packages. Warranties on repair work show that the provider stands behind their quality. This gives you recourse if issues arise after servicing.
Considering Customer Reviews and Pricing Transparency
Customer reviews and testimonials provide valuable insight into the reliability, turnaround time, and overall satisfaction of previous photography equipment owners. Pricing transparency is essential; the best providers give detailed quotes upfront without hidden fees or unexpected charges after the work is completed.
For professional photographers who rely on their camera gear for income, choosing a service provider that offers loaner equipment during repairs is a significant advantage. Sending your camera to the manufacturer or an authorized partner service center ensures that genuine parts and proper diagnostic systems are used throughout the process.
Effective Camera Cleaning Techniques
Keeping your camera clean is crucial for capturing stunning photos. Using the right cleaning methods helps avoid damage and keeps your camera working well. Here are some effective techniques for cleaning your lenses, camera body, and sensor.
Safely Cleaning Your Lenses
Start by using a blower to get rid of dust and dirt. This step is essential before any physical contact with the glass surface occurs. After that, use a soft, microfiber cloth to wipe away smudges. For tough stains, Zeiss lens wipes are a great option. They clean safely without harming your lens.
Proper Cleaning of Camera Body and Sensor
Dirt and oils can build up on your camera’s body, affecting its performance. A soft wipe with a microfiber cloth can remove surface dirt. For cleaning the sensor, use a special kit with the right swabs. Avoid using compressed air, as it can push dirt further into the camera.
Follow these steps for effective sensor cleaning:
- Use the rocket blower to remove larger bits of dust.
- Use the lens pen brush to flick away remaining specs.
- Clean the front element with the cleaning end of the lens pen using a circular motion.
- For stubborn marks, use pre-moistened lens tissues.
- Don’t forget to clean the lens cap.
- Clean the rear element and lens mount as well.
Using the Right Cleaning Products and Tools
Always begin lens cleaning with a rocket blower to remove loose dust particles. Use a lens pen or soft makeup brush to gently flick away remaining dust specs without applying pressure that could scratch the lens coating. For stubborn marks, Zeiss pre-moistened lens wipes provide a safe cleaning solution that evaporates quickly without leaving residue.
Sensor cleaning should be performed with a dedicated sensor cleaning kit using swabs specifically designed for your camera’s sensor size. Regularly cleaning the camera body with a microfiber cloth will help remove oils and dirt that accumulate from handling during shoots.
By following these cleaning techniques, photographers can ensure their equipment remains in excellent condition, ready to capture beautiful images.
Climate Control and Storage Tips to Protect Your Camera Gear
Proper care of camera gear is essential for maintaining its longevity and performance. Humidity and temperature play significant roles in how well cameras function over time. High humidity can lead to mold growth in camera bodies and lenses, which damages both glass components and internal electronics. Fluctuations in temperature can exacerbate these issues, leading to moisture buildup and potential damage.
To avoid these problems, it’s vital to keep cameras in a controlled environment. Here are some effective practices for storing your photography equipment.
Impact of Humidity and Temperature on Camera Equipment
Singapore’s tropical climate, with its consistently high humidity levels, makes climate control essential for camera gear maintenance. High humidity can cause fungal growth on lens glass and inside camera bodies, permanently damaging optical coatings and electronic components.
Investing in a dry cabinet is one of the best ways to store cameras and lenses in a humidity-controlled environment. This typically maintains humidity levels between 40 and 50 percent, protecting your gear from moisture-related damage.
Best Practices for Short-Term and Long-Term Storage
Avoid storing photography equipment in direct sunlight or near heat sources. Excessive temperatures can warp parts and degrade lubricants over time. For short-term storage between shoots, keep your camera gear in a cool, well-ventilated area away from windows and air conditioning vents that cause temperature fluctuations.
Before placing cameras in long-term storage, remove all batteries to prevent corrosion and potential leakage that can destroy internal electronics. Clean the camera body and all lenses thoroughly to ensure no dust, dirt, or oils remain that could cause damage over time.
Preparing Cameras for Extended Periods Without Use
For extended periods without use, the best place for camera storage is cool, dry, and dark. Use silica gel packets inside camera bags and storage cases to absorb residual moisture and maintain a dry environment for your equipment. These simple steps can help protect your camera gear for years to come.
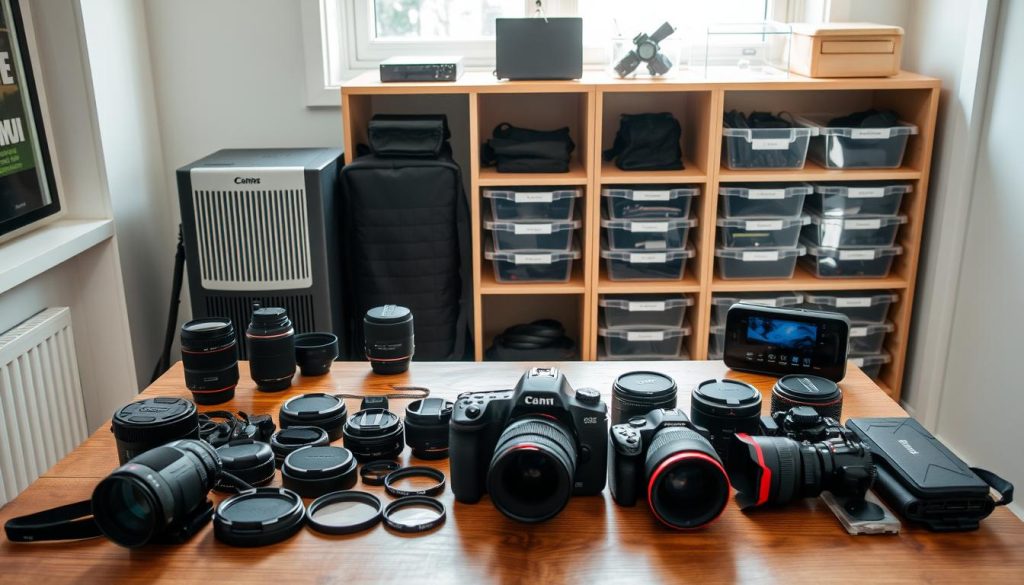
By following these climate control and storage tips, photographers can ensure their camera equipment remains in excellent condition, ready for any photography adventure.
For more detailed guidance on camera maintenance, visit this resource.
Monitoring Camera Performance for Long-Term Reliability
Keeping an eye on camera performance is vital for ensuring long-lasting reliability. After professional maintenance, it’s essential to observe how your camera operates. Look for any changes in image quality and sound. Additionally, check if the camera responds quickly to commands.
Performing test shots in various lighting conditions helps verify that all systems are functioning correctly. Monitor image quality closely for signs of recurring issues, such as dark spots or blurriness. Pay attention to any unusual noises during operation, as these can indicate mechanical issues.
Establishing a routine of reviewing photos at full magnification can help catch subtle quality issues. Keeping a simple log of service dates and any observed issues creates a maintenance history. This proactive approach ensures your camera gear remains reliable and produces high-quality work for years to come.
FAQ
Why is regular camera servicing important?
Regular servicing preserves image quality and extends the lifespan of your equipment. It helps maintain optimal performance, ensuring that your photos remain sharp and vibrant.
How often should a camera be serviced?
Annual servicing is recommended, but factors like usage frequency and environmental conditions can affect this. Pay attention to signs that indicate your camera may need maintenance.
What are common signs that a camera needs maintenance?
Signs include slow shutter speeds, inconsistent focus, or visible dust on the sensor. If you notice any of these issues, it’s time to consider servicing.
What does the camera servicing process involve?
The process typically includes inspecting the camera body, cleaning the sensor, and calibrating focusing systems. A professional service provider will ensure everything is functioning correctly.
Can I perform basic maintenance at home?
Yes, using a UV filter for lens protection and safely cleaning the camera sensor are tasks you can do at home. Regular care can help keep your gear in good condition.
What common issues require professional service?
Problems like slow shutter speeds and dust or debris inside the camera are best handled by professionals. They have the tools and expertise to diagnose and fix these issues effectively.
What tools are essential for camera maintenance?
Basic tools include lens cleaning solutions and microfiber cloths. For more advanced repairs, specialized tools may be needed, depending on the issue.
How do I choose a professional camera service provider?
Look for providers with experience and certification. Understanding their service offerings and checking customer reviews can help you make an informed decision.
What are effective camera cleaning techniques?
Safely cleaning lenses and properly cleaning the camera body and sensor are crucial. Using the right cleaning products and tools will prevent damage and maintain performance.
How can climate control affect camera gear?
Humidity and temperature can impact camera performance. Proper storage practices help protect your equipment from damage caused by extreme conditions.
How can I monitor camera performance for reliability?
Regularly check for issues and maintain a schedule for servicing. Keeping an eye on performance will help ensure long-term reliability of your camera gear.


