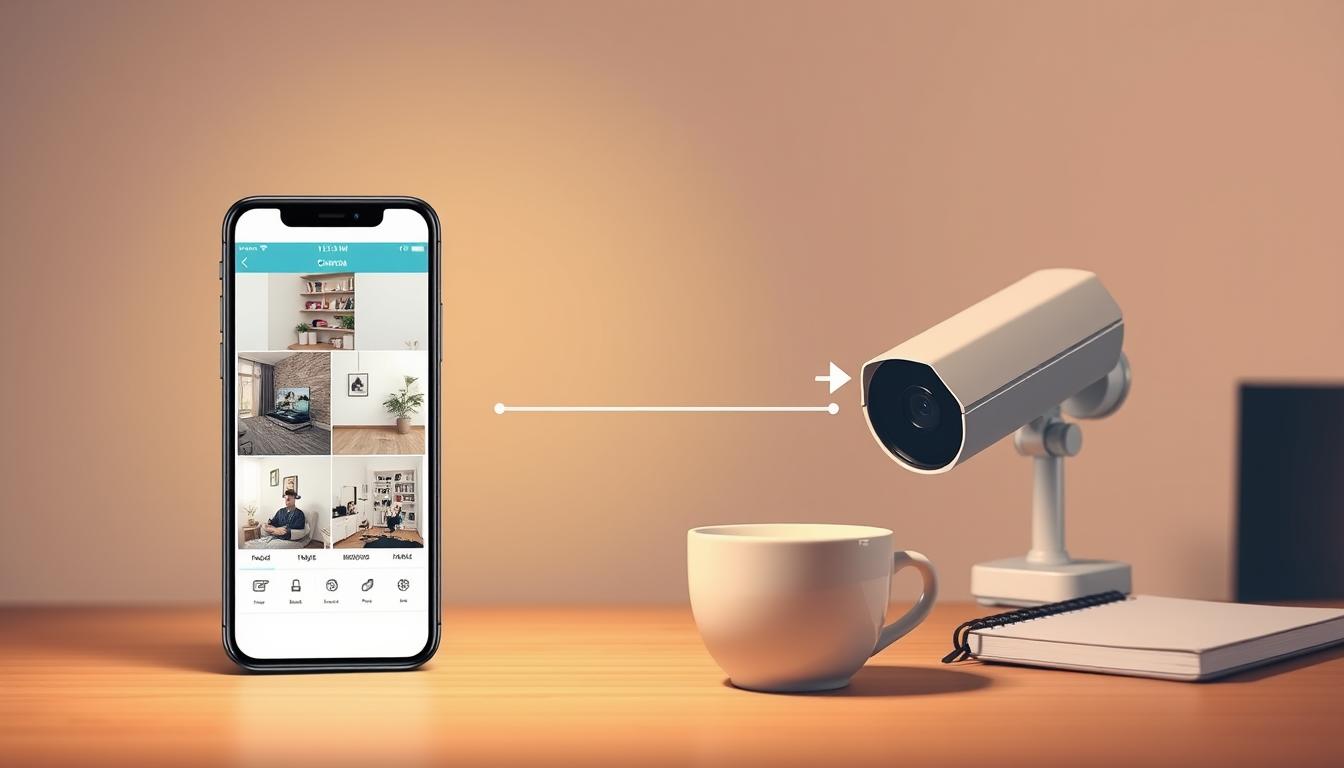
Why Can’t I See My Security Cameras on My Phone?
A blank screen where your live feed should be is a common and frustrating experience. You rely on your surveillance system for peace of mind. When the connection fails, it feels like a breach in your safety net.
Remote monitoring is a cornerstone of modern security. It allows for real-time surveillance from anywhere using a mobile device. This capability is vital for both homes and businesses across Singapore.
The benefits are clear: instant notification alerts, remote accessibility, and constant oversight. When these features stop working, it disrupts your entire security posture.
This guide is designed to cut through the frustration. Most connectivity issues have logical solutions. We will provide a clear, methodical troubleshooting path to restore your view.
Key Takeaways
- Remote camera access is a fundamental feature of modern security systems.
- A failed connection is usually caused by a simple, fixable problem.
- This article provides a step-by-step guide to diagnose the issue.
- Real-time monitoring and alerts are key benefits of a working system.
- Internet connectivity is often the primary point of failure.
- Proper app setup and permissions are essential for a stable feed.
- Regular system checks can prevent most common disruptions.
Understanding Why Your Security Camera Feed Won’t Load
The promise of remote surveillance falls apart the moment your security app fails to display the camera stream. Before diving into technical fixes, it helps to know the typical reasons for this failure. Identifying the root cause is the first step toward a solution.
Most disruptions fall into a few logical categories. Understanding these groups makes the troubleshooting process less overwhelming. You can start to pinpoint where the problem originates.
The Frustration of a Blank Screen
Opening your security camera application expecting live footage and seeing nothing is disconcerting. This instant failure undermines the core benefit of remote monitoring. The sense of control and safety is replaced by uncertainty.
This situation is common for many users in Singapore. Urban living often involves complex WiFi setups. Dense housing can lead to signal interference.
The emotional response is real. You rely on these devices for peace of mind. A blank screen creates a gap in your surveillance coverage when you need it most.
Common Culprits Behind Connection Problems
Several frequent issues block your view. They often involve simple oversights or environmental factors. Here are the primary categories to investigate.
- Network Connectivity Issues: A weak WiFi signal is a top cause. Your phone and camera must maintain a stable link to your router. Distance and physical walls degrade this connection.
- App and Software Glitches: An outdated mobile app may lose compatibility. Your phone’s operating system update can also break functionality. Security software or firewalls on the phone itself can mistakenly block the stream.
- Camera Configuration Errors: Incorrect WiFi passwords stored on the camera prevent access. Motion detection or recording settings might inadvertently disable the live feed. Wrong date/time settings can confuse the system.
- Account and Access Problems: Entering incorrect login credentials will deny access. The camera might be offline due to a power loss. Too many simultaneous users can overload the camera’s capacity.
Each of these problem areas has straightforward checks. By mentally sorting your issue into one of these groups, you can focus your efforts. The following sections provide the specific steps for each scenario.
Why Can’t I See My Security Cameras on My Phone? Start With the Basics
Before delving into complex network diagnostics, a systematic check of hardware fundamentals is essential. Many streaming failures originate from simple physical oversights. Addressing these first saves significant time and effort.
This initial process follows a core troubleshooting principle: check the plug first. Ensure every device in your home security chain has stable power and proper connections. Only then should you investigate software or signal issues.
Verify Camera Power and Physical Connections
A camera without electricity cannot transmit a feed. Begin with a visual and physical inspection of your equipment. This is the most critical of all initial steps.
First, look for LED status lights on the security unit itself. A solid or blinking light typically indicates it is receiving power. If no light is visible, check the power adapter.
Ensure the adapter is firmly plugged into both the wall outlet and the camera. Inspect the cable for any obvious damage or fraying. For wireless models, this confirms the unit is on and ready to connect to WiFi.
Wired systems using Power over Ethernet (PoE) require extra checks. Verify the Ethernet cable is securely seated in both the camera and the PoE switch or injector. Also, confirm the network video recorder is powered on and operational.
A powerful diagnostic step is to temporarily bypass wireless issues. Use an Ethernet cable to connect your security camera directly to your router. If the feed appears, the problem is likely with your WiFi signal.
Confirm the Camera is Online and Not in Sleep Mode
Power alone does not guarantee a network connection. You must verify the device is actively online. Status lights often communicate this through specific colors or blink patterns.
Consult your camera manual to decode these indicators. Alternatively, log into the manufacturer’s dedicated software or app. The interface should show a clear “online” status for each of your cameras.
Some units are configured to enter a sleep or power-saving mode. This can interrupt constant streaming to preserve battery life or reduce bandwidth. Check your device settings for such features.
If enabled, you may need to wake the camera manually or adjust the schedule. Ensuring it remains actively connected is key for reliable remote viewing on your phone.
Investigating Network and Internet Connectivity Issues
More often than not, the root of streaming failure lies not with the camera itself, but with the network it relies upon. This digital pathway is critical for live video transmission. A weak or unstable link will immediately disrupt your remote view.
Resolving these connectivity issues requires a methodical approach. You must examine the chain linking your security cameras, router, and mobile phone. Each point is a potential failure source.
Checking Your WiFi Signal Strength and Stability
Wireless cameras depend entirely on a robust WiFi signal. Physical distance and obstacles like walls are major signal killers. The first diagnostic step is to assess the signal quality at the camera‘s location.
Use your smartphone’s WiFi analyzer or your router‘s admin page. Look for signal strength indicators. If the signal is weak, try moving the camera closer to the router as a test.
Bandwidth congestion from other devices can also starve your stream. Temporarily disconnect unused smart home gadgets, tablets, or streaming boxes. This frees up network capacity for a smoother video feed.
Ensuring Your Phone and Camera Are on the Same Network
A critical yet common oversight involves mismatched networks. For local streaming, your viewing phone and the security camera must connect to the same wireless network (SSID).
Check your phone’s WiFi settings. Verify it is connected to your home network, not a guest network. The camera must be on that exact same network. This is especially crucial during initial setup to connect camera to the app.
Rebooting Your Router and Modem
Electronic devices like routers can develop temporary glitches. A simple power cycle often clears these errors and renews IP addresses. This is a fundamental troubleshooting action.
Unplug both your modem and router from power. Wait for a full 60 seconds. This allows their internal memory to clear. Then, plug the modem back in, wait for it to fully boot, then power on the router.
This process can resolve a wide range of intermittent connection problems. It is a recommended first step for many network issues.
Addressing Mobile Data vs. WiFi Conflicts on Your Phone
Modern smartphones are designed to switch to mobile data when WiFi is poor. This feature can accidentally break your local connection to the camera.
When you are at home, temporarily disable mobile data in your phone’s settings. Force the device to use only your home WiFi. This ensures a direct local link for the camera app to function correctly.
Persistent connectivity problems often stem from the network environment. For a comprehensive diagnosis and professional setup assistance, consider consulting a specialist in security system maintenance. Once your network is ruled out, software-related glitches are the next area to investigate.
Solving App-Related Problems and Glitches
Software glitches within the viewing application are a frequent source of streaming disruption. Your mobile app is the essential interface that decodes and displays the video feed. When this software malfunctions, your remote access fails completely.
This part of the process focuses on the digital tools on your phone. We will address common issues like outdated versions and system conflicts. Resolving these can quickly restore your live view.
Updating Your Security Camera App to the Latest Version
Developers regularly release app updates to fix bugs and improve security. An outdated version may lose compatibility with your camera’s firmware. This mismatch is a common problem.
Always use the official manufacturer‘s application from the App Store or Google Play. Third-party apps pose security risks and lack support. Check for updates in your phone’s store.
Open the store, search for your camera’s app, and tap “Update” if available. This simple step ensures you have the latest features and stability patches. It is a fundamental maintenance task for all users.
Checking for Phone Operating System (OS) Compatibility
Your phone’s operating system must meet the application’s requirements. An old OS version can break the app‘s functionality. This causes crashes or login failures.
First, check your phone‘s OS version. For iOS, go to Settings > General > About. For Android, go to Settings > About Phone. Note the version number.
Next, visit the app‘s store page. Look at the “Requirements” or “Compatibility” section. Compare it with your device information. If your OS is too old, you may need to update your phone‘s software.
Clearing the App Cache or Reinstalling the Application
Corrupted temporary data can cause the app to freeze or display errors. Clearing the cache removes this data without deleting your login. It is a safe first attempt.
On Android, go to Settings > Apps > [Your Camera App] > Storage > Clear Cache. On iOS, offloading the app (Settings > General > iPhone Storage) has a similar effect. This often resolves unexplained glitches.
If problems persist, a full reinstall may be necessary. Uninstall the application, then download it fresh from the official store. You will need to log in again with your credentials. This resets the software to a clean state.
Sticking with the official manufacturer software is non-negotiable for security and reliability. For a detailed guide on confirming your system is operational, learn how to verify your CCTV is functioning correctly on your. After addressing app and phone issues, the next step is to examine the camera’s own configuration.
Reviewing Camera Configuration and Settings
Misconfigured device parameters can silently block your remote access, even with perfect network connectivity. The focus now shifts to the settings stored directly on the camera hardware. These internal instructions govern its every action.
Errors here are common, often stemming from initial setup or accidental changes. A systematic review of this device configuration is your next logical step. It ensures the unit behaves as your security system requires.
Confirming WiFi Credentials Entered Correctly on the Camera
A single typo in the WiFi password can make your camera invisible. First, you must access its configuration menu. This is typically done through the manufacturer’s app or a local web interface.
Follow these steps to verify the network connection:
- Locate the network or wireless settings section within the camera‘s menu.
- Check that the Service Set Identifier (SSID) matches your home WiFi name exactly.
- Re-enter the password carefully, ensuring correct case sensitivity and special characters.
- Save the changes and allow the device to reboot and reconnect.
This process re-establishes the fundamental link between your camera and your home network. Without this, no mobile app can establish a stream.
Verifying Motion Detection and Recording Settings
Advanced features like motion detection are powerful. If misconfigured, they can create the illusion of a malfunction. Your camera might be working but not streaming as expected.
Open the camera settings related to recording and events. Review the active mode. Is it set for continuous streaming or only event-based recording?
Check the sensitivity levels and detection zones. Overly restrictive zones may ignore broad areas. Also, verify any active schedules. A schedule set for “Night Only” will disable live feeds during the day.
Ensuring these features align with your surveillance needs is crucial. Proper configuration guarantees you receive the alerts and footage you expect.
Checking for Incorrect Date/Time Settings on the Camera
Inaccurate date and time stamps cause confusion in footage timelines. This error can also disrupt cloud service registration or scheduled tasks. The system relies on correct timestamps for proper operation.
Access the general settings menu on your camera. Look for the date, time, and timezone options. Set them to match your local Singapore time precisely.
If an option for Network Time Protocol (NTP) exists, enable it. This allows the camera to sync time automatically with internet servers. It maintains long-term accuracy without manual adjustment.
A final review of all active camera settings confirms the unit is ready. It should be configured for your desired mode, whether that’s 24/7 streaming or smart motion detection recording. This internal check completes the on-device troubleshooting phase.
Addressing Account, Login, and User Access Problems
Authentication failures represent a silent barrier to your surveillance feed, often overlooked during initial troubleshooting. Your network and security camera may function perfectly. Yet, incorrect authorization settings will still block your view.
This category of problem revolves around digital permissions and identity verification. It controls who can see the footage and from which devices. Resolving these issues restores authorized access to your system.

Double-Checking Your Username and Password
Incorrect login credentials are a primary cause of failed access. Always verify the username and password you are entering. A simple typo is enough to deny entry.
A critical step is changing default factory credentials. Common defaults like “admin” or “1234” pose a severe security risk. Update these immediately during your initial setup.
If you suspect a mistake, use the “Forgot Password” feature in your app. This typically sends a reset link to your registered email. Follow the manufacturer’s official recovery way.
Reviewing Shared Access and User Account Limits
Modern systems allow multiple users, like family members, to view feeds. This is a convenient feature. However, it can lead to unexpected problems if not managed.
Most security camera systems have a limit on simultaneous streams. If too many devices are watching live, it can kick one user off. Check your product specifications for this limit.
Manage invitations and permissions through the app or web portal. The primary account holder should review who has access. Revoke permissions for users who no longer need them.
For secure sharing, avoid giving out your main account password. Instead, use built-in sharing features. Some applications offer a “Trust Circle” or guest invite system. This method is safer and more controlled.
Ensuring Your Account is Properly Activated
A newly purchased or factory-reset camera requires full activation. This process links the hardware to your online profile. Without it, the camera connected to WiFi will still not stream to your phone.
The activation usually happens within the manufacturer’s application. You may need to scan a QR code on the device. Follow the on-screen prompts carefully.
Email verification is a common final step. Check your inbox for a confirmation link from the service provider. Clicking this link finalizes the setup and enables remote viewing. Ensure your account shows as “active” or “verified” in the app settings.
Updating Firmware and Checking for System Conflicts
One often overlooked aspect of troubleshooting involves the embedded software and network addressing of your equipment. These advanced checks are vital for long-term system health and security.
Outdated software or clashing network settings can cause persistent connectivity failures. Addressing them prevents future issues and protects your investment.
How to Safely Update Your Camera’s Firmware
Firmware is the permanent software programmed into your camera‘s hardware. It controls core functions. An outdated version can create instability and security holes.
Manufacturers release updates to patch vulnerabilities and add features. Always find the correct file on the official manufacturer website. Match the model number exactly.
The update process usually happens through the camera‘s web interface or dedicated app. Follow these steps carefully:
- Download the firmware file to your computer.
- Access your camera‘s admin page via its local IP address.
- Navigate to the Maintenance or System Update section.
- Upload the file and start the update. Do not power off the device during this.
This crucial step ensures your security cameras operate with the latest technology and fixes.
Updating Your Network Video Recorder (NVR/DVR) Software
For systems with a central recorder, its software is equally important. The NVR or DVR manages all connected security cameras.
An outdated recorder system can cause widespread connectivity problems. It may fail to communicate with individual cameras or mobile apps.
Check for updates in the recorder’s on-screen menu or web portal. The update method is similar to a single camera. Always back up recordings first if possible.
Keeping this central unit current guarantees smooth operation for your entire surveillance system.
Identifying and Resolving IP Address Conflicts
Every device on your network, including cameras, needs a unique IP address. A conflict occurs when two devices share the same number.
This clash causes communication to fail. Your camera may appear offline. You can check for conflicts using your computer’s command prompt.
Open Command Prompt and type arp -a to see a list of assigned IPs. You can also try ping followed by your camera’s suspected IP. A reply from an unexpected device indicates a conflict.
To resolve it, first restart your router. This often triggers the DHCP server to reassign fresh addresses to all devices.
If the problem returns, set a static IP for your camera. Choose an address outside your router’s automatic DHCP range. Configure this in the camera‘s own network settings.
Resolving these conflicts is a key step for a stable, reliable surveillance network.
Considering Environmental and Interference Factors
The physical environment around your camera is a powerful, often invisible force that can disrupt your surveillance feed. Even with perfect settings and a strong network, elements like walls, appliances, and light can degrade performance.
These factors affect both the wireless signal and the camera‘s ability to capture clear details. Identifying and mitigating them is a crucial step for reliable monitoring.
How Distance and Physical Obstacles Weaken WiFi
WiFi signals weaken significantly over distance and when passing through solid objects. This attenuation is a primary cause of poor video quality or complete signal loss.
Materials like concrete, brick, and metal are particularly effective at blocking radio waves. A camera placed behind several walls may be in a dead zone. The signal strength at its location might be too low for stable streaming.
A simple diagnostic test is to temporarily move the unit closer to your router. If the feed becomes stable, the original location has a weak WiFi connection. You may need a WiFi extender or to reposition the device for better coverage.
Reducing Interference from Other Electronic Devices
Many common household devices emit radio frequencies that cause wireless interference. This noise competes with your camera‘s signal, disrupting the connectivity.
Major culprits include microwave ovens, cordless phones, and baby monitors. Even neighboring home WiFi networks can congest the airwaves. This is especially common in dense urban areas like Singapore.
To reduce this conflict, access your router’s admin settings. Change the WiFi channel to one less crowded. Physically relocating the router or the security camera away from other electronics can also create a clearer path for the signal.
Testing Camera Function in Different Lighting Conditions
Lighting extremes challenge a camera‘s imaging sensors. Direct sunlight can cause severe overexposure, washing out the scene. It can also make scanning a QR code during setup nearly impossible.
At night, different features come into play. If the live feed is lost in darkness, the built-in infrared LEDs may have failed. Alternatively, a setting might have disabled the night vision mode.
Check the camera’s video settings for an “IR Mode” or “Night Vision” option. Ensure it is set to “Auto” or “On.” Then, test the unit in a completely dark room. You should see a grainy, black-and-white image if the infrared illuminators are working.
These practical tests help rule out environmental causes. They ensure your security system performs reliably in all conditions for effective monitoring.
Final Steps and When to Seek Professional Support
These final steps and support options conclude our systematic troubleshooting guide. If you’ve worked through all previous steps without success, consider external support.
Consult your manufacturer‘s online FAQ for specific details. If the problem persists, contact their technical support team. Have your camera model and a description of the issue ready.
For persistent failures, hardware damage to the camera itself may be the cause. In such cases, professional repair or replacement is often the best way forward.
Investing in quality security camera technology from reputable brands reduces future issues. Don’t abandon your home security camera system; restoring your view brings valuable peace of mind.
FAQ
What are the most common reasons my camera feed won’t show up on my phone?
The most frequent issues involve connectivity problems. Your phone and the security camera must be on the same network, with a strong WiFi signal. Other common culprits include an outdated mobile app, incorrect login credentials for your account, or the camera itself being powered off or in a sleep mode.
How do I check if my network is causing the problem?
First, ensure both your mobile device and the security camera are connected to the same home WiFi. Check your router to see if the camera is listed as a connected device. A simple reboot of your router and modem can often resolve temporary connection glitches and restore your surveillance feed.
Could my security camera app be the issue?
Absolutely. An outdated or glitchy app is a common source of trouble. Visit your phone’s app store to check for and install any available updates for brands like Google Nest or Ring. If problems persist, try clearing the app cache or performing a complete reinstall to refresh the connection.
What camera settings should I verify first?
Start with the basics on the camera itself. Confirm the WiFi credentials are entered correctly during the setup. Also, check the camera’s date and time settings, as an incorrect configuration can sometimes disrupt cloud services and remote viewing on your phone.
Why can’t I log into my security camera system on my phone?
This is often a simple user error. Double-check your username and password for typos. Ensure your account is fully activated and that you haven’t reached a user limit on shared systems. If you’ve changed your home network password, you may need to reconnect the camera with the new settings.
When should I update my camera’s firmware?
You should check for firmware updates whenever you experience persistent connectivity or performance issues. Manufacturers like Arlo and Reolink release updates to fix bugs and improve stability. Always follow the manufacturer’s official guide to update safely, usually through the companion app.
Can other devices in my home interfere with my security cameras?
Yes, interference from other electronics can weaken the signal. Devices like microwaves, baby monitors, or even dense walls can impact WiFi performance. Try moving your router or camera to minimize obstacles and distance. Testing in different lighting conditions can also rule out environmental factors affecting the image.
What should I do if none of the basic troubleshooting steps work?
If you’ve exhausted all basic steps—checking power, network, app, and settings—it’s time to contact support. Reach out to your camera brand’s customer service (e.g., Lorex or Eufy) for specialized help. There may be a hardware fault with the camera or a more complex system configuration issue requiring professional support.


