

What are the Most Common CCTV Camera Problems?
A reliable surveillance system is a cornerstone of modern security. When cameras fail, they leave blind spots that can compromise safety for homes and businesses.
Technical failures range from a complete loss of power to frustratingly blurry footage. Such issues make identification impossible and defeat the entire purpose of monitoring.
In Singapore’s unique urban environment, additional challenges like intense heat and high humidity can accelerate wear. These factors stress electronic components and connections.
This guide will help you diagnose and fix frequent malfunctions. We provide clear, step-by-step solutions to restore your system’s performance and protect your property.
Key Takeaways
- Surveillance system failures create significant security risks that require immediate attention.
- Blurry video footage is a frequent issue that prevents clear identification of people or events.
- Power supply and network connectivity problems are among the most common technical failures.
- Environmental factors like heat and humidity pose extra challenges for equipment in tropical climates.
- Many common problems can be resolved with systematic troubleshooting before calling a professional.
- Regular maintenance of camera settings and firmware updates can prevent numerous issues.
- Understanding these malfunctions is the first step toward a more reliable and long-lasting security setup.
Understanding CCTV Camera Failures in Singapore’s Unique Environment
Operating CCTV cameras in Singapore means battling relentless humidity and dense infrastructure. The island’s equatorial climate and packed urban landscape create conditions that accelerate equipment wear. These environmental factors explain why many surveillance systems here face premature failures.
Successful security monitoring requires understanding these local challenges. You must account for both atmospheric moisture and physical obstructions. This knowledge helps select the right hardware and implement effective protection strategies.
The Impact of Humidity and Urban Density on Surveillance Systems
Singapore’s tropical climate acts as a silent accelerator for component degradation. High humidity corrodes metal connectors up to three times faster than in temperate regions. This moisture is responsible for a staggering 70% of weather-related CCTV failures locally.
Condensation forms on camera lenses and circuit boards. This leads to blurred footage and eventual electrical shorts. The constant dampness attacks every connection point in your surveillance setup.
Intense heat presents another major challenge. Prolonged sun exposure fries infrared cut filters within a single year. Studies show 40% of outdoor cameras suffer image distortion from this thermal damage.
Urban density creates equally serious problems. Singapore’s forest of high-rise buildings disrupts wireless signals. This interference causes intermittent footage loss and connectivity drops.
Tall structures create physical obstructions that block camera sightlines. Complex infrastructure generates electromagnetic noise that corrupts data transmission. Ground loop faults often trace back to tangled wiring in skyscraper installations.
Balancing Security Needs with Environmental Challenges
Selecting appropriate hardware becomes critical in this environment. IP66-rated housings provide essential protection against driving rain and dust. Marine-grade cables offer superior corrosion resistance for coastal installations like East Coast Park.
HDB corridor installations present specific difficulties. These confined spaces experience high humidity with limited airflow. Installations must navigate strict privacy laws while ensuring effective coverage.
Location dramatically affects reliability rates. Data shows coastal cameras in Marina Bay experience 30% more outages during monsoon seasons. This compares to units installed in inland industrial areas.
Proper camera placement and proactive weatherproofing are necessities here. They are not just recommendations for optimal performance. Strategic positioning avoids direct sun exposure while maintaining clear sightlines.
Regular maintenance checks should focus on connector integrity and lens clarity. These simple steps mitigate the most common environmental threats. They extend the operational life of your entire surveillance investment.
Understanding these local conditions provides a foundation for effective troubleshooting. It explains why certain failures occur more frequently in Singapore. This knowledge informs both initial installation choices and ongoing system care.
What is the Common Problem of CCTV Camera? A Top Issues Overview
A statistical look at service requests reveals clear leaders in CCTV system breakdowns. Certain malfunctions appear with such regularity they become predictable. Understanding this hierarchy is the first step toward building a resilient security operation.
Data from thousands of service calls provides a definitive frequency breakdown. This knowledge allows you to prioritize troubleshooting and allocate preventative resources effectively.
From Power Loss to Blurry Footage: A Frequency Breakdown
Power supply irregularities are the undisputed leader. They account for a staggering 58% of all malfunctioning surveillance system service requests. Fluctuating voltage or complete loss of electricity cripples the entire setup instantly.
Network and connectivity issues follow closely behind. IP address conflicts alone cause 28% of system outages. This problem escalates quickly in expanding multi-camera installations where device management becomes complex.
Perhaps the most preventable issue relates to image clarity. Simple dirty lenses are responsible for 80% of all reported image quality problems. Dust, spider webs, and water spots degrade footage without any internal component failure.
Hardware failures account for approximately 30% of total breakdowns. This category includes faulty infrared sensors, failing hard drives in recorders, and damaged cables. Environmental stress often accelerates these physical defects.
Other frequent glitches include firmware crashes, seen in 19% of cases. Infrared sensor failures specifically affect 42% of systems during night operations. Storage device malfunctions also rank highly for causing data loss.
Why Regular Maintenance is Your First Line of Defense
A scheduled cleaning and inspection routine is your most cost-effective security investment. Proactive care targets the high-frequency issues revealed by the data. It stops small problems from escalating into major outages.
Implementing bi-annual professional maintenance cuts overall system failures by an impressive 75%. This proves that scheduled service is far cheaper than emergency reactive repairs. The return on investment for preventative checks is substantial.
Focus maintenance efforts on the high-probability trouble spots. Regularly clean camera lenses and housings. Check all power connections and cable terminations for corrosion or looseness.
Verify network settings and update device firmware during these scheduled sessions. Test infrared night vision performance as part of the checklist. This systematic approach addresses the majority of potential failures before they occur.
This overview establishes that while technical problems are varied, they follow predictable patterns. With proper knowledge and a disciplined maintenance schedule, most common surveillance issues are largely preventable.
Power Supply Failures and Electrical Issues
Inconsistent electrical delivery cripples more security setups than any software glitch or network error. These malfunctions manifest as cameras that refuse to turn on, reboot randomly, or produce intermittent, flickering feeds. In Singapore, a staggering 80% of these disruptions stem from a single, preventable source: mismatched transformer ratings.
High-demand Pan-Tilt-Zoom (PTZ) units are particularly vulnerable to being underpowered. This creates a critical weak point in your entire surveillance network.
Diagnosing Power-Related Camera Failures: A Step-by-Step Check
Effective troubleshooting requires a systematic, step-by-step approach. Begin with the most basic tool: a digital multimeter. You need to test voltage at three critical junctures in the power delivery chain.
- Power Adapter Output: Verify the adapter is producing its rated voltage (e.g., 12V DC).
- Junction Box: Check for voltage drops after distribution splits to multiple devices.
- Camera Input Port: Ensure full voltage is actually reaching the device itself.
Understanding your equipment’s hunger for watts is crucial. A standard fixed camera may need only 12 watts. A PTZ model, with its motors and heaters, can demand 50 watts—over four times more. Using an underrated supply guarantees failure.
Physical inspection is your next vital step. Look for these common culprits:
- Frayed or pinched power cables exposing wires.
- Loose connectors in terminal blocks or plugs.
- Corrosion on terminals, especially in coastal areas.
- An overloaded circuit trying to support too many devices.
This diagnostic process isolates the fault, whether it’s a bad adapter, a broken cable, or systemic overload.
Solutions for Unstable Power Connections and Voltage Spikes
Once you diagnose the issue, implement hardware solutions designed for long-term stability. Start at the source: always use a power adapter with a rating exceeding your camera’s maximum draw.
For comprehensive protection, install an Uninterruptible Power Supply (UPS). A 1500VA model can safeguard up to eight cameras from surges and provide backup during short outages. This is a non-negotiable for business security.
Isolating dedicated power lines for surveillance equipment can reduce electrical failures by 40%, as proven in installations at Tuas Industrial Park.
Larger systems demand more robust infrastructure. For setups with 100+ cameras, use dedicated electrical circuits to prevent voltage drops from other equipment. Implementing managed Power over Ethernet (PoE) switches simplifies delivery and offers centralized monitoring and reboot capabilities.
Proactive prevention beats emergency repairs every time. Schedule monthly audits to inspect connection integrity and verify transformer ratings. This simple habit prevents unexpected blackouts and ensures your cameras receive the clean, consistent power they need for reliable, 24/7 performance.
Network Connectivity and IP Configuration Problems
When an IP camera drops offline, it creates a digital blind spot that undermines your entire surveillance operation. These network connectivity problems rank among the top frustrations for modern security systems. Cameras may disappear from the live feed or stream severely lagging footage.
In Singapore’s dense urban landscape, the good news is that 68% of these glitches resolve after proper subnet configuration and network management. This highlights that many issues are software-based, not hardware failures. A systematic approach to troubleshooting restores reliable monitoring.
Step-by-Step Network Troubleshooting for IP Cameras
Begin your diagnosis with a simple ping test to the camera’s IP address. Open your command prompt and type “ping [camera IP]”. Consistent response times above 50 milliseconds indicate problematic network lag. This is critical for data-heavy 4K camera streams which demand stable throughput.
Bandwidth management is your next crucial check. Allocate at least 4 megabits per second (Mbps) of network bandwidth for each 1080p camera. Congestion occurs when multiple devices compete for limited data capacity, causing freezing and dropouts.
Follow this ordered protocol to isolate the fault:
- Verify Physical Links: Ensure Ethernet cables are securely plugged in at both the camera and switch.
- Test Basic Connectivity: Use the ping command as described to confirm the device is reachable.
- Analyze Network Traffic: Employ a tool like Wireshark to analyze real-time packet loss on the camera’s port.
- Prioritize Video Data: Enable Quality of Service (QoS) settings on your router. This prioritizes surveillance traffic over less critical web browsing.
For persistent issues, consider fixing a CCTV camera that suddenly stopped with a full network audit. This guide covers deeper diagnostics.
These steps form a clear protocol for restoring a stable feed. They move from basic checks to advanced traffic analysis.
Resolving IP Address Conflicts in Your Surveillance System
IP address conflicts cause cameras to intermittently disappear, flicker, or reboot randomly. This plagued major systems like Changi Airport Terminal 4 before technicians implemented a resolution strategy. The conflict happens when two devices on the same network receive the same IP address, often from a dynamic DHCP server.
Symptoms are distinct and disruptive. You might see one camera feed replace another, or a device cycling on and off the network. To identify the clash, check your router’s ARP (Address Resolution Protocol) tables. Match the suspicious IP address with the correct camera’s unique MAC address.
In Singapore, assigning static IP addresses to critical cameras prevents DHCP-related drops and is a foundational best practice for reliable surveillance.
Implement these solutions to eliminate conflicts and boost stability:
- Assign Static IPs: Manually set a unique, fixed IP address for each camera outside your router’s DHCP range.
- Segment Your Network: For large deployments, create subnets by location. Use 192.168.1.x for Building A and 192.168.2.x for the parking area, for example.
- Use VLANs for Complex Setups: In multi-building installations along Orchard Road, configure Virtual Local Area Networks (VLANs). This isolates surveillance traffic for better performance and enhanced security.
This structured approach to network configuration ensures your cameras remain accessible and your security footage flows without interruption. Proper IP management is a cornerstone of modern surveillance reliability.
PoE (Power Over Ethernet) Complications and Solutions
While Power over Ethernet is a modern convenience for IP cameras, its complications often stem from invisible voltage drops and mismatched power budgets. This technology merges data and electrical supply into one cable, simplifying setup but creating a single point of failure. When PoE malfunctions, you lose both video feed and device power simultaneously.
This section explores frequent delivery issues and provides actionable steps for a robust setup. A stable PoE foundation is critical for uninterrupted surveillance system performance.
Identifying and Fixing PoE Delivery Issues
Voltage drop is the primary enemy of reliable PoE. Efficiency plummets on cable runs exceeding 100 meters. In Singapore’s humid climate, moisture absorption in cables can cause an additional 25% performance loss, especially in daisy-chained configurations.
Symptoms include cameras rebooting randomly, infrared cut filters failing at night, or features like heaters deactivating. These are clear signs the device isn’t receiving sufficient power.
Diagnosis requires a PoE tester. This tool verifies that the correct voltage—typically 48V—actually reaches the camera end. Don’t assume power leaving the switch arrives intact.
Mismatched standards cause many headaches. The older 802.3af standard provides only 15 watts, often insufficient for cameras with powerful IR illuminators. The 802.3at (PoE+) standard offers 30 watts, which is better for most modern devices.
An overloaded PoE switch is a frequent culprit. When the total draw of connected cameras nears the switch’s maximum budget, it may throttle power. This causes unstable camera operation and can even throttle data bandwidth, crippling 4K video streams.
Follow these diagnostic steps when issues arise:
- Use a PoE tester to measure voltage at the camera’s connection point.
- Calculate the total power draw of all connected devices versus your switch’s rated budget.
- Check for damaged or low-quality Ethernet cables that increase resistance.
- Verify each camera’s power requirement matches the port’s supplied standard (af, at, or bt).
Best Practices for a Reliable PoE Surveillance Setup
Selecting the right equipment from the start prevents most complications. For demanding PTZ cameras with motors and heaters, deploy switches supporting the 802.3bt standard. This provides up to 60 watts per port, ensuring consistent operation.
Combat distance and interference with proper cabling. Use shielded Category 6A (Cat6A) cables in dense urban areas. This minimizes electromagnetic interference from other infrastructure. For runs beyond 70 meters, install active PoE extenders to boost the signal.
Heat management is non-negotiable. PoE switches generate significant heat. Install them in well-ventilated racks to prevent overheating, which degrades performance and shortens device lifespan.
The Sentosa Cove marina upgrade demonstrated this principle. Switching to 802.3bt switches and shielded Cat6A cabling eliminated random camera reboots and restored full night vision capabilities.
Midspan injectors offer excellent flexibility. Products like the Ubiquiti POE-50-60W add PoE capability to existing networks. They are perfect for powering a distant camera without replacing your core switch.
Always budget power conservatively. Never load a switch beyond 80% of its rated capacity. This headroom accommodates peak power demands and ensures long-term stability for every connected device.
Implementing these practices guarantees stable electrical delivery. Your entire IP camera network will perform reliably, day and night, securing your property without unexpected dropouts.
Poor Image Quality and Video Problems
Blurry or discolored video footage transforms a security camera from an asset into a liability. When you cannot identify a person or read a license plate, the entire purpose of monitoring fails. This section explores the root causes of subpar visuals and the menu adjustments that restore evidential clarity.
These glitches range from simple fixes to complex technical mismatches. Understanding them turns mediocre surveillance into a reliable source of forensic evidence.
Causes of Blurry, Distorted, or Discolored Footage
A dirty or misaligned lens is the most frequent physical culprit. Dust, spider webs, or condensation scatter light, creating a permanent haze. Regular cleaning is a non-negotiable first step for clear image quality.
Blurry footage often stems from an improperly focused lens. This happens after camera movement or during initial setup. Vibration from a loose mount also introduces motion blur, especially in windy areas.
Using a low-resolution device for a detailed task guarantees failure. License plate recognition demands high pixel density. A general-view camera lacks the detail for such forensic work.
Distorted colors indicate a white balance failure. When whites appear blue or yellow, the camera misinterprets the light source. Auto White Balance (AWB) often fails when pointed at large sections of sky or specific artificial lights.
Compression artifacts from incorrect bitrate settings create blocky, pixelated video. Sensor limitations in low light produce grainy, noisy images. These technical limits require smarter camera settings, not just better hardware.
Camera Settings for Optimal Clarity: Focus, WDR, and White Balance
Manual focus adjustment ensures permanent sharpness. Use a monitor to zoom in on a fixed object while turning the lens. Lock it in place once the image is crisp.
Wide Dynamic Range (WDR) technology is essential for high-contrast scenes. It balances very bright and dark areas within the same frame. Cameras with 140dB WDR improve readability in 85% of challenging scenarios.
The nighttime surveillance upgrade at Clarke Quay demonstrated this. Installing high-WDR cameras dramatically improved evidence quality in the area’s bright neon and deep shadow environments.
For fluid motion capture, set the shutter speed to 1/60 second. This prevents choppy playback. In low light, prioritize a camera with high sensitivity. Models with 1 lux sensitivity reduce image noise by 40% compared to standard versions.
Enable 3D digital noise reduction in the settings menu. This feature cleans up the picture without sacrificing detail. Also, schedule the IR cut filter to transition automatically at dawn and dusk.
If AWB fails, manually tune the white balance. Point the camera at a pure white object under the prevailing light and set the value. This fixes persistent color casts.
For forensic-grade evidence, calculate pixel density. Reliable license plate recognition requires at least 50 pixels per foot of the target’s width at the recorded distance. Choose camera resolution and lens focal length accordingly.
These adjustments have the greatest impact on video quality. They turn raw data into clear, actionable intelligence for your security operation.
Night Vision and Infrared (IR) Performance Issues
When darkness falls, a surveillance system’s most critical test begins—its ability to see clearly without natural light. Failures here create a dangerous security void, precisely when many incidents occur. This gap renders your monitoring setup effectively blind during critical hours.
Malfunctioning infrared components are usually to blame. The two main culprits are faulty IR Light Emitting Diodes (LEDs) and a stuck IR cut filter. Both prevent the device from capturing usable low-light footage.
Singapore’s constant heat and humidity accelerate wear on these mechanical parts. Daily thermal cycling degrades the IR cut filter faster than in temperate climates. Proactive maintenance is not just advised; it’s essential for reliable night-time security.
Troubleshooting Common IR and Low-Light Problems
Begin diagnostics with a simple visual check. In complete darkness, the ring of IR LEDs around the lens should emit a faint red glow. No glow indicates a dead LED array or a power circuit failure.
Another frequent issue is “IR bounce.” This happens when the camera’s own infrared light reflects off a nearby surface. A bright white blob appears in the footage, completely obscuring the view.
- Check reflective surfaces: Avoid pointing the lens directly at glass, white walls, or metal.
- Test the IR cut filter: Listen for a faint click at dusk and dawn as it moves. No sound may mean it’s stuck.
- Inspect ambient light interference: Street lamps or neon signs can confuse the day/night sensor, preventing IR mode activation.
Excessive ambient light is a common problem in urban areas. It can fool the photo sensor, keeping the camera in color mode. The result is a dark, grainy image because the IR illuminators never turn on.
For persistent glitches, verify power delivery to the IR components. Weak voltage from a long cable run or an overloaded PoE switch can cause intermittent LED failure. This is especially true for cameras with powerful illuminators.
Optimizing Camera Placement and Settings for Night Surveillance
Strategic installation prevents many low-light issues. Avoid pointing lenses directly at glass windows or other light sources. Angle cameras so their own IR illumination spreads evenly across the scene, not onto a close wall.
Dive into your device’s settings menu for major performance gains. Adjust the sensitivity of the light sensor that triggers IR mode. Setting a schedule for forced night mode bypasses unreliable auto-detection.
Industry professionals in Singapore recommend proactively replacing the mechanical IR cut filter every 24 months due to rapid thermal degradation.
Fine-tune the intensity of the built-in IR LEDs. Match their power to the scene size. Too much intensity causes washout; too little leaves dark corners. For covering large areas like car parks, built-in LEDs are often insufficient.
Adding separate IR illuminators extends effective range without overloading the camera’s internal components. These external units provide even, powerful lighting for expansive zones.
Ultimate image quality depends on the sensor. A larger sensor with higher sensitivity, measured in lux (e.g., 0.001 lux), produces clearer, less noisy footage. It captures more available light, yielding better detail.
Implementing these optimization steps closes a major security vulnerability. It ensures your surveillance system delivers clear, detailed footage throughout the entire night. Your property remains protected during its most vulnerable hours.
Cabling, Wiring, and Physical Connection Faults
Signal integrity in your surveillance setup depends entirely on the health of its physical wiring, a vulnerability magnified by Singapore’s climate. These connections form the nervous system of your entire operation.
Physical faults here are a leading cause of intermittent signals, complete dropouts, and poor image quality. A single corroded connector can compromise the feed from a critical camera.
Common Cable Faults and Their Impact on Signal Integrity
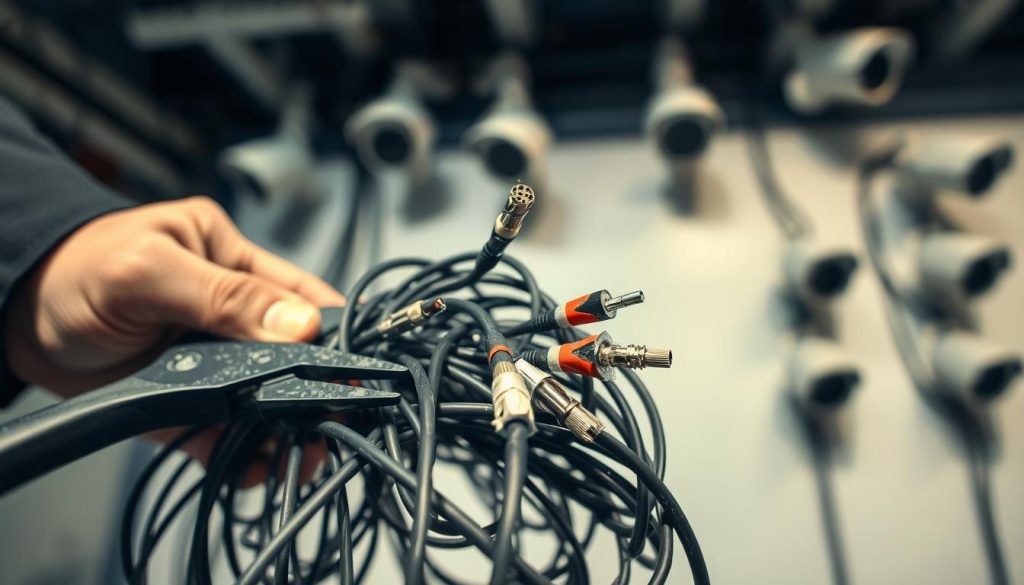
Several frequent physical failures degrade performance. Corrosion at connector points accelerates rapidly in high humidity.
Physical damage from rodents, abrasion, or accidental impact breaks conductors. Degradation of cable insulation due to relentless UV exposure is another major issue.
The type of cable installed matters greatly. Older RG59 coaxial cables deteriorate three times faster than modern Category 6 (Cat6) Ethernet cables in humid conditions.
This rapid decay causes significant signal loss and fuzzy analog footage. The impact on your video feed is direct and severe.
- Damaged Shielding: Compromised cable shielding introduces electromagnetic interference (EMI). This is especially problematic near MRT tracks or high-voltage power lines.
- Broken Conductors: A snapped wire within the cable causes complete signal loss. The camera will appear dead on the monitoring system.
- Moisture Ingress: Water inside the cable jacket corrodes the copper, increasing resistance and weakening the signal over time.
These faults create a cascade of problems, from snowy video to total failure. Identifying them requires a physical inspection of the entire cable run.
Proper Cable Management and Weatherproofing Techniques
Effective management starts with selecting the right cable for the environment. For outdoor installations, always use waterproof and UV-resistant Cat6.
Inside HDB flats, choose shielded Cat6 to resist EMI from the dense internal wiring. This simple choice prevents many headaches.
Weatherproofing outdoor runs is non-negotiable. Implement these proven techniques to block Singapore’s rain and humidity.
- Use gel-filled or heat-shrink connectors on all outdoor terminations.
- Create “drip loops” before cable entry points to prevent water from running into equipment.
- Seal all junction boxes and conduit entries with high-quality silicone sealant.
The fix at Bugis Street market demonstrated this perfectly. Technicians resolved years of flickering feeds by systematically replacing all old RG59 with waterproof Cat6. They also installed surge protectors every 50 meters for added protection.
For industrial sites or runs exceeding 100 meters, fiber optic cable is the gold standard. It offers total immunity to EMI, no voltage drop over distance, and superior environmental resistance.
Proper grounding is a critical, often overlooked step. Correctly grounding all cables and equipment can reduce electrical interference by up to 70%.
It also provides a safe path for power surges, protecting your valuable devices. This is essential for installations near major infrastructure.
Regularly inspect your cabling infrastructure. Look for cracks, corrosion, and loose connections. Proactive maintenance ensures a robust physical connection for years of reliable service.
Software Glitches and Outdated Firmware
Beyond cables and lenses, the code running on your cameras and recorders is a frontline defense against digital intrusions and system crashes. This software layer controls everything from motion detection to video encoding.
When it malfunctions or becomes obsolete, your entire surveillance operation is at risk. These glitches are insidious, often causing intermittent failures that are hard to diagnose.
The Risks of Running Outdated Camera Firmware
Operating with old firmware opens dangerous security holes. Research shows regular updates prevent up to 45% of potential security breaches. They patch exploits that hackers actively target.
Outdated software manifests in frustrating ways. You might see random camera reboots or critical features like motion detection simply stop working.
Compatibility issues with new devices or full Video Management System (VMS) crashes are other red flags. Surveillance audits indicate codec mismatches cause 60% of VMS failures.
Manufacturers like Hikvision and Dahua release patches approximately every 90 days. These address bugs, boost performance, and close security holes. Ignoring these updates leaves your network vulnerable.
How to Safely Check and Update Your System Software
A methodical process prevents update disasters. First, always back up your current device configuration. This saves all your custom settings.
Download the firmware file directly from the manufacturer’s official website. Never use files from third-party sources. Verify the file’s checksum to ensure it wasn’t corrupted during download.
Different brands use different tools. Hikvision systems often utilize the iVMS-4200 software for centralized updates. Some older Dahua models may require manual file transfers via FTP.
Implementing a scheduled review cycle is a best practice. This turns reactive patching into proactive system management.
The PSA Singapore port authority project demonstrated powerful results. Implementing a scheduled, biannual firmware review and update cycle reduced overall system failures by 60%.
After any update, test all core functions immediately. Check night vision, motion detection, and recording. Ensure the new firmware hasn’t introduced fresh issues.
Always have a rollback plan. This is your safety net. Maintain an archive of the original firmware versions for all your camera models.
Keep a spare Network Video Recorder (NVR) for emergency recovery. If an update fails catastrophically, you can restore service quickly without prolonged downtime.
Following this cautious protocol transforms your software from a potential weakness into a pillar of reliability. It ensures your surveillance data remains secure and accessible.
Environmental and Weather-Related Damage
A camera’s survival outdoors depends on more than just its electronics. It requires a fortress against the elements. Singapore’s heat, relentless rain, and pervasive humidity form a destructive trio.
These factors aggressively degrade unprotected components. Without proper hardening, your security investment faces premature failure. This section provides a complete guide to building that resilient fortress.
Weatherproofing Your Surveillance System for Tropical Climates
Weatherproofing is the essential countermeasure. An IP66-rated housing is your first line of defense. This rating guarantees a seal against dust and powerful water jets from any direction.
Such protection prevents an estimated 90% of weather-related failures in outdoor installations. It’s a non-negotiable starting point for reliable performance.
Material choice amplifies your defense. For coastal areas like East Coast Park, stainless steel mounting brackets resist salt corrosion far better than aluminum. Combine them with marine-grade cable glands for a robust seal.
Proactive maintenance steps are critical in this climate. Implement this quarterly routine:
- Apply dielectric grease to all electrical connections to block moisture.
- Place silica gel desiccant packs inside junction boxes to absorb trapped humidity.
- Inspect cable entries and seals for any cracks or wear.
This routine preserves signal integrity and power connections. It stops minor issues from becoming major system failures.
Dealing with Sun Glare, Condensation, and Physical Obstructions
Specific environmental issues demand targeted solutions. Sun glare washes out footage during sunrise and sunset, especially for east- or west-facing units.
3M anti-reflective lens coatings can reduce this flare by up to 65%. Physical sun shades or strategic repositioning also offer significant help.
Condensation, or “fogging,” inside the dome is a frequent headache. Humid air gets trapped and cools on the lens. Housings with built-in breather vents equalize pressure and allow moisture to escape.
For persistent fogging in high-humidity zones, small anti-fog heaters inside the housing provide a reliable fix, ensuring clear image quality at all times.
Physical obstructions like growing foliage or new construction can slowly block the field of view. A regular visual inspection schedule is vital. Trim plants and clear debris every few months.
The dome material itself matters greatly. Polycarbonate covers last about three years under intense UV exposure. Standard acrylic domes may yellow and degrade in just 18 months.
For extreme environments, such as offshore installations, even stronger measures are needed. Titanium-coated glass lenses and pressurized housings withstand constant salt spray and unfiltered UV light.
By selecting the right equipment and implementing these techniques, your surveillance system can thrive outdoors. For a broader set of troubleshooting tips for a non-working camera, explore our dedicated guide. It complements this hardening strategy for complete reliability.
DIY Troubleshooting: Simple Fixes You Can Try Yourself
Before you pick up the phone to call a technician, many surveillance hiccups have straightforward solutions you can handle personally. Data shows over half of all monitoring system malfunctions resolve without expert intervention. This empowers you to restore security quickly and save on service costs.
A systematic approach is your best tool. Starting with simple checks often identifies the root cause. This method builds confidence and ensures you don’t overlook basic glitches.
Basic Troubleshooting Steps for Common CCTV Issues
Always begin with the safest, simplest actions. A complete power cycle is the first recommended step. Unplug the camera and its recorder for 30 seconds, then restart them.
This reboots the electronics and clears temporary software errors. It’s a surprisingly effective fix for frozen feeds or devices not responding.
Follow a structured 10-point checklist for comprehensive diagnostics:
- Verify the power outlet is functioning with another device.
- Check and firmly reseat all cable connections—both power and data.
- Clean the camera lens gently with a microfiber cloth.
- Reboot your network router if using IP-based cameras.
- Inspect cables for visible damage or corrosion.
- Verify the device’s power adapter is the correct voltage.
- Check for obstructions blocking the camera’s field of view.
- Log into the camera’s web interface to review its status.
- Ensure the recorder’s hard drive has available storage space.
- Confirm network settings haven’t been accidentally changed.
For network connectivity problems, simply reseating the Ethernet cable at both ends works wonders. Residents in Bishan HDB estates resolved 55% of their dropouts with this one action. Loose connections are a frequent, easily fixed culprit.
Appropriate DIY fixes include basic cleaning, cable management, and adjusting software settings. Updating device firmware using the manufacturer’s official guide is also safe. These tasks require no special tools or advanced technical knowledge.
When to Attempt Repairs and When to Call a Professional
Knowing the limits of do-it-yourself work is crucial for safety and protecting your investment. Complex electrical faults involving mains voltage demand a licensed expert. Internal hardware repairs, like replacing a circuit board or infrared sensor, also require professional skill.
Attempting these advanced fixes yourself risks personal injury, further device damage, and voiding warranties. Firmware corruption recovery is another area best left to technicians with proper tools.
A cost-benefit analysis is revealing. DIY maintenance on minor issues can save about 60% compared to a service call. However, a botched major repair can escalate costs, with professional corrections typically ranging from $200 to $500.
Always consult your equipment’s warranty terms before opening any camera housing. Tampering with internal seals or components often invalidates the manufacturer’s guarantee. This can leave you fully liable for future replacement costs.
Use this clear decision matrix for guidance:
- Try it yourself: Basic software adjustments, reseating loose cables, cleaning lenses, updating firmware.
- Call a certified technician: Work involving mains electricity, internal hardware replacement, complex network reconfiguration, or physical sensor repairs.
This balanced approach builds your capability to handle common glitches. It also instills respect for technical limits, ensuring your system gets fixed correctly without creating new hazards or expenses.
Ensuring Long-Term Reliability of Your CCTV System
Sustaining clear footage and uninterrupted coverage demands more than good equipment. It requires a committed maintenance regimen.
Data proves a proactive strategy works. Bi-annual professional service cuts total system failures by 75%. Annual expert audits detect 90% of emerging issues before they disrupt your security.
Implement a simple quarterly schedule. Clean lenses monthly and test backup power every 60 days. In humid climates, replace IR cut filters twice a year.
Adopt predictive replacement for cables and update firmware regularly. Document all activities. This disciplined approach transforms your surveillance network into a durable, long-term asset.
FAQ
What causes a security camera to go offline or lose connection?
The most frequent culprits are power or network disruptions. Check the power adapter and cables first. For IP cameras, a router reboot often solves temporary network glitches. IP address conflicts with other devices on your network can also cause a camera to drop off.
Why is my CCTV footage blurry or out of focus?
Blurry images often stem from a dirty lens, incorrect focus settings, or a damaged camera housing. Clean the lens gently with a microfiber cloth. For varifocal models, use your system’s software to adjust the focus manually. Persistent blurriness may indicate a faulty lens.
How can I fix poor night vision on my surveillance camera?
Poor infrared performance is commonly due to obstructions like spider webs, reflective surfaces nearby, or a failing IR cut filter. Clean the camera’s IR LED window. Ensure it’s not pointed at glass or a wall. Adjust the camera’s placement and sensitivity settings in the configuration menu for better low-light capture.
What should I do if my PoE camera isn’t receiving power?
First, verify that your PoE switch or injector is functioning and provides adequate power for the camera model. Test with a known-working Ethernet cable. The issue could be a faulty cable, an undersized PoE power budget, or a damaged port on the camera or switch.
Can weather affect my outdoor security system’s performance?
Absolutely. Humidity and extreme heat in tropical climates can lead to condensation inside the housing, causing image haze. Direct sun glare can wash out daytime footage. Always use cameras with a proper IP66 or higher weatherproof rating and install sunshades where needed to protect your surveillance equipment.
Why is my recorded video choppy or lagging during playback?
This is typically a bandwidth or storage issue. Check if your network can handle the video data rate, especially for high-resolution streams. A failing hard drive in your DVR or NVR can also cause playback problems. Ensure your system’s firmware is up-to-date for optimal performance.
How important is updating my camera’s firmware?
Critical. Manufacturers like Hikvision and Dahua release updates to fix bugs, patch security vulnerabilities, and improve stability. Running outdated firmware can leave your entire system exposed. Always download updates from the official brand website and follow their instructions carefully.
When should I call a professional instead of trying a DIY fix?
Contact a professional security service for complex wiring problems, recurring electrical faults, or major water damage inside a camera. If basic troubleshooting like rebooting and checking cables fails, an expert can diagnose deeper network configuration or hardware failures efficiently.


