

Identifying and Resolving Common CCTV Camera Problems
In today’s world, a reliable surveillance system is a cornerstone of safety. For homes and businesses across Singapore, functioning CCTV cameras are non-negotiable. They provide essential monitoring and deterrence.
When a security camera fails, it is more than a minor hassle. It creates a genuine vulnerability. Properties and people become exposed to potential threats. Understanding how to fix these malfunctions is critical.
This guide empowers you with practical knowledge. You will learn to diagnose and solve frequent surveillance issues. We cover a wide spectrum, from total power loss to blurry footage.
Local factors like humidity and lighting can affect performance. A proactive approach to maintenance prevents small glitches from escalating. With the right steps, you can restore your system’s integrity.
Regular checks and professional assessments ensure long-term reliability. This resource is designed for homeowners, managers, and security staff. Troubleshooting becomes a manageable task with clear guidance.
Key Takeaways
- A faulty CCTV system represents a direct security risk, not just an inconvenience.
- Proactive identification and repair prevent minor issues from becoming major security gaps.
- Frequent malfunctions include power supply failures, poor image quality, and night vision problems.
- Singapore’s unique environment can impact camera performance and requires consideration.
- Consistent maintenance and expert evaluations are key to long-term surveillance reliability.
- This article provides actionable solutions for a range of common technical issues.
- Effective troubleshooting is an achievable skill with the correct knowledge and approach.
The Critical Role of CCTV Systems in Singaporean Security
From HDB estates to bustling commercial districts, vigilant surveillance is a constant feature of life in Singapore. This is not by accident. A reported 90% of public areas across the island are under constant watch. This staggering figure highlights a national commitment to safety that is both visible and effective.
These monitoring networks serve a powerful dual purpose. Their presence alone discourages unlawful acts, acting as a strong deterrent. Should an incident occur, the recorded footage becomes invaluable evidence for authorities. It helps identify perpetrators and reconstruct events with clarity.
Driven by security concerns, private adoption is growing rapidly. Homeowners and business operators are investing in their own security camera setups. This layered approach creates a more comprehensive safety net for the entire community.
Various camera types are deployed to meet different needs. Discreet dome cameras are common for indoor monitoring. Bullet cameras offer focused, long-range observation outdoors. For active coverage of large areas, PTZ (Pan-Tilt-Zoom) units provide remote control and zoom capabilities.
Modern technology significantly boosts their effectiveness. High-resolution imaging captures fine details like faces and license plates. Intelligent video analytics can alert operators to unusual movements. This turns passive recording into an active security tool.
The reliability of this infrastructure is directly tied to public safety. A single malfunctioning unit can create a blind spot. Understanding and addressing common cctv issues is therefore about more than just equipment upkeep. It is integral to maintaining a vital layer of societal protection.
Singapore’s tropical climate presents unique challenges. High humidity and frequent heavy rainfall can stress cctv hardware and external cabling. This environment makes proactive maintenance and robust installation non-negotiable.
A well-maintained surveillance network is a cornerstone of the nation’s security infrastructure. For system owners, ensuring their cctv systems remain operational is not just a technical task. It is a shared responsibility that contributes to the safety and order Singapore is known for.
What is the Common Problem of CCTV Camera? An Overview
When a camera fails, the root cause usually falls into one of several well-defined categories. Recognizing these patterns is the first step toward a swift repair.
Frequent malfunctions cluster around power delivery, video transmission, image clarity, and data storage. Each category has distinct symptoms you can learn to identify.
Complete power failure is a primary concern. The unit shows no signs of life. This often points to a faulty adapter, damaged cable, or an issue with the local electrical supply.
Loss of video signal appears as a “no signal” error on your monitor. You might also see distorted or scrambled footage. Loose or corroded physical connections are typical culprits here.
Degraded image quality makes surveillance ineffective. Blurry images, incorrect colors, or glare obscure important details. A dirty lens, incorrect settings, or harsh lighting conditions often cause this.
Ineffective motion detection creates gaps in security coverage. The system fails to alert you or record when movement occurs. Sensitivity settings or sensor blockage usually need adjustment.
Poor night vision results in pitch-black or grainy footage after dark. Failed infrared (IR) LEDs or competing ambient light frequently disrupt low-light performance.
Unstable network connections plague modern IP cameras. Intermittent streaming or an inability to connect remotely points to Wi-Fi connectivity or bandwidth issues.
Video freezing or lagging makes real-time monitoring impossible. This usually strains local network resources or overwhelms the camera’s own hardware.
Recording failure is a critical problem. It creates a total surveillance blackout where no evidence is saved. This can stem from incorrect DVR/NVR settings, full storage, or a faulty hard drive.
These problems are often interconnected. A single loose cable might cause both a power loss and a video feed issue. Diagnosing one symptom can lead you to solve another.
Every one of these frequent cctv issues has logical causes and practical solutions. The following sections provide detailed steps to diagnose and fix each category, restoring your surveillance integrity.
Power and Connectivity Failures: When Your Camera Goes Dark
Power loss and network dropouts are among the most disruptive failures a CCTV system can experience. A unit that goes completely offline creates an immediate blind spot. Restoring function requires a logical approach to diagnose the root cause.
These malfunctions typically stem from the hardware delivering electricity or the data pathway carrying the video feed. Isolating which component failed is your first task. Systematic checks can often identify a simple, fixable issue.
Diagnosing Power Supply and Electrical Issues
A camera showing no signs of life points directly to a power problem. Begin with the most basic component: the wall outlet. Test it with a lamp or phone charger to confirm it is live.
Next, inspect the camera’s power adapter. Look for physical damage like frayed wires, bent pins, or burn marks. A defective adapter is a frequent culprit behind total power failure.
Follow the entire power supply chain. Check every connection between the outlet, adapter, and the camera itself. Ensure plugs are fully seated and look for corrosion on metal contacts. Loose connections over time are a common issue.
If possible, test the camera with a known-working, compatible adapter. This quickly rules out a faulty power supply. For systems using Power over Ethernet (PoE), check the injector or switch; a blown fuse inside can halt power to all connected devices.
Warning: Never use an adapter with mismatched voltage. This can permanently destroy the unit’s internal circuitry. If you’re technically inclined, a multimeter can verify the adapter’s voltage output matches its label.
Solving power problems is the fundamental first step. Without stable electricity, no other diagnostic or network solutions will work.
Troubleshooting Network and Wi-Fi Connectivity
For modern IP cameras, losing network connectivity is as crippling as losing power. Symptoms include the camera showing “offline” in your app, laggy video, or intermittent streaming.
A weak or unstable Wi-Fi signal is the primary cause. Check the signal strength at the camera’s location using a smartphone. Common sources of interference include microwaves, cordless phones, thick concrete walls, and other electronic devices.
- Improve Coverage: Reposition your router, use Wi-Fi range extenders, or invest in a mesh network system.
- Manage Bandwidth: Multiple high-resolution cameras can saturate your home network. Reduce streaming resolution or frame rate in the camera’s settings to alleviate strain.
- Prevent IP Conflicts: Two devices with the same IP address will cause connectivity issues. Assign a static IP address to each camera within your router’s settings for stability.
If remote access fails, check your router’s firewall and port forwarding configurations. For mission-critical surveillance, a wired Ethernet connection is always more reliable than wireless. It provides consistent performance and eliminates wireless problems entirely.
Addressing these power and network issues restores the vital links your security system depends on. A stable foundation ensures reliable video feed and recording.
Resolving Video Feed and Image Quality Issues
Visual clarity and a stable signal are the bedrock of effective security monitoring. When these elements fail, your ability to observe and record events is compromised. This section tackles two core visual malfunctions: a missing feed and poor picture quality.
Each has distinct causes, from physical cable faults to incorrect software configurations. Following a structured diagnostic approach helps you pinpoint the exact issue. You can then apply the correct fix to restore a crisp, reliable view.
Fixing “No Signal” and Distorted Footage
A “No Signal” message or scrambled video indicates a break in the data path. Always start with the simplest solution. Firmly reseat all video cables at both the camera and recorder ends.
For analog systems, check the BNC connectors. Modern IP cameras use Ethernet cables. Ensure each click is secure and tight. A loose connection is a frequent culprit for signal loss.
Next, visually inspect the entire cable run. Look for cuts, severe kinks, or chew damage from pests. Any compromise to the cabling can cause total signal loss or introduce interference like “snow” into the footage.
Isolate the fault by testing the camera with a spare, known-good cable. If the signal returns, you’ve found a bad cable. For IP cameras, you can also ping the device’s IP address from a computer. A successful reply confirms basic network connectivity.
Electrical interference can cause distorted images. This happens when power lines run parallel to video cables. The result is often horizontal bands or static noise. Use shielded cables and keep power and data lines separated by a few inches.
Finally, the problem might not be the camera or cable. A faulty port on your DVR or NVR can also be the cause. Test the camera on a different input channel. If it works there, the original recorder port likely needs service.
Correcting Blurry Images and Color Distortion (White Balance)
Blurry footage fails to capture crucial details like faces or license plates. Often, the lens is simply dirty. Fingerprints, dust, and tropical humidity can obscure the view.
Clean the lens carefully with a microfiber cloth and lens cleaner. Avoid abrasive materials that can cause scratches. A clear lens is the first step toward a sharp image.
If blur persists, access the camera’s video settings via its software interface. Look for manual controls for focus, sharpness, and contrast. Adjust these settings incrementally while monitoring the live feed for improvement.
Persistent blur may indicate a hardware fault. A misaligned lens element or a failing image sensor could be the cause. These issues typically require professional assessment and repair.
Color distortion makes whites appear blue or yellow, skewing all other colors. This is usually a white balance issue. Cameras use Auto White Balance (AWB) or Auto Tracking White Balance (ATW) to correct for different light types.
Sometimes, these auto modes struggle. Locate the white balance settings in your camera’s menu. For outdoor units, angling them slightly downward reduces the amount of sky in the frame. This often helps AWB perform better.
In areas with mixed lighting, like streetlights and building lights, disable auto modes. Manually set the white balance to match the predominant light source. Test adjustments during both day and night to find the most natural color.
Note that some budget cameras have a limited color range. They may not achieve perfect color accuracy in all conditions. Manual tuning provides the best possible result for your specific environment.
Overcoming Night Vision and Low-Light Performance Problems
Darkness can transform a reliable daytime watch into a grainy, ineffective blur. For any security system, consistent performance after sunset is non-negotiable.
Many cctv problems become apparent only in low-light conditions. A unit that works perfectly by day may fail completely at night. Understanding these specific issues is the first step to fixing them.
Two main areas cause poor night vision. External environmental factors often degrade the image. Internal hardware malfunctions can also cripple a camera’s low-light capability.
This section breaks down these challenges. You will learn what disrupts infrared vision and how to restore clear surveillance after dark.
Environmental Factors That Disrupt Night Vision
Your camera’s surroundings play a huge role in night performance. Several external conditions can severely degrade infrared (IR) vision.
Direct or reflected bright lighting is a major culprit. Street lamps, building windows, or car headlights can “wash out” the image. This creates glare and overexposed spots that obscure critical details.
Singapore’s frequent weather also causes problems. Heavy rain, fog, or condensation on the lens scatters IR light. Visibility range drops dramatically, making distant objects hard to see.
Physical obstructions often go unnoticed. Spider webs, dust, or grime on the camera’s IR LED array or protective dome block infrared light. The result is hazy or spotty night images.
Extremely dark areas present another challenge. If a space has zero ambient light, it may exceed the unit’s rated IR illumination distance. Distant objects remain in complete darkness.
A faulty IR cut filter is an internal hardware problem. This filter switches the camera between color day mode and monochrome night mode. If it malfunctions, the camera might stay in color mode after dark.
The result is a very dark, noisy footage with poor quality. Identifying these environmental and hardware factors is key to finding a solution.
Solutions for Clear Surveillance After Dark
You can take direct action to fix low-light issues. A systematic approach often restores full night vision capability.
Start with a basic hardware check. In a dark room, look at the front of your camera. Functioning IR LEDs should emit a faint red glow. No glow indicates dead LEDs, a primary cause of failure.
Reposition the unit to avoid problematic lighting. Do not point it directly at or near bright light sources. Even a small angle change can reduce glare and improve image clarity.
Regular cleaning is essential. Gently wipe the external housing, lens, and the IR LED window with a microfiber cloth. Remove any spider webs, dust, or water spots.
- Boost Illumination: For large or very dark areas, add an external IR illuminator. Ensure it matches your camera’s infrared wavelength for compatibility.
- Weatherproofing: Use cameras with a high IP rating for outdoor use. Install a protective hood or housing to shield the lens from direct rain and condensation.
- Adjust Settings: Access your camera’s video menu. Tune IR sensitivity, brightness, and contrast specifically for night mode. Enable “Smart IR” if available to prevent overexposure of close objects.
If the IR cut filter is faulty or the LEDs are dead, the internal module likely needs replacement. This is a task for a professional technician.
Implementing these solutions ensures your system provides clear, reliable monitoring around the clock. Effective night performance closes a critical security gap.
Addressing Recording Failures and Storage Issues
A silent security breach occurs when your cameras are live but the recorder fails to archive their footage. This recording failure is a critical problem. It creates dangerous gaps where events go undocumented.
Your surveillance loses its primary purpose: providing evidence. Three main culprits cause this issue. Physical disconnections, incorrect settings, and storage problems are often to blame.
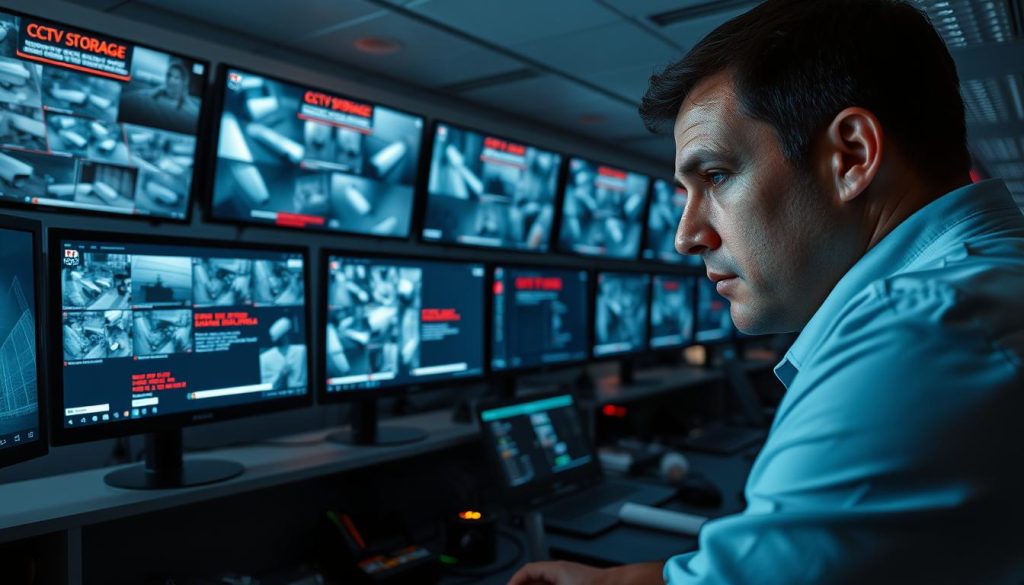
Start with a basic physical inspection. Ensure all video and power cables are firmly connected to your DVR or NVR. Check that the recorder itself is powered on and not in standby mode.
Loose cables are a frequent cause of recording interruptions. Also verify connections at the camera end. For network-based systems, a lost connectivity link can halt video archiving.
Next, navigate your DVR menu to verify configuration. Ensure each camera channel is set to “record.” Check the schedule and motion detection zones.
Faulty settings can skip sessions entirely. Confirm the storage destination is correctly selected. A misconfigured system might monitor but not save any footage.
Storage management is crucial. Access the system interface to check available hard drive space. Continuous recording consumes significant storage over time.
A full drive prevents new video from being saved. Implement a recording overwrite policy, often called cyclic recording. This allows old files to be deleted automatically.
Adjust video compression settings to extend capacity. Modern codecs like H.265 use less space than older H.264. This improves storage performance without adding hardware.
Be alert for signs of a failing hard drive. Unusual clicking noises, system crashes, or persistent “disk error” messages are red flags. A corrupted drive can cause partial or total recording loss.
Replace a faulty drive promptly with a surveillance-rated HDD. These devices are built for constant write cycles. Using a standard desktop drive may lead to premature failure.
Keep your DVR or NVR firmware updated. Manufacturers release patches that fix bugs causing recording interruptions. Regular updates are a key part of system maintenance.
For IP camera systems, ensure the network path to the recorder is stable. Connectivity drops can halt archiving. This links back to earlier troubleshooting for network issues.
Regularly verify your cctv systems by playing back clips from different times. This is the only sure way to confirm the archive function works. Don’t assume recording is active just because the live feed looks good.
Proactive checks prevent evidential blackouts. For more on related problems, see our guide on fixing issues where a CCTV camera suddenly stopped. A reliable archive is the backbone of any effective surveillance operation.
Physical Infrastructure: Cabling and Connection Integrity
Beyond the cameras and recorders, the true reliability of a surveillance system lies in its cabling. This physical network is the central nervous system of your entire cctv setup. It carries every signal and delivers essential power.
Compromised cables cause a majority of persistent issues. Corrosion on connectors is frequent in Singapore’s humid conditions. Rodents can chew through insulation, and weather exposure makes plastic brittle.
Loose terminations from a rushed installation are another common cctv problem. Each weak point degrades signal strength and connectivity. Your surveillance feed becomes unstable.
Always use high-quality, outdoor-rated cables for exterior runs. Proper shielding protects against electromagnetic interference from nearby power lines. This prevents video distortion and data loss.
During installation, protect cabling with PVC conduits or trunking. Form drip loops where cables enter junction boxes. This simple step stops water from tracking down the line into connections.
Inside control rooms, manage cables with ties and racks. Label both ends of every cable. Organized cabling simplifies troubleshooting and future expansions for your system.
Select the correct cable type for your camera technology. Analog systems need coaxial cables. Modern IP cameras require CAT5e or CAT6 for data and PoE power supply.
Perform routine visual inspections of all accessible cabling. Look for cracks, chew marks, or discoloration at connections. Signs of overheating indicate a serious damage risk.
Secure, waterproof connections are non-negotiable. Use properly crimped BNC or RJ45 connectors. For outdoor terminations, gel-filled connectors seal out moisture permanently.
Cable faults can be intermittent, making diagnosis tricky. Methodically swap cables one at a time to isolate a faulty line. This tests each segment of your network.
Investing time in proper cabling installation and maintenance prevents most power, video, and network issues. For complex faults, consider professional CCTV camera repairs. A solid physical foundation keeps all devices, from lens to dvr, functioning as one reliable unit.
Software and Firmware: Keeping Your System Updated
While cables and lenses are tangible, the software governing your system is its invisible intelligence. This digital layer controls everything from image processing to network access.
Keeping it current is a non-negotiable part of security maintenance. Outdated code can introduce glitches and open dangerous vulnerabilities.
You manage two main software types. Firmware is the embedded operating system inside your camera or DVR. It dictates how the hardware functions.
Client software includes mobile apps and PC programs for viewing feeds. Both require attention for a seamless setup.
Firmware updates are crucial for patching security flaws. Manufacturers discover weaknesses that could allow unauthorized access to your surveillance feed.
Patches close these digital backdoors. Ignoring them leaves your entire network exposed, regardless of physical security measures.
Old firmware also causes operational issues. You might experience random reboots, failed motion alerts, or poor night performance.
Incompatibility with newer apps is another frequent problem. Your phone may fail to connect to older cameras.
- Random device freezes or crashes.
- Reduced video quality or encoding errors.
- Inaccurate recording schedules.
- Loss of specific features.
Check your current firmware version first. Access your camera’s web interface or the DVR system menu. The version number is usually listed under “Device Information” or “System.”
Always download updates from the manufacturer’s official website. Never use files from third-party sources. Read the release notes to understand what the patch fixes.
Follow the upgrade instructions precisely. The process often involves uploading a file to the device’s interface. Never interrupt power during a firmware update.
A sudden power cut can “brick” the device, rendering it unusable. For critical systems, use an Uninterruptible Power Supply (UPS) during this time.
Keep your viewing software updated too. New app versions ensure compatibility with updated firmware. You also gain improved interfaces and bug fixes.
Enable automatic update checks if your system offers this feature. It streamlines maintenance by notifying you when new versions are available.
After a major firmware update, review your camera settings. Defaults can sometimes be restored. Reconfigure motion zones, schedules, and image settings as needed.
Treat software maintenance as essential digital hygiene. It is as vital as cleaning a lens. Regular updates keep your cctv systems secure, stable, and fully featured for their entire lifespan.
Proactive Maintenance for a Reliable CCTV System
A proactive maintenance schedule transforms your CCTV from a reactive tool into a resilient security asset. Waiting for a malfunction to occur is a risky strategy. Regular care prevents small problems from escalating into major security gaps.
This disciplined approach extends the life of all devices. It also ensures continuous, high-quality monitoring. Your investment in surveillance technology pays off fully with consistent upkeep.
Start with a simple monthly visual check. Walk around your property and inspect each camera housing. Look for dirt, spider webs, or signs of physical damage.
Verify the field of view remains clear. New plant growth or construction can block the lens. Ensure mounting brackets are tight and secure against wind or vibration.
Every three months, perform a deeper clean. Safely power down the system first. Use a soft microfiber cloth and lens cleaner to wipe the camera glass and infrared cover.
This restores optical clarity for sharp images. In Singapore’s humid conditions, condensation and grime build up quickly. Regular cleaning is non-negotiable for clear footage.
Conduct a comprehensive review twice a year. Test every camera’s live video feed, night vision, and motion detection. Play back recording clips to confirm archiving works perfectly.
This functional audit catches subtle issues before they cause a failure. It is a core part of reliable cctv systems management.
Manage the environment around your cameras. Trim back bushes and tree branches. Overgrowth can block views or provide cover for tampering.
Keep the area well-lit and free of clutter. This supports both the camera’s performance and its deterrent value. Environmental control is a simple but powerful security step.
Log every maintenance activity. Note the date of cleaning, any settings changes, and problems found. This log tracks your system’s health over time.
It becomes a valuable record for troubleshooting. You can spot patterns, like a particular camera needing frequent cleaning.
For complex or large-scale systems, schedule periodic professional audits. A technician performs advanced diagnostics. They check cabling integrity, signal strength, and overall configuration.
Expert solutions often optimize performance beyond basic checks. This is especially wise for business security camera networks.
Do not forget storage maintenance. Access your DVR or NVR menu periodically. Check the hard drive’s health using S.M.A.R.T. diagnostics.
Plan for storage expansion before it becomes critical. Full drives halt recording, creating dangerous evidence gaps. Proactive management keeps your archive secure.
Revisit camera placement and angles during your bi-annual review. Security needs evolve. A new blind spot may have emerged that requires adjustment.
Regular maintenance is your best insurance policy. It maximizes return on investment and ensures continuous coverage. This routine minimizes costly emergency repairs and keeps your surveillance vigilant every day.
Ensuring Your Surveillance System Remains Vigilant
Empowerment through understanding turns potential vulnerabilities into strengths. You now possess the knowledge to identify and fix frequent surveillance malfunctions. This directly strengthens your property and personal safety.
A systematic approach is key. Always start by checking power supplies and physical cabling. Then address video quality, network connectivity, and software settings. Remember, Singapore’s environment impacts camera performance.
Adopt a proactive mindset. Schedule regular checks to avoid being blindsided by failures. When self-troubleshooting hits a limit, a certified technician provides expert solutions.
Your reliable cctv system is a continuous guardian. It deters crime and delivers peace of mind. Perform a basic health check today using this guide’s steps. You are well-equipped to maintain vigilant security for years to come.
FAQ
Why does my security camera show a black screen or have no power?
A black screen often points to a power supply failure. Check if the power adapter is plugged in and the outlet is working. Inspect the main cable for any physical damage. For PoE (Power over Ethernet) cameras, ensure the network switch injects power and that the Ethernet cabling is intact.
What causes a "No Signal" error on my DVR or monitor?
This frequent issue stems from connectivity problems. It could be a loose or damaged BNC or Siamese cable connection, a faulty video balun, or a problem with the DVR’s channel input. For IP cameras, check network configuration and signal strength. Always verify all physical connections are secure first.
How can I fix blurry or distorted footage from my surveillance system?
Blurry images are commonly due to a dirty or misadjusted lens, incorrect focus, or a low-resolution setting. Clean the camera housing with a soft cloth. Access the camera’s settings via its software to adjust focus and ensure the resolution is set to its highest capability for clearer video quality.
Why does my camera’s night vision look hazy or have a short range?
Poor night vision performance is frequently caused by environmental factors like fog, dust on the IR lens, or reflective surfaces. Cleaning the camera’s infrared cover is essential. For extended range, consider models with stronger IR illuminators or adding separate infrared lighting to the area.
What should I do if my CCTV system is not recording any footage?
Recording failures usually relate to storage. First, check the hard drive in your DVR or NVR for errors or if it’s full. Verify the recording schedule is enabled in the settings. For cloud-based systems, ensure your subscription is active and there’s stable network connectivity for uploads.
How often should I maintain my CCTV installation?
Proactive maintenance is key. Perform a visual check of all cameras, housings, and cables every three months. Clean lenses quarterly and review recorded footage weekly to verify performance. Schedule a professional inspection annually to update firmware, check power supplies, and assess overall system health.


