Why is my Blink camera blinking red and not connecting? Troubleshooting Guide
Many homeowners in Singapore face connectivity issues with their security devices. A Blink camera flashing red often indicates technical problems that need immediate attention. This guide helps identify common causes and offers practical solutions.
Red LED signals usually point to power, Wi-Fi, or hardware failures. Some models, like the Blink Mini or Outdoor versions, have unique warning patterns. Understanding these differences ensures accurate troubleshooting.
Tropical climates can affect device performance. High humidity or sudden power surges may trigger error alerts. Simple fixes like resetting the device or checking network settings often resolve minor issues.
Key Takeaways
- Red blinking lights signal critical errors needing attention
- Power and Wi-Fi problems are common causes
- Different Blink models have specific warning indicators
- Environmental factors impact device performance
- Basic troubleshooting often solves connectivity problems
Understanding Blink Camera LED Indicators
Security cameras use LED indicators to communicate their status, and understanding these signals is crucial for troubleshooting. Different colors and patterns reveal whether the device is functioning normally or requires attention. This section decodes these visual cues for quick diagnostics.
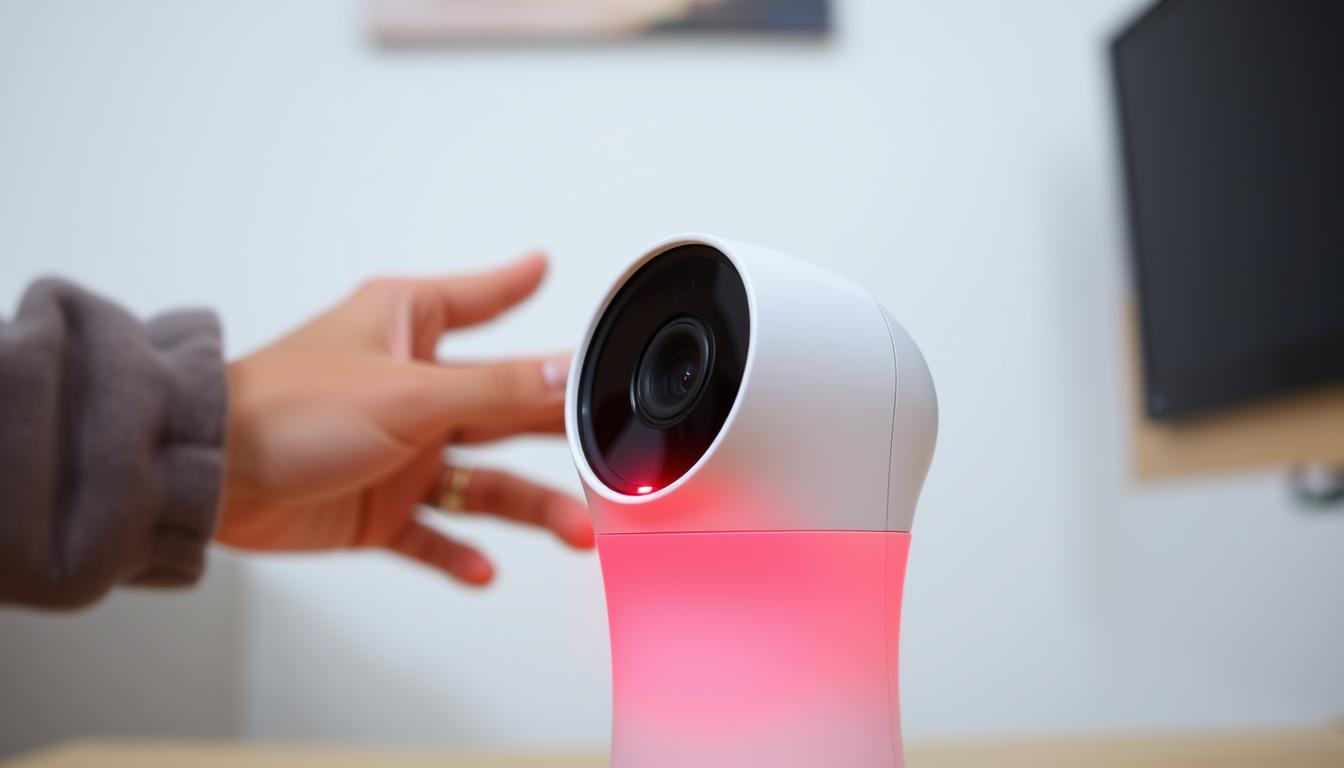
What a blinking red light means
A blinking red light typically signals an urgent issue. It may indicate Wi-Fi disconnection, low battery, or hardware failure. For outdoor models, environmental factors like Singapore’s high humidity can trigger false alerts.
If the light pulses rapidly during setup, the camera might be struggling to pair with the sync module. A slow blink often points to power disruptions. Check connections or replace batteries if this persists.
Other LED signals and their interpretations
Solid red usually means the device is offline or has a critical error. A blinking green light shows the camera is attempting to connect to Wi-Fi. Once stable, it turns steady blue during active recording.
Infrared emissions cause a faint red glow in night vision mode—this is normal. Newer Blink camera generations may have subtle variations in these patterns. Always consult the manual for model-specific details.
Pro Tip: LED visibility can vary under direct sunlight or heavy rain. Position the device to avoid glare while ensuring clear indicator visibility.
Common Causes of a Blinking Red Light
Connectivity problems in smart home systems frequently stem from three primary causes. A red LED alert helps narrow down whether the issue relates to network stability, energy supply, or configuration errors. Addressing these systematically restores device functionality.
Internet connection problems
Signal strength drops are common in Singapore’s dense urban areas. Blink devices require a stable 2.4GHz network—5GHz bands aren’t supported. Minimum 2Mbps upload speed ensures smooth operation.
Router compatibility matters. Some local ISPs use settings that conflict with DHCP protocols.
StarHub and Singtel users report fewer issues when disabling IPv6 during initial setup.
Low battery or power issues
Lithium batteries outperform alkaline in tropical climates, lasting 30% longer. Voltage fluctuations in HDB apartments may trickle-charge units incorrectly. Always verify your power source with a multimeter if outages occur frequently.
Camera setup mode
Devices blink red during pairing attempts. The process times out after 90 seconds if the sync module fails detection. Ensure the camera setup occurs within 10 feet of the router to avoid interference from Wi-Fi channel congestion.
How to Fix a Blink Camera Blinking Red
Effective fixes for LED alerts require methodical checks of power, network, and hardware. Start with basic troubleshooting before advancing to complex solutions. This section outlines actionable steps tailored for Singapore’s urban environment.
Check your internet connection
Wi-Fi instability is a leading cause of red alerts. Ensure your router broadcasts a 2.4GHz band—Blink devices don’t support 5GHz networks. For StarHub or M1 users:
- Power cycle the router for 30 seconds
- Disable IPv6 in router settings temporarily
- Verify signal strength exceeds 2Mbps upload speed
Tip: Place the sync module within 3 meters of the router during setup to minimize interference.
Replace or recharge the batteries
Singapore’s humidity accelerates battery drain. Opt for lithium AA batteries (available at Challenger stores) for 30% longer lifespan. For wired setups:
- Test adapter voltage with a multimeter
- Compare wired vs. battery performance in monsoon conditions
Low power triggers red flashes even with partial charge. Replace cells if voltage drops below 1.5V.
Restart the camera
Soft resets resolve temporary glitches. Follow these steps:
- Locate the reset button near the USB port
- Press reset for 5–10 seconds until the LED blinks blue
- Reconfigure via the Blink app
If failures persist, scan the QR code below for a video demonstration of advanced troubleshooting.
Resolving Wi-Fi Connectivity Issues
Singapore’s urban density creates unique challenges for wireless security systems. Thick concrete walls and competing networks often weaken signals. These solutions optimize performance for Blink devices across different home layouts.
Verify signal strength in the Blink app
The Blink app displays real-time signal strength using a three-bar metric. Ideal performance requires:
- Minimum 3 bars during setup
- Consistent readings below -70dBm
- Stable ping under 100ms
Test different locations before permanent installation. Move the device if readings fluctuate more than 15dBm.
Optimal placement for the Sync Module
Position the hub 3-10 feet from your Wi-Fi router in open space. Avoid:
- Metal cabinets
- Refrigerators
- Microwave ovens
Pro Tip: Elevate the module 1.5m above ground for better signal dispersion in landed properties.
Using Wi-Fi extenders or mesh networks
For HDB flats exceeding 90sqm, consider these upgrades:
- TP-Link Deco X20 – Budget-friendly mesh for concrete walls
- Google Nest Wifi – Seamless roaming between nodes
- ASUS RP-AX56 – Dedicated 2.4GHz extender
Channel selection matters in high-density areas. Use apps like Wi-Fi Analyzer to find less congested frequencies between 1, 6, or 11.
Addressing Power and Battery Problems
Consistent power source is critical for security devices. Singapore’s humidity and frequent storms can disrupt energy flow to your Blink camera. This section covers practical solutions for stable operation.
Testing the power source
Use a multimeter to verify voltage stays within 5V ±5% tolerance. Common failure points include:
- Frayed USB cables near connectors
- Overheated adapters in enclosed spaces
- Voltage drops during monsoon season
For outdoor units, check weatherproofing seals every 3 months. Salt air accelerates corrosion in coastal areas.
Choosing the right batteries
Lithium AA batteries outperform NiMH in tropical conditions. Available at NTUC FairPrice:
- Energizer Ultimate Lithium – 2-year lifespan
- Panasonic Pro Power – Best for high-drain devices
- Duracell Optimum – Humidity-resistant casing
Store spares in airtight containers with silica gel packs to extend shelf life.
Checking solar panel performance
Outdoor models need 4+ hours of direct sunlight. Position solar panels at 15° angles facing north. Clean monthly with microfiber cloths to maintain efficiency.
During December monsoon, supplement with USB power. Monitor charging via the Blink app’s energy dashboard.
Resetting Your Blink Camera
A factory reset can be the ultimate solution for stubborn connectivity issues. This process clears all customized settings and returns the device to its original state. Before proceeding, always backup your configurations through the companion app.
Identifying When a Reset Is Necessary
Consider resetting when facing unresponsive controls or repeated error alerts. Other telltale signs include failed firmware updates or incorrect password prompts. Soft resets (quick power cycles) should be attempted first for minor glitches.
Performing a Complete Factory Reset
Locate the small reset button near the power port. Use a paperclip to press hold it for 30 seconds until the LED flashes amber. The device will reboot automatically when successful.
- Pre-reset checklist: Note down Wi-Fi credentials and motion zones
- Different reset types: Soft (10-second hold) vs Hard (30-second hold)
- Post-reset: Reconfigure through the app within 15 minutes
Common reset failures often involve incomplete button presses. Ensure continuous pressure throughout the entire duration. The LED color sequence confirms proper execution—amber to blue indicates success.
Warning: All local recordings and custom settings will be erased during hard resets. Cloud-stored clips remain unaffected.
Follow these steps to reconnect after resetting:
- Open the device management app
- Select “Add New Device” option
- Scan the QR code on your unit
Firmware versions stay intact during resets. For Singapore users, monsoon season may require more frequent resets due to humidity-related glitches.
Updating Firmware and Software
Regular software maintenance keeps security devices operating at peak performance. The blink app and firmware work together to deliver security patches and new features. Quarterly updates address Singapore’s unique climate challenges like humidity-related glitches.
Checking for firmware updates
Automatic updates are enabled by default in the blink app settings. Verify your device runs the latest firmware version:
- Open the app and select your camera
- Navigate to Device Settings > Firmware
- Look for “Up to Date” status or update prompt
Failed updates often stem from unstable Wi-Fi. Try these steps if issues occur:
- Restart your router and sync module
- Ensure iOS 15+ or Android 10+ compatibility
- Check storage space exceeds 500MB
Updating the Blink app
Singapore receives feature rollouts 2-3 weeks after US launches. The blink app version must match your device generation:
- Blink Mini: v6.8+ required for monsoon mode
- Outdoor models: v5.4+ supports enhanced night vision
Manual APK installation may bypass regional delays. Download only from official sources.
For optimal performance, schedule updates during off-peak hours. The app notifies users when critical security patches deploy locally.
Optimizing Motion Detection Settings
Precision adjustments to security device settings can dramatically reduce false alerts. Fine-tuning ensures your system ignores common triggers like swaying plants while capturing genuine threats. Singapore’s urban environment demands special calibration for wildlife and weather patterns.

Adjusting sensitivity levels
The 1-10 sensitivity scale allows customized responsiveness. Start at level 5 and test with these scenarios:
- Walk-test at 3m distance during monsoon rain
- Observe how palm fronds trigger alerts at different levels
- Adjust angles to avoid detecting passing MRT trains
Infrared motion detection performs better than visible light at night. Reduce sensitivity by 1-2 points during heavy rainfall to minimize false alarms.
Cleaning the camera lens
A smudged camera lens reduces detection accuracy. Use microfiber cloths monthly or after storms. Approved cleaning solutions include:
- 70% isopropyl alcohol for grease
- Distilled water for dust
- Lens pens for stubborn spots
Never use paper towels—microscratches distort infrared signals.
Position cameras under eaves to minimize direct rain contact. Regular maintenance ensures optimal motion detection in humid conditions.
Checking Router and Network Settings
Router settings impact connectivity more than most users realize. Proper configuration ensures stable communication between devices and servers. Singapore’s dense urban environment requires special attention to bandwidth allocation and signal interference.
Ensuring 2.4 GHz band compatibility
Most security devices exclusively use the 2.4GHz frequency band. Modern routers often default to 5GHz or enable band steering, which causes connection failures. Follow these steps to verify compatibility:
- Access your router settings via 192.168.1.1 (common for StarHub/M1)
- Navigate to Wireless Settings > Advanced Options
- Disable “Smart Connect” or band steering features
- Create separate SSIDs for 2.4GHz and 5GHz networks
Singtel users should look for “Dual Band Separation” under Broadband > Home Network.
Disabling VPNs during setup
Virtual Private Networks often interfere with device registration. Temporarily turn off these services when configuring new equipment:
- Disconnect all active VPN connections
- Clear DNS cache (ipconfig/flushdns on Windows)
- Restart both router and security device
For essential VPN usage, configure exceptions for local network traffic. Cloudflare’s 1.1.1.1 DNS often provides better stability than ISP defaults.
When to Contact Blink Support
Technical issues sometimes require professional intervention despite thorough troubleshooting. When basic solutions fail to resolve persistent red LED alerts, manufacturer assistance becomes necessary. Recognize these scenarios where DIY methods reach their limits.
Identifying Hardware Failures
Physical damage often reveals itself through visible cues. Check for these hardware failure indicators:
- Cracked lenses or moisture inside the housing
- Corroded battery terminals from Singapore’s humidity
- Overheating marks near power ports
Non-responsive reset buttons and inconsistent LED patterns also suggest component failure. Test with different power sources before concluding.
Warranty and Replacement Options
Blink’s standard one-year warranty covers manufacturing defects in Singapore. Prepare these for claims:
- Original purchase receipt from authorized retailers
- Device serial number and firmware version
- Video evidence of the malfunction
Authorized service centers at Funan Mall and Jem verify claims within 3 business days.
For out-of-warranty devices, compare repair costs against new unit pricing. Contact Blink support via live chat for expedited RMA processing during monsoon season delays.
Preventing Future Connectivity Issues
Strategic planning prevents 80% of common device connectivity failures. Implementing climate-adapted best practices ensures reliable operation through Singapore’s tropical weather cycles. These measures combine technical adjustments with environmental considerations.
Optimal camera placement strategies
Position devices 2-3 meters above ground for ideal motion detection. Avoid direct sunlight exposure which causes overheating alerts during peak hours. North-facing installations minimize glare from afternoon showers.
Consider these urban environment factors:
- Install waterproof casings before monsoon season (June-November)
- Maintain 1m clearance from metal surfaces that interfere with signals
- Use anti-theft mounts in public housing common areas
Scheduled maintenance routines
Monthly checks keep systems running smoothly through humidity fluctuations. Create a seasonal checklist including:
- Battery terminal cleaning with isopropyl wipes
- Lens inspection for condensation buildup
- Wi-Fi signal strength verification
Set quarterly reminders in the Blink app for firmware updates and security audits.
For long-term reliability, synchronize battery replacements with Singapore’s dry seasons (Feb-Mar, Jul-Aug). Store spare parts in airtight containers with silica gel to prevent moisture damage.
Keeping Your Blink Camera Running Smoothly
Maintaining reliable home security requires consistent device monitoring. Track performance through the Blink app’s health reports. Note battery levels, signal strength, and error logs weekly to catch issues early.
Adopt best practices like seasonal maintenance checks. Clean lenses before monsoon season and test backup power monthly. Pair your blink camera with smart plugs for remote reboots during outages.
Upgrade older models during annual sales for better features. Newer blink camera versions handle humidity better. Share tips with neighbors—community forums often reveal local fixes for Singapore’s unique challenges.
FAQ
What does a blinking red light on my Blink camera indicate?
A blinking red light typically means connectivity issues, low battery, or setup mode activation. Check the Blink app for detailed alerts.
How do I fix my Blink camera if it won’t connect to Wi-Fi?
Ensure strong signal strength, restart your router, and verify the Sync Module is within range. If issues persist, reset the device.
Should I replace the batteries if my Blink camera shows a red light?
Yes. Weak batteries often trigger a red LED. Use lithium AA batteries for optimal performance.
Why does my Blink camera stay in setup mode?
If the green light blinks continuously, the camera hasn’t paired. Re-enter setup mode via the app and follow the prompts.
How do I reset my Blink camera?
Press and hold the reset button for 10+ seconds until the LED flashes. Reconfigure via the Blink app afterward.
Can a VPN interfere with my Blink camera’s connection?
Yes. Disable VPNs during setup to ensure a stable Wi-Fi connection.
When should I contact Blink Support?
If troubleshooting fails or the solid red light persists, reach out for hardware diagnostics or warranty claims.
How can I improve motion detection accuracy?
Adjust sensitivity settings in the app and clean the lens regularly for clearer detection.
Does the Sync Module placement affect connectivity?
Absolutely. Keep it central, away from obstructions, and within 100 feet of cameras for strong signal strength.
What’s the best way to prevent future issues?
Regularly update firmware, check power sources, and maintain optimal Wi-Fi signal strength.


