Why is my Blink camera blinking red and not connecting? Fixes
That flashing red indicator on your security device can be frustrating. This signal often means your equipment needs attention.
Many users encounter this issue with their home monitoring systems. The problem could stem from various sources.
Connectivity problems frequently cause the red LED. Weak Wi-Fi signals or router issues might be the culprit.
Power sources also play a crucial role. Low batteries or faulty adapters can trigger the warning light.
This guide provides clear solutions for Singapore residents and global users. We’ll help you restore proper function to your device.
Key Takeaways
- The red light indicates various potential issues with your device
- Connectivity problems are a common cause of this warning signal
- Power sources including batteries need regular verification
- Simple resets often resolve the connection problem
- Different Blink models may have slightly different indicator patterns
- Professional support remains available for persistent issues
- Regular maintenance helps prevent future connectivity problems
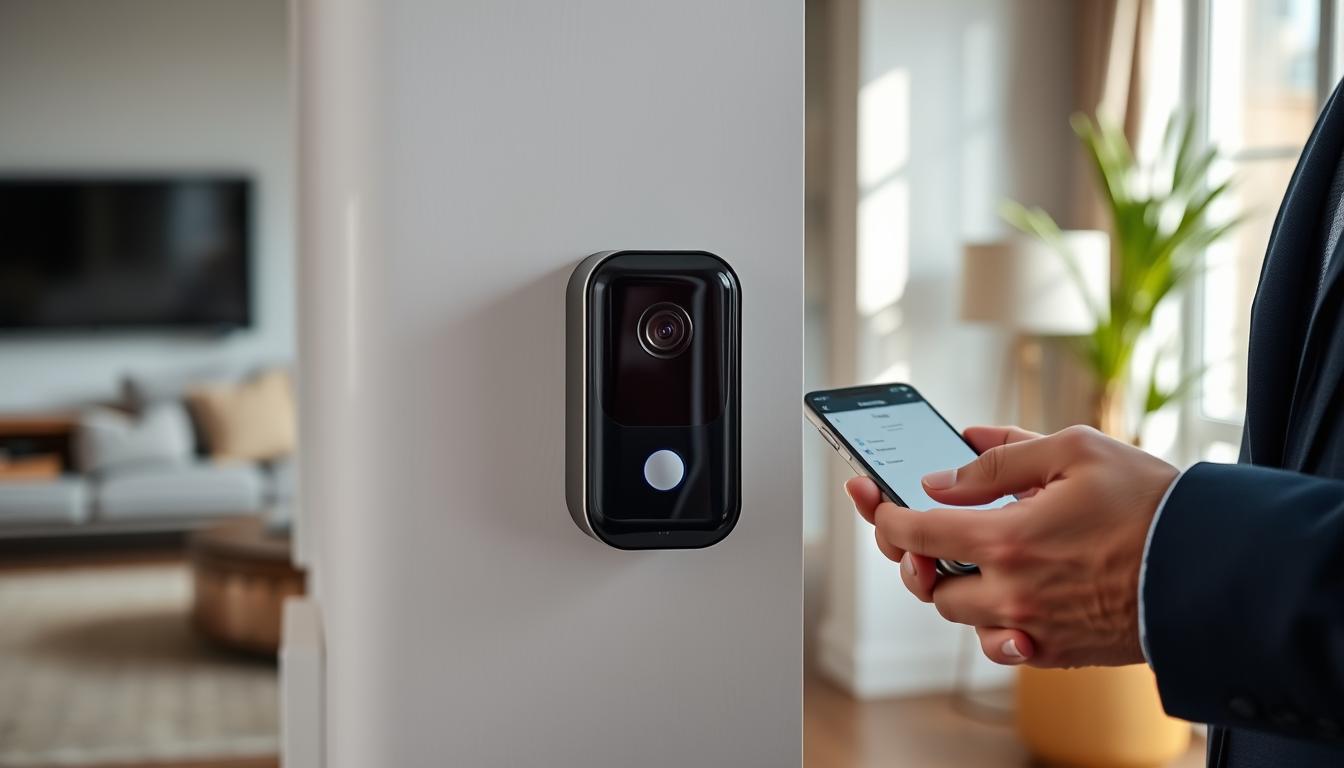
Understanding Your Blink Camera’s Red Blinking Light
That crimson glow from your security device isn’t random. Each flash pattern carries specific meaning about your equipment’s status.
Different models communicate through unique light sequences. Recognizing these signals helps you respond appropriately to device needs.
What the Red Light Indicates Across Blink Models
Blink Outdoor 4 devices flash red during setup procedures. This occurs when changing systems or adjusting Wi-Fi settings.
The Video Doorbell displays similar behavior during connection seeking. Both models might need battery removal if patterns deviate from expectations.
Mini and Mini 2 models show solid red when offline. Unplugging and replugging often restores connection. Persistent issues might require reset button activation.
Older generations like Outdoor/Indoor 3rd Gen flash every three seconds during disconnection. Initial battery insertion triggers five long flashes followed by rhythmic short flashes.
Common Scenarios for Red Blinking Patterns
Setup mode activation frequently causes the red LED illumination. Wi-Fi disconnection presents another common trigger for these visual alerts.
Low power levels often manifest through specific flash sequences. Motion detection can briefly activate the red light during normal operation.
“Understanding your device’s light patterns prevents unnecessary troubleshooting steps. What appears problematic might be normal operation.”
Infrared night vision sometimes creates reddish glows in darkness. This differs from error indicators and requires no corrective action.
Always consult your model’s manual for precise pattern interpretations. Correct diagnosis ensures appropriate resolution steps for your specific situation.
Initial Checks and Basic Troubleshooting Steps
Before diving into complex solutions, start with these fundamental checks. Simple power and setup verification often resolves the flashing indicator quickly.
These basic steps address the most common causes of device alerts. They require minimal technical knowledge and save valuable time.
https://www.youtube.com/watch?v=EshyUx064Pg
Verifying Power and Battery Status
Begin with your equipment’s energy source. For battery-operated units, remove and reinsert the power cells to reset the system.
Plug-in models like the Mini need unplugging and replugging. This simple power cycle clears temporary glitches effectively.
Always use fresh AA lithium batteries for optimal performance. Alkaline alternatives degrade faster and cause premature warnings.
Failing power sources often trigger specific flash patterns. Five or six red flashes after recording typically indicate low energy levels.
Ensuring Camera Is in Setup Mode Correctly
Proper initialization is crucial for successful operation. The red light should flash during this process when everything works correctly.
Consult your Blink app guidelines for precise instructions. Typically, this involves holding the reset mechanism or following prompts.
New or recently reset devices should enter setup mode properly. The Mini shows red briefly before transitioning to green and blue readiness indicators.
If you see a steady red glow, use the reset button. Employ a thin object to avoid damaging the mechanism during this process.
“Basic troubleshooting eliminates simple causes first. This methodical approach saves time and prevents unnecessary complex procedures.”
Confirm all connections remain secure and properly seated. Loose contacts can mimic more serious operational issues.
These foundational checks should precede network or software investigations. They address straightforward causes of visual alerts efficiently.
For persistent problems after these steps, consider exploring advanced connectivity solutions in subsequent sections.
Addressing Wi-Fi and Internet Connection Issues
Wireless connection issues represent a common source of operational problems. Many homeowners encounter network-related challenges with their security equipment.
These connectivity problems often manifest through specific indicator patterns. Understanding network requirements helps resolve these issues effectively.
Checking Router Compatibility and Signal Strength
Your security equipment requires specific network specifications. Blink cameras only connect to 2.4 GHz Wi-Fi networks (802.11 b/g/n).
5GHz networks remain incompatible and cause connection failures. Verify your router supports this essential frequency band.
Check signal strength through the Blink app navigation menu. Go to Device Settings > General Settings > Camera to Wi-Fi for connection metrics.
Two bars or less indicates weak signal strength. This often causes operational problems and visual alerts.
Consider repositioning equipment closer to the router. Outdoor models particularly benefit from reduced distance to the signal source.
Restarting Your Router and Modem
Network equipment restart resolves many temporary glitches. Unplug your router and modem for approximately 60 seconds.
Replug the devices and allow several minutes for reboot completion. Check your security equipment connection after full restart.
Network overload can affect performance during heavy usage. Reduce streaming or gaming activity during setup procedures.
Wi-Fi password verification remains crucial for successful linking. Authentication failures often cause persistent operational issues.
Sync module users should reconnect through the app interface. Select Change Wi-Fi Network and follow the prompted instructions.
“Regular network monitoring and router firmware updates prevent future connectivity problems. Maintaining stable environments ensures reliable security system operation.”
Wi-Fi extenders boost range for equipment in remote locations. This solution improves strength and stability for consistent performance.
Singapore residents should consider local network infrastructure characteristics. Tropical weather conditions sometimes affect wireless signal propagation.
Resolving Power and Battery-Related Problems
Power-related issues often trigger that persistent red indicator on your security equipment. These energy source difficulties represent some of the most common operational challenges homeowners face.
Different models have unique power requirements and warning patterns. Understanding these specifications helps you address the root cause effectively.
Replacing Batteries in Outdoor and Indoor Models
Battery-powered equipment requires specific energy cell types for optimal performance. Always use fresh 1.5V AA lithium non-rechargeable batteries in your devices.
Alkaline alternatives degrade faster and provide inconsistent power delivery. This rapid depletion frequently causes visual alerts and operational interruptions.
Outdoor models particularly benefit from lithium battery installation. These power sources maintain consistent performance across temperature variations.
When the red LED flashes five or six times after recording, immediate replacement becomes necessary. This pattern strongly indicates complete energy cell failure.
Singapore residents should consider local humidity effects on battery life. Proper storage of spare units maintains their efficacy when needed.
Power Cycling Plug-In Cameras Like Blink Mini
Plug-in models require different troubleshooting approaches than battery-operated units. The Mini and similar devices benefit from simple power cycling procedures.
Unplug the equipment for approximately ten seconds before reconnecting. This reset clears temporary glitches affecting normal operation.
Always verify the power adapter and outlet functionality during this process. Faulty connections can mimic more complex operational issues.
Regular maintenance prevents future power-related disruptions. Periodic checks ensure consistent performance of your security system.
“Proper power management forms the foundation of reliable security system operation. Addressing energy source issues first often resolves apparent connectivity problems.”
Solar-powered setups require additional verification steps. Ensure the solar panel receives adequate sunlight for proper charging.
Supplement with backup power during extended cloudy periods. This prevents operational disruptions in your monitoring system.
Different models have varying power requirements and indicator patterns. Always consult your specific device manual for precise troubleshooting guidance.
Resetting and Reconnecting Your Blink Camera
Sometimes your security equipment needs a fresh start. A complete reset often solves stubborn connection problems.
This process clears old settings and prepares your device for new configuration. It’s particularly useful after moving or changing networks.
Using the Reset Button on Different Blink Models
Each model has a unique reset mechanism location. The Mini features its button on the bottom casing.
Use a thin object like a paperclip to press this button. Avoid sharp tools that might damage the mechanism.
For the Mini 2, you must disconnect the mount first. This reveals the reset button hidden beneath the mounting hardware.
Outdoor and Indoor models have accessible reset buttons. Simply press and hold for several seconds to initiate the process.
Wait for the LED pattern to change after pressing. Typically, red changes to blinking green or solid blue indicating success.
Re-adding Camera to Blink App and System
After resetting, you’ll need to reconnect your equipment. Open the Blink app and tap the Add Device icon.
Follow the on-screen instructions carefully during this process. Select your Wi-Fi network and enter the password correctly.
If the device was previously configured, delete it first. This prevents configuration conflicts that might cause issues.
Ensure your network is active during re-addition. Authentication errors can lead to repeated connection failures.
Sync module users might need to reset their module too. Reconnect it to Wi-Fi through the app for stable linking.
“A proper reset refreshes all connections and settings. This often resolves software glitches causing operational problems.”
Name your device appropriately during the camera setup. This helps with identification if you have multiple units.
The process effectively clears network mismatches and software issues. Your equipment should function normally after completion.
Advanced Troubleshooting for Persistent Issues
When basic fixes don’t resolve your security equipment’s warning signals, deeper investigation becomes necessary. These advanced techniques address underlying software and configuration problems.
Persistent operational issues often require more technical solutions. Proper implementation restores full functionality to your monitoring system.

Updating Firmware and Blink App Software
Outdated software frequently causes operational problems with security equipment. Regular updates maintain compatibility and performance.
Check the Blink app for available firmware updates through the device settings menu. Current software ensures optimal camera functionality.
Update your mobile application through official stores like Google Play or Apple App Store. This maintains proper communication between your device and monitoring system.
Singapore users should ensure stable internet connection during update processes. Tropical weather can affect download reliability.
Checking Motion Detection and Storage Settings
Configuration adjustments often resolve persistent warning indicators. Motion sensitivity settings require careful calibration.
Adjust detection levels to avoid false triggers that cause unnecessary alerts. Too high sensitivity activates the camera flashing during normal environmental changes.
Clean the lens regularly to maintain accurate motion detection. Dust accumulation affects performance and triggers erroneous signals.
Monitor storage capacity through the Clips screen in your app. XT2 and XT models share 7200 seconds of recording time.
Storage overflow disrupts normal operation and may cause visual warnings. Manage clip retention to prevent system overload.
“Regular software maintenance and configuration checks prevent most advanced issues. Proactive management ensures consistent security system performance.”
Infrared night vision settings affect light appearance in darkness. Proper configuration avoids confusion with error indicators.
Factory reset through the app resolves deep-seated software problems. This clears all settings for fresh camera setup.
Advanced users can explore network diagnostics for hidden connection issues. Router logs and Wi-Fi analyzers identify underlying problems.
Optimal placement enhances motion detection accuracy. This reduces false alerts and associated warning signals.
Regular maintenance prevents most persistent operational issues. Your security system remains reliable through proper care.
When to Seek Professional Support and Contact Options
Despite thorough troubleshooting, some technical issues require expert intervention. Recognizing when to seek professional help saves time and prevents further complications.
Persistent problems often indicate deeper hardware or system issues. Knowing your support options ensures quick resolution.
Identifying Hardware Failures and Warranty Coverage
A solid red indicator that remains unchanged after 120 seconds suggests hardware failure. Reset attempts that show no response confirm this diagnosis.
Check warranty status through the Blink app or website before contacting support. Eligible devices often qualify for free replacement or repair.
Have your device model and serial number ready for efficient assistance. This information speeds up the support process significantly.
“Persistent hardware issues beyond two minutes indicate professional intervention needed. Proper documentation ensures smoother warranty claims.”
Blink Support Channels for Singapore Users
Singapore residents can access support through multiple channels. The official website offers ticket submission for technical issues.
International phone support remains available for all users. Local options might provide faster response times for regional concerns.
Community forums and help articles offer additional insights while awaiting professional response. These resources often provide temporary solutions.
For out-of-warranty devices, consider authorized repair services. Compare costs against replacement options based on device age and history.
The support team can guide through advanced diagnostics if needed. They may arrange hardware inspection for persistent issues.
Always document your troubleshooting steps before contacting professionals. This information helps technicians diagnose problems faster.
Ensuring Long-Term Performance and Prevention Tips
Maintaining your security system requires consistent care and attention. Proactive measures prevent most common operational issues.
Optimize your Wi-Fi network for reliable performance. Place routers centrally and use extenders for better coverage.
Regular battery maintenance ensures consistent power. Replace lithium AA cells every 3-6 months for optimal performance.
Keep lenses clean to maintain accurate motion detection. Gentle wiping prevents false alerts and maintains video quality.
Update firmware through the Blink app regularly. This provides security patches and performance improvements.
Protect outdoor devices with weatherproof covers. Singapore’s climate requires extra protection against humidity.
Monitor storage capacity to prevent full system errors. Delete old clips or upgrade plans when necessary.
Secure mounting prevents alignment issues. Firm installation avoids tampering and operational problems.
Schedule routine resets every few months. This refreshes settings and maintains peak device performance.
Following these tips minimizes warning signals. Your security system will deliver reliable, long-term protection.
FAQ
What does a red blinking light mean on a Blink camera?
A red blinking light typically indicates a setup or connection issue. It often means the device is in setup mode, has lost its internet connection, or is experiencing a low battery. Check your network and power sources first.
How do I reset my Blink camera when it flashes red?
Locate the small reset button on your device. Press and hold it for about 10–15 seconds until the light turns red, then release. Wait for the device to reboot and attempt reconnection through the Blink app.
Can weak Wi-Fi cause the red blinking light?
Yes, weak signal strength or an unstable internet connection frequently causes the red LED to flash. Ensure your camera is within range of your router and consider restarting your modem to refresh the network.
Do I need to replace batteries if the light is red?
For battery-powered models like Blink Outdoor, a red light often signals low power. Replace with fresh, high-quality lithium batteries to restore normal function and clear the warning indicator.
What should I do if resetting doesn’t fix the issue?
If basic reset steps fail, check for app or firmware updates. Persistent problems may indicate hardware failure—contact Blink Support for warranty assistance or further troubleshooting guidance.
How can I prevent my Blink camera from disconnecting often?
Maintain strong Wi-Fi signal strength, use recommended power sources, keep firmware updated, and ensure motion detection settings are optimized. Regular maintenance reduces connectivity problems.


