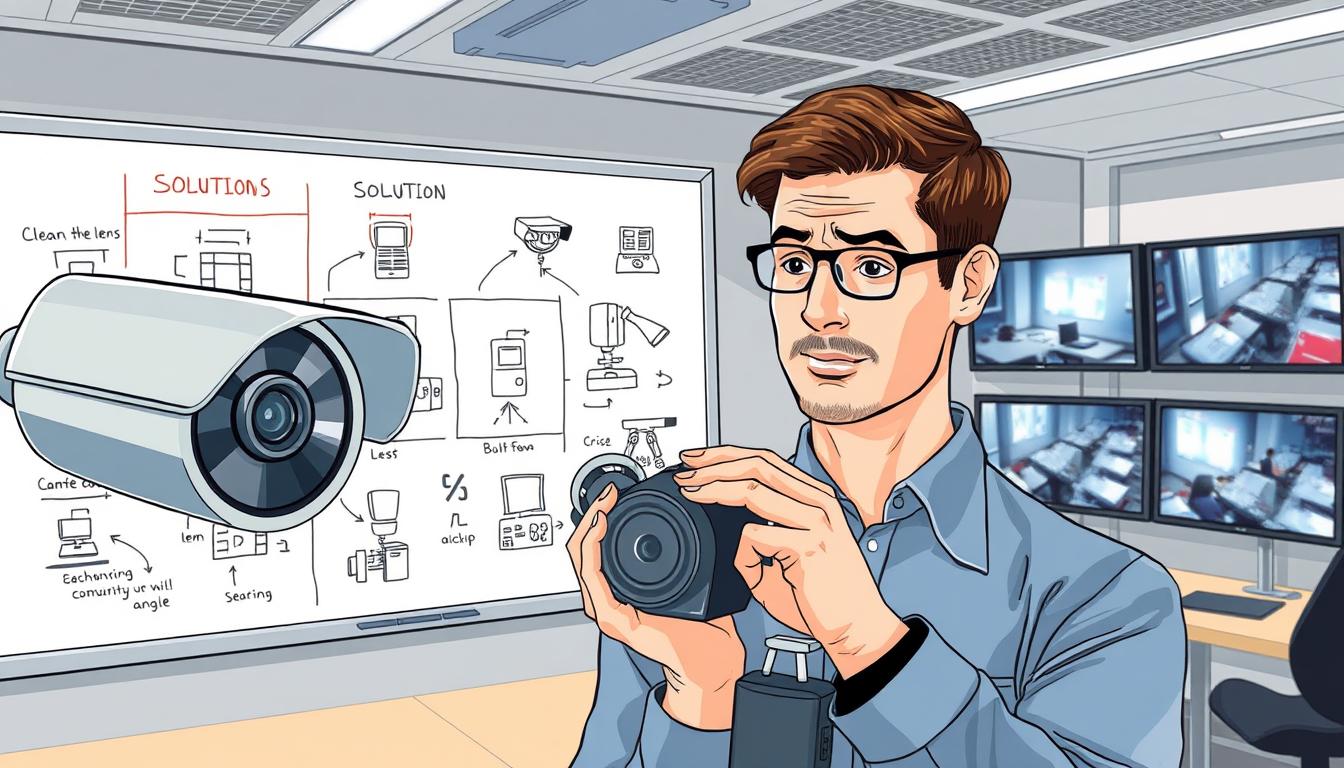
What is the common problem of CCTV camera? Solutions & Fixes
A reliable surveillance system is the backbone of property security. When a camera fails, it creates a dangerous blind spot.
This leaves homes and businesses in Singapore vulnerable. Many people face frustrating problems with their CCTV setups.
The good news is that most frequent issues have straightforward causes. Often, the fix does not require expert help.
Factors like loose power cables, Wi-Fi drops, or Singapore’s high humidity are typical culprits. Understanding these failure points allows for quick action.
This guide provides a clear path from identifying a malfunction to restoring your security. We cover practical, do-it-yourself solutions for common problems.
Proactive maintenance ensures your surveillance system runs continuously. Protect what matters most without unnecessary downtime or worry.
Key Takeaways
- Most CCTV malfunctions stem from simple, fixable causes like power or network connections.
- System failure creates critical security blind spots, compromising property safety.
- Proactive maintenance and understanding common issues prevent most downtime.
- Many solutions are DIY-friendly, saving time and money on service calls.
- Local factors in Singapore, such as humidity, can affect camera performance.
- Identifying the specific problem is the first step toward a reliable fix.
- A logical troubleshooting approach resolves the majority of common surveillance problems.
Understanding Common CCTV Camera Issues in Singapore
Singapore’s unique environment shapes the performance of security cameras. High humidity and frequent rain can degrade outdoor equipment quickly.
These local conditions directly affect your monitoring setup. They often lead to unexpected video loss or poor signal quality.
Network congestion in dense urban areas also impacts wireless feeds. Outdated firmware frequently causes glitches in the local surveillance system.
Power supply failures are a primary reason for downtime. Faulty wiring or an unstable network connection disrupts video transmission.
Addressing these infrastructural weaknesses is vital. A proactive maintenance schedule prevents most frequent malfunctions.
Many problems start with simple physical connections. A loose cable or a dirty lens can cause major failures.
Regular inspections of cable condition are essential. Singapore’s climate can harm connections rapidly.
For dependable operation, recognizing these regional trends is crucial. This understanding enables rapid detection and correction of most errors.
Local specialists, such as those at CCTV Maintenance, deliver focused remedies. They comprehend the particular installation challenges encountered locally.
Of all possible breakdowns, one emerges as the most common. This topic will be addressed in the following part.
What is the Most Common Problem with CCTV Cameras?
Most monitoring setups experience recurring failures that compromise their primary function. Three specific areas account for the majority of surveillance system headaches. Understanding these categories helps users diagnose issues quickly and effectively.
Unstable electrical current, poor network signals, and deteriorating video clarity represent the core challenges. Each category has distinct symptoms but often interacts with the others. A systematic approach to these malfunctions restores reliable protection.
Power Supply Failures: The Primary Culprit
Inconsistent or lost electrical current ranks as the leading cause of surveillance downtime. When cameras lose power, they go completely offline, creating immediate security gaps. This issue often stems from simple physical failures in the supply chain.
Faulty adapters, overloaded circuits, and damaged cables frequently disrupt operations. Incompatible voltage requirements can also prevent devices from starting properly. Symptoms like flickering indicator lights or sudden shutdowns signal an unstable power supply.
Overheating units and system-wide crashes often trace back to electrical deficiencies. As noted by security experts, “A camera without reliable electricity is merely a decorative fixture.” These foundational failures make subsequent troubleshooting steps impossible until resolved.
Comprehensive checks of cords, connections, and voltage needs form the first line of defense. The dedicated troubleshooting section that follows provides step-by-step guidance for restoring stable electricity to your surveillance network.
Network and Connectivity Dropouts
Modern surveillance relies heavily on data transmission across networks. When this connection fails, cameras may remain powered but unable to stream footage. Weak Wi-Fi signals, IP address conflicts, and bandwidth saturation commonly interrupt video feeds.
Users experience these dropouts as frozen live views or missing recordings. The inability to access feeds remotely represents a clear symptom of network problems. Frequent disconnections and slow video buffers indicate underlying connectivity issues.
Diagnostic tools like the ping command help verify communication between devices and the network. Both wired and wireless setups face unique challenges in maintaining consistent data flow. A stable power source means little if network pathways remain blocked.
This interplay between systems explains why some malfunctions seem intermittent. Later chapters detail specific methods for securing Wi-Fi networks and resolving IP conflicts to ensure uninterrupted surveillance data transmission.
Image Quality Degradation Over Time
Surveillance equipment can function technically while producing useless footage. Blurry, grainy, or discolored video fails to serve its identification purpose. Gradual image quality decline often goes unnoticed until critical moments reveal its inadequacy.
Dirt accumulation on lenses represents the most frequent physical cause. Sensor malfunctions and incorrect settings also distort visual information. Poor quality nighttime image capture particularly undermines 24/7 security systems.
Clear visual evidence forms the foundation of any security investigation. Compromised footage provides little more than false confidence.
Environmental factors like Singapore’s humidity accelerate lens fogging and corrosion. Regular cleaning and proper configuration maintain optical clarity. Without intervention, even high-resolution devices produce disappointing results.
These three problem areas—power, network, and visual clarity—often interconnect. An unstable electrical source might cause network hardware to reboot, disrupting connectivity. Similarly, power fluctuations can affect sensor performance, degrading image quality.
Recognizing these patterns represents the first step toward reliable surveillance. Each category has established diagnostic procedures and proven solutions. For immediate assistance with sudden failures, professional support offers targeted expertise in local conditions.
Troubleshooting Power Supply and Electrical Issues
Power irregularities represent the single biggest threat to continuous camera operation. When electricity falters, your entire surveillance network can collapse. This guide provides clear diagnostic steps to restore stable current flow.
Begin with systematic checks of basic components. Logical progression from simple to complex solutions saves time. Most electrical faults have identifiable symptoms and straightforward fixes.
Identifying Symptoms of Power Problems
Recognizing early warning signs prevents complete system failure. Intermittent operation often signals an unstable power source. Cameras may reboot randomly or display rolling lines on video feeds.
Complete failure to start points to a broken circuit. Listen for buzzing or humming from adapters. These sounds indicate transformer issues or voltage mismatches.
Distinguish between main supply faults and individual unit problems. Test other devices on the same circuit. If they work, focus on the camera’s dedicated power supply chain.
Overheating power bricks feel unusually hot to touch. This thermal damage can permanently affect performance. Address it immediately to avoid fire risks.
Step-by-Step Guide to Checking Power Cords and Connections
Follow this methodical approach for reliable results. First, visually inspect all cables for fraying or cuts. Singapore’s humid climate accelerates wire corrosion.
Test the wall outlet with a lamp or phone charger. Ensure the socket delivers consistent current. Loose connections inside outlets cause intermittent faults.
Verify adapter output using a multimeter. Match readings to your camera’s voltage requirements. Even small mismatches can prevent proper startup.
Make sure all plugs fit snugly into their ports. Wiggling a connector shouldn’t interrupt the feed. Secure weatherproof covers on outdoor connections.
Consider installing surge protectors for critical devices. They guard against Singapore’s occasional voltage spikes. An uninterruptible power supply maintains operation during brief outages.
Solving Power Over Ethernet (PoE) Failures
PoE systems combine data and electricity in one cable. This integration creates unique failure points. Start by checking the switch or injector’s status lights.
Insufficient power budgets cause random shutdowns. Calculate total wattage for all connected cameras. Avoid exceeding 70% of your switch’s rated capacity.
Use a PoE tester to verify voltage at the camera end. Readings below required levels indicate supply issues. Long cable runs over 100 meters often cause voltage drop.
Swap ports and cables to isolate the fault. A different port working suggests a bad switch channel. Monitor device temperatures during operation.
Reboot the entire system to clear temporary glitches. Update switch firmware if available. These steps resolve most PoE instability problems.
For persistent electrical faults, professional assessment may be necessary. Simple fixes address loose plugs or dirty contacts. Complex issues require replacement of damaged components.
Fixing Network Connectivity and IP Conflicts
Network stability forms the critical link between your security cameras and remote monitoring access. When this connection falters, live video feeds disappear or become unusable. Restoring reliable data transmission requires a methodical approach to common network issues.
Two primary culprits disrupt surveillance feeds: general connection loss and IP address conflicts. Each has distinct symptoms but shares similar root causes in your network configuration. Understanding both empowers you to quickly diagnose and fix streaming problems.
Using Ping to Diagnose Connection Loss
The ping command provides a simple way to test communication with your camera. Open Command Prompt on Windows or Terminal on Mac. Type “ping” followed by your camera’s IP address and press Enter.
Successful responses show reply times in milliseconds. High latency or “request timed out” messages indicate network problems. These delays often correlate with choppy video or complete disconnections.
Consistent timeouts mean the camera is offline or unreachable. Intermittent failures suggest an unstable connection. Use this tool before adjusting complex settings to verify basic connectivity.
Resolving IP Address Conflicts in Your System
IP conflicts occur when two devices share the same network address. This confusion prevents proper communication. Your router’s DHCP server usually manages these assignments automatically.
Manual IP assignment errors or a faulty DHCP server cause most conflicts. Signs include devices randomly losing connection. You might be unable to access the camera’s video feed despite it having power.
Log into your router’s admin panel to view connected devices. Look for duplicate IP addresses in the network settings. Change any conflicting static IPs to unique values within your network range.
For permanent cameras, use DHCP reservation instead of manual assignment. This ensures they always receive the same address from the router. Restart both the camera and router after making changes to clear any cached data.
Securing Your Wi-Fi for Stable Camera Feeds
Wireless performance depends heavily on placement and interference reduction. Position cameras within reasonable range of your router. Thick walls and large metal objects can significantly weaken the signal.
Reduce competition from other electronics like microwaves and cordless phones. These devices operate on similar frequencies and disrupt Wi-Fi connectivity. Consider upgrading to a mesh network for large properties with multiple cameras.
Create a separate Wi-Fi SSID exclusively for security devices. This simple strategy minimizes bandwidth competition from phones and laptops. Your camera feeds gain priority on their dedicated network channel.
Always use strong encryption like WPA2 or WPA3 on your wireless network. This prevents unauthorized access that could disrupt or hijack surveillance streams. A secure connection is a stable connection for continuous monitoring.
Many perceived camera malfunctions actually stem from network infrastructure issues. Optimizing your home or business network creates a reliable foundation. Stable connectivity ensures your security system performs as intended around the clock.
Solving Common CCTV Image Quality Problems
The true test of any monitoring setup lies in the clarity and accuracy of its recorded images. When video becomes blurry, too dark, or shows distorted colors, identification becomes impossible. These visual issues represent some of the most frustrating cctv problems for users in Singapore.
Thankfully, most image quality degradation has identifiable causes. Simple maintenance and proper settings adjustments restore visual fidelity. This section provides targeted solution approaches for three specific visual failures.
Fixing Blurry or Grainy Night Vision Footage
Infrared illumination often fails to deliver clear night vision. Blurry or grainy footage during darkness undermines 24/7 security. Several technical factors contribute to this poor performance.
Weak or dirty IR LEDs cannot illuminate scenes properly. Sensors designed for daylight struggle in low light conditions. Lenses set for daytime focus create blurry night images.
Infrared light bouncing off nearby walls creates washed-out video. Dust and spider webs on the protective dome scatter illumination. These issues combine to produce unusable nighttime recordings.
Practical solutions restore clear night vision:
- Clean the camera lens and IR window monthly with a soft cloth
- Reposition units to avoid IR bounce-back from reflective surfaces
- Add external IR illuminators for larger or chronically dark areas
- Upgrade to cameras with superior low-light “starlight” sensors
- Reduce video compression settings that degrade image detail
Regular maintenance prevents most night vision failures. A clear lens ensures maximum light reaches the sensor. Proper positioning optimizes infrared illumination efficiency.
Correcting Overexposed or Dark Video Feeds
Challenging lighting conditions create extreme contrast in surveillance footage. A camera facing a sunrise window may show only white glare. Another monitoring a dark alley next to a bright streetlight captures pure shadows.
These overexposed or dark videos result from unbalanced lighting. Incorrect exposure settings cannot handle high dynamic range. Degraded sensors lose sensitivity to subtle light variations.
The solution involves both physical adjustment and software configuration. First, check the camera’s exposure settings in its web interface. Many units default to automatic modes that fail in mixed lighting.
Enable Wide Dynamic Range (WDR) if your camera supports this feature. WDR balances bright and dark areas within the same image. It preserves detail in both shadowed and highlighted regions.
Physically reposition cameras to avoid direct glare from lights or windows. Sometimes a slight angle change eliminates overexposure completely. Clean the lens regularly since dirt causes light scattering and reduced contrast.
For persistent issues, consider cameras with superior dynamic range capabilities. Modern sensors handle Singapore’s varied lighting better than older models. Proper configuration transforms unusable video into clear evidence.
Adjusting White Balance for True-to-Life Colors
Incorrect white balance distorts all colors in surveillance footage. Whites may appear blueish or yellowish under artificial lighting. This color shift reduces accuracy for identification purposes.
Auto white balance modes (ATW/AWB) often struggle with consistent results. They continuously adjust based on the dominant light source. This creates flickering color changes in the recorded image.
For outdoor installations, angle cameras away from the sky. The large blue expanse tricks auto-white balance systems. Pointing slightly downward improves color consistency throughout the day.
Access your camera’s settings through its web interface or mobile app. Locate the white balance controls in the image quality section. Disable automatic modes for stable, consistent lighting environments.
Manually set the white balance to match your primary light source. Use presets for daylight, fluorescent, or incandescent lighting. Fine-tune with custom Kelvin temperature settings for perfect color reproduction.
Accurate color representation matters for identifying clothing, vehicles, and other evidentiary details. Don’t settle for distorted hues that compromise your surveillance effectiveness.
Adjust hue or gamma settings if colors still appear unnatural. These secondary controls fine-tune the color palette. Test changes during different times to ensure consistent performance.
Remember that image quality settings require periodic review. Seasonal changes in daylight hours affect lighting conditions. Revisit white balance adjustments every few months for optimal results.
Clear, color-accurate video provides the evidence needed for security investigations. These adjustments transform mediocre footage into reliable visual documentation. Your surveillance system finally delivers on its promised protection.
Addressing Physical Installation and Hardware Faults
The physical integrity of your surveillance equipment is just as critical as its digital settings. Poor mounting or weathered components cause many avoidable malfunctions.
These hardware issues often manifest as intermittent failures that confuse users. A systematic inspection of the physical setup reveals straightforward solutions.
Inspecting and Securing Damaged Cables
Think of cables as the nervous system of your entire surveillance network. They are highly vulnerable to weather, pests, and accidental damage.
Loose or frayed wires directly cause signal loss and power interruptions. Regular visual checks prevent most connection failures before they happen.
Follow this simple inspection checklist each season:
- Look for chew marks from rodents along the cable run.
- Check for cracks in insulation from Singapore’s strong UV exposure.
- Inspect for green corrosion at connection points, especially near the sea.
- Ensure no strain exists on connectors where cables enter housings.
For reliable performance, use weatherproof conduits for all outdoor installations. Armored or UV-protected cables withstand local conditions much better.
Secure all connections with cable clips or ties. This prevents wind or vibration from loosening them over time. A small investment in proper materials prevents major problems later.
Cleaning Lenses and Housings for Clear Views
A dirty lens is a primary reason for poor video quality. Dust, sap, and salt buildup scatter light and blur images.
Cleaning must be done safely to avoid scratches or seal damage. Use a soft microfiber cloth and approved lens cleaner for the glass.
Compressed air removes debris from vents and crevices first. Gently wipe the outer housing to maintain proper heat dissipation.
Make sure the camera is powered down during cleaning if possible. This prevents accidental movement or electrical short. Never use abrasive materials or harsh chemicals.
A clean housing prevents overheating and moisture ingress. Both conditions can destroy internal electronics. This simple task is a critical part of routine maintenance.
Dealing with Camera Freezing and Hardware Crashes
When a unit freezes or reboots randomly, diagnose whether it’s software or hardware. Software glitches often resolve with a simple reboot.
Hardware failures require more investigation. Start by checking for overheating. Feel the camera housing; it should be warm, not hot.
Ensure adequate ventilation around the device. Trim vegetation or remove obstructions blocking airflow. Overheating stresses components and causes premature failure.
Verify the power supply provides stable, sufficient current. An underpowered adapter forces cameras to work harder, leading to crashes.
Internal component failure is another possibility. A dying SD card in standalone units causes recording errors. Failing capacitors often lead to random reboots.
Persistent freezing after basic troubleshooting usually signals a deeper hardware issue. Continuing to use a failing device risks complete breakdown at a critical moment.
If a reset to factory defaults doesn’t stop the crashes, professional assessment is needed. Some physical fixes, like securing a cable, are DIY-friendly.
Internal repairs typically require technical support with proper tools and parts. Knowing this distinction saves both time and frustration.
Managing Software, Firmware, and Settings
The digital intelligence behind your surveillance network resides in its software and configuration settings. While cameras and cables provide the physical framework, the code governing them determines actual performance.
Proper management of this digital layer prevents numerous failures. It transforms separate components into a cohesive security system.
Neglecting software upkeep leads to gradual degradation. Bugs accumulate and security vulnerabilities emerge over time. A structured approach to updates and configuration maintains peak operation.
The Critical Importance of Regular Firmware Updates
Firmware acts as the permanent software programmed into your surveillance hardware. Manufacturers release updates to fix bugs, patch security holes, and add features.
Ignoring these updates poses significant risks. Outdated firmware is a prime target for hackers seeking access to your video feeds. It also causes compatibility issues with newer devices on your network.
Data shows proactive updates can prevent 80% of common faults. They also reduce potential security breaches by up to 50%. This makes firmware management a non-negotiable maintenance task.
Check for updates through your camera’s web interface or the manufacturer’s mobile app. Make sure you download only official files from the brand’s website. Unofficial firmware can brick your equipment permanently.
The update process usually involves uploading a file and waiting for a reboot. Never power off the device during this critical operation. A failed update often requires a factory reset to recover.
Resetting Your Camera to Factory Defaults
This nuclear troubleshooting solution clears all custom configurations. It returns the device to its original out-of-box state.
A factory reset fixes persistent glitches that reboots cannot solve. Use it after a botched firmware update or when login credentials are lost. It also removes potential malware infections from the unit.
Remember that this action erases every personalized setting. Your recording schedules, motion zones, and network settings will be wiped clean.
Follow these steps for a safe reset:
- Locate the small reset button on the camera housing.
- Use a paperclip to press and hold it for 10-15 seconds.
- Wait for the unit to reboot completely, indicated by status lights.
- Access the camera using its default IP address and admin password.
- Reconfigure all essential settings from scratch.
Document your configuration before performing any reset. This saves hours of reconstruction work afterward.
Configuring DVR/NVR Settings for Reliable Recording
Your digital video recorder or network video recorder is the brain of the entire setup. Its settings dictate what footage gets saved and how it’s stored.
Common misconfigurations create frustrating recording gaps. A full hard drive with no overwrite policy stops all new footage. Incorrect motion zones cause missed events while filling storage with useless clips.
Start by setting a clear recording schedule. Choose between continuous capture or motion-activated modes. Continuous ensures no moment is missed but consumes more storage space.
Match resolution and frame rate to your security needs. Higher quality provides clearer evidence but fills drives faster. Find a balance that preserves detail without causing premature storage overflow.
Configure automatic overwrite policies for your DVR. This ensures old footage is deleted when space runs low. Without this, recording simply stops when the drive is full.
Allocate storage wisely across multiple cameras. Critical views might warrant higher quality settings than auxiliary angles. Regular checks verify your configuration works as intended.
Integrate software management into a holistic maintenance routine. Weekly checks should verify correct date stamps and review event logs. Monthly tasks include updating software and checking storage health.
Schedule quarterly full system audits and annual professional inspections. This layered approach catches issues before they cause failure.
Optimal software configuration is what transforms a collection of cameras and wires into a coherent, reliable security surveillance system.
Your vigilance with digital management ensures physical security remains uncompromised. The right settings keep your surveillance intelligent and responsive day after day.
When Your CCTV Camera Shows a Black Screen
Few things are more alarming than checking your surveillance feed only to find a completely black screen. This immediate video loss represents a critical failure in your security monitoring. Your property becomes vulnerable until the feed is restored.

A black display means no video signal reaches your monitor or app. The issue typically stems from two root causes. Either the camera lacks electrical power, or the signal path is broken.
Common culprits include faulty adapters, dead outlets, and malfunctioning PoE switches. Damaged or loose cables also disrupt transmission. Internal hardware failure is less frequent but possible.
Follow this logical diagnostic approach. Start with the simplest, most likely fixes. Progress to more complex solutions only if needed.
Systematic Black Screen Troubleshooting Steps
First, verify your monitor or NVR is powered on. Ensure it’s set to the correct input channel. This basic check eliminates simple oversight.
Look for the power indicator LED on the camera housing. A lit LED confirms electricity reaches the unit. No light suggests a power supply issue.
Test the electrical outlet with another device like a lamp. Verify the adapter is firmly plugged in at both ends. Try a known-working adapter if available.
Inspect all cables for visible damage. Look for cuts, fraying, or chew marks. Reseat every connection to ensure proper contact.
For IP cameras, check network connectivity. Verify the device appears in your router’s connected clients list. Confirm it has a valid IP address.
Methodical elimination of each component isolates the faulty part. Never assume the camera itself has failed until supporting infrastructure is verified.
Power Over Ethernet Specific Checks
PoE systems combine data and electricity in one cable. A faulty injector or switch can deliver power but no data. This creates a black screen despite the camera being powered.
Check status lights on your PoE switch or injector. Ensure the correct port is active for your camera. Try connecting the unit to a different PoE port.
Use a multimeter to test voltage at the camera end. Long cable runs over 100 meters often cause voltage drop. Readings below specification prevent proper operation.
Swap Ethernet cables with a known-good one. This test rules out hidden damage within the wiring. Many apparent hardware failures trace back to bad cables.
When the Camera Itself is the Problem
If infrastructure checks pass, the camera hardware may have failed. A damaged image sensor creates permanent black footage. Internal power regulation circuits can also fail.
Try the suspect camera on a different NVR/DVR port. Use an alternative power supply if possible. This isolation test confirms where the problem lies.
Units with infrared capabilities present unique failure modes. A black screen during daytime but working night vision points to a stuck IR-cut filter. This mechanical component switches between day and night modes.
Conversely, functional daytime video with black night footage suggests failed IR LEDs. The filter works but no infrared illumination reaches the scene.
Remember that most black screen issues have identifiable causes. They rarely remain mysteries with proper investigation. Systematic troubleshooting almost always reveals the broken component.
Essential Four-Point Checklist
When facing a black surveillance screen, work through this easy-to-remember checklist:
- Power: Verify electricity reaches the camera from source to unit.
- Cable: Inspect all wiring for physical damage and secure connections.
- Connection: Ensure proper links between camera, recorder, and monitor.
- Device: Test the camera in isolation if other checks pass.
This structured approach minimizes stress during a security emergency. You restore protection quickly by eliminating possibilities in order.
Most black screen problems resolve with basic fixes like reseating cables or replacing adapters. Complex hardware failures require professional assessment. Your methodical diagnosis saves time either way.
Dealing with Cameras that Randomly Reboot or Lose Settings
Random resets and configuration amnesia in surveillance devices are frustrating symptoms with specific, diagnosable causes. Your cameras might forget Wi-Fi passwords, recording schedules, or the correct date.
This erratic behavior creates unpredictable blind spots. A unit that reboots itself misses critical events during its downtime.
An unstable electrical current is the primary suspect for these problems. Voltage sags or micro-interruptions can force a device to reset as if it lost power completely.
Check if your surveillance system shares a circuit with high-draw appliances. Air conditioners or refrigerators cycling on can cause brief voltage drops.
These drops are often enough to crash sensitive electronics. Using a dedicated outlet or a UPS (Uninterruptible Power Supply) provides clean, stable energy.
Many cameras have a small internal backup battery. This coin cell preserves settings during a brief main power loss.
If this battery is dead, the unit cannot retain its configuration. It will default to factory settings every time the current flickers.
Consult your user manual to see if this battery is user-replaceable. A fresh battery can solve the amnesia problem immediately.
Firmware corruption is another potential software cause. Buggy code can cause the device to crash and reboot.
Performing a clean firmware re-flash often fixes this. Follow the manufacturer’s precise guidelines for this process.
Make sure you download the official firmware file from the brand’s website. An incorrect file can permanently damage your equipment.
For IP cameras, network issues can induce reboots. A persistent network storm or a denial-of-service attack from another infected device could crash the camera’s software.
This overwhelms the unit, forcing a restart. Isolating your surveillance system on a dedicated network switch or VLAN prevents this.
It shields your cameras from disruptive traffic elsewhere on your home or office network.
A Four-Step Diagnostic Sequence
Follow this logical sequence to identify and fix the root cause:
- Monitor the Power: Use a UPS or a simple voltage logger to check for fluctuations. Stable, clean power supply is the foundation.
- Check the Backup Battery: Replace the camera’s internal backup battery if it is accessible and suspected to be dead.
- Update or Reinstall Firmware: Perform a clean firmware update following the manufacturer’s instructions to rule out software bugs.
- Isolate the Network: Place the affected camera on a dedicated network segment to eliminate network-induced crashes.
Ignoring a camera that reboots randomly is a security risk. Its unreliability means you cannot trust it to be recording when you need it most.
If these problems persist after addressing power and firmware, the issue is likely internal. A failing memory chip or other hardware fault may require professional attention.
Persistent failure points to a component that needs repair or replacement. Continuing to use a faulty unit risks a complete breakdown at a critical moment.
Stable, clean electricity is crucial for more than just operation. It ensures consistent performance and reliable memory retention for your surveillance electronics.
Addressing this foundation prevents the frustration of random reboots and lost settings. Your security monitoring remains dependable over time.
The Essential Role of Regular Reboots and Maintenance
Electronic devices benefit from periodic restarts, just like any complex system requiring optimal operation. This simple habit serves as preventative medicine for your entire surveillance setup.
A scheduled reboot clears temporary files and resets software connections. It addresses minor glitches before they escalate into major failures.
Continuous operation creates memory leaks in digital recorders and cameras. These leaks gradually consume resources, slowing down playback and response times.
In Singapore, research indicates approximately 30% of surveillance issues stem from software or transient hardware states. Regular maintenance directly targets this significant percentage.
Think of reboots as routine check-ups for your security electronics. They restore performance without invasive procedures or costly service calls.
Reboot Versus Factory Reset: Knowing the Difference
A standard reboot temporarily powers down your equipment. It clears the active memory while preserving all your custom settings and configurations.
This maintenance action is safe and reversible. Your recording schedules, network settings, and motion zones remain intact after restart.
A factory reset represents a more drastic troubleshooting solution. It wipes all personalized data, returning devices to their original factory state.
Make sure you understand this critical distinction. Use reboots for routine care and factory resets only for severe, unresolved malfunctions.
Tangible Benefits of Scheduled System Restarts
Regular reboots deliver multiple performance improvements for surveillance networks. These benefits compound over time, enhancing overall reliability.
First, they resolve intermittent connectivity between cameras and recorders. A fresh start re-establishes stable communication pathways.
Frozen video feeds often unfreeze after a proper power cycle. This simple fix restores live monitoring without technical expertise.
Corrupted temporary files that slow down playback get cleared automatically. Your system regains its original speed and responsiveness.
Network IP conflicts sometimes resolve themselves during reboot sequences. Devices obtain fresh addresses from your router’s DHCP server.
Preventative maintenance through regular reboots can avoid nearly one-third of common technical issues. This represents significant protection for your property security.
Implementing a Safe Reboot Procedure
Follow these steps to restart your surveillance system without risking data loss:
- Save any ongoing manual recordings before beginning the process.
- Use the software shutdown command in your NVR/DVR interface if available.
- Power down individual cameras first, starting with those farthest from the recorder.
- Shut down the network video recorder or digital video recorder properly.
- Turn off network switches and routers serving your surveillance devices.
- Wait 60 seconds to ensure all components fully discharge.
- Restart equipment in reverse order: network, recorder, then cameras.
This sequence prevents power surges and connection errors. It ensures a clean startup for every component in your security ecosystem.
Scheduling Maintenance Without Missing Critical Events
The concern about missing recordings during reboots is valid but manageable. Schedule maintenance during known low-activity periods for your property.
Early Sunday mornings often work well for residential installations. Business systems might use late Friday nights after operations conclude.
Verify your system automatically resumes recording upon restart. Most modern surveillance equipment includes this essential feature.
Keep maintenance sessions brief—typically under five minutes total downtime. This minimizes any potential coverage gap during the process.
Integrating Reboots Into Broader System Care
Regular restarts form one component of comprehensive surveillance maintenance. Combine them with monthly lens cleaning and quarterly cable inspections.
This holistic approach extends hardware lifespan significantly. Well-maintained devices operate reliably for years beyond their expected service life.
Consistent performance ensures more reliable evidence collection when needed. Clear, uninterrupted footage holds greater value for security investigations.
Peace of mind grows from knowing your surveillance network operates at peak efficiency. You avoid the stress of unexpected failures during critical moments.
Adopting this simple habit represents the most cost-effective DIY action available. It requires no special tools or technical training, just consistent attention.
Your proactive approach transforms reactive troubleshooting into structured prevention. This shift saves time, money, and potential security vulnerabilities over the long term.
Simple DIY Fixes for Immediate CCTV Problems
Many sudden camera malfunctions have straightforward fixes that anyone can perform in minutes. This quick-reference guide matches common symptoms with their most likely causes.
You can restore your surveillance feed without waiting for professional help. These emergency solutions address the majority of frequent problems.
Always start with the simplest possible steps. Check physical connections and verify basic power status first. This approach resolves over half of all reported issues.
Quick-Fix Reference Table
Use this table to diagnose and fix your surveillance system immediately:
| Symptom | Likely Cause | Immediate Action |
|---|---|---|
| No video signal | Loose power cable or dead outlet | Check and reseat the power connection at both ends |
| Black screen | Broken video transmission | Verify all cable connections between camera and recorder |
| Flickering video | Inconsistent lighting or sensitivity | Adjust light sensitivity settings in camera menu |
| Noisy or grainy footage | Poor lighting or high compression | Check recording quality settings and improve ambient light |
| Incorrect colors | Wrong white balance setting | Access camera web interface to adjust white balance |
| Failed night vision | Obstructed infrared LEDs | Clean lens and ensure no objects block IR illumination |
| Can’t connect remotely | App or network configuration error | Force-close and reopen mobile app, check router status |
| DVR not recording | Full hard drive or settings error | Inspect available storage space and recording schedule |
| Choppy video playback | Insufficient network bandwidth | Reduce other network traffic or upgrade internet speed |
| Black and white images | Low ambient light triggering IR mode | Add supplementary lighting or adjust day/night settings |
The Essential Three-Step First Response
Before investigating specific symptoms, perform these universal checks. They solve countless surveillance failures instantly.
1. Power Cycle Everything
Unplug your camera from its power source for 30 seconds. Also restart your recorder and network router. This clears temporary software glitches.
2. Inspect All Physical Connections
Tighten every cable connector at both the camera and recorder ends. Look for visible damage to wires. Loose plugs cause most “mysterious” failures.
3. Verify Basic Status Indicators
Check for glowing LED lights on cameras and network equipment. No lights usually means no power. Solid lights indicate proper operation.
Specific Quality Issue Solutions
Some visual problems require targeted adjustments beyond basic troubleshooting.
Make sure your camera isn’t pointing directly at bright light sources. This causes overexposure and washed-out video. Reposition the unit slightly to avoid glare.
Clean the lens gently with a microfiber cloth. Dust and fingerprints dramatically reduce image clarity. Regular cleaning maintains optimal video quality.
Log into your camera’s web interface using its IP address. From here, you can restart the device remotely. This often fixes software freezes.
Mobile App and Software Troubleshooting
When you cannot view feeds on your phone, try these steps:
- Force-close the viewing application completely, then reopen it
- Uninstall and reinstall the latest version of the app
- Restart your home or office router to refresh network connections
- Verify your internet connection is active and stable
- Check that port forwarding is correctly configured if accessing remotely
For DVR recording problems, inspect the hard drive’s health. Most systems show storage capacity in their menus. Format the drive if errors appear.
Safety First: Important Precautions
Always prioritize personal safety when performing DIY fixes. Never work with electrical components while standing on wet surfaces.
Avoid opening camera housings unless absolutely necessary. This often voids warranties and exposes sensitive electronics to damage.
Use proper tools like insulated screwdrivers. If you feel unsure about any electrical work, stop immediately. Professional assistance ensures safe resolution.
Empowering Results Through Simple Actions
With this checklist, you can confidently address most surveillance malfunctions. Issues like choppy video often stem from network bandwidth.
Incorrect colors usually mean white balance needs adjustment. Failed motion detection requires sensitivity setting changes.
These solutions save significant time and money. You avoid unnecessary service calls for basic problems. Your security system returns to full operation quickly.
Make sure you document which fix worked for future reference. This creates your personal troubleshooting guide for next time.
Many surveillance failures have simple roots. Equally simple actions restore protection and peace of mind. Your DIY efforts keep your property secure without delay.
Seeking Professional CCTV Support in Singapore
When do-it-yourself solutions fall short, professional expertise becomes essential for maintaining reliable surveillance. This investment in your property’s security ensures complex issues get resolved correctly.
Persistent cctv problems after basic troubleshooting often signal deeper issues. Physical damage to cctv camera housings or internal hardware typically requires specialist attention.
Certified technicians bring proper diagnostic tools for tricky network or installation challenges. They configure advanced devices and modern cctv cameras for optimal performance.
For reliable assessment and repair of common cctv systems, contact CCTV Maintenance at +65 60135960. Their team addresses everything from single cctv camera faults to complete system upgrades.
Professional support represents a strategic solution for continuous protection of your assets. A functional security system provides invaluable peace of mind.
FAQ
What usually causes a CCTV camera to have no power?
The most frequent reason for a camera losing power is a faulty power supply unit or a loose connection. Check the power adapter, the outlet, and all cables. For PoE systems, ensure your network switch provides adequate power and that the Ethernet cable is securely connected at both ends.
Why is my security camera feed blurry or grainy at night?
Poor night vision often stems from dirty lenses, insufficient ambient light, or incorrect IR settings. Clean the camera’s lens and housing. Ensure no bright light sources are facing the camera, and adjust the IR cut filter settings in the device’s menu for better low-light image quality.
How can I fix a CCTV camera that keeps disconnecting from the network?
Start by rebooting the camera and your router. Use a ping command to test for packet loss. IP address conflicts are a common cause; assign a static IP to each device in your system. For Wi-Fi models, improve connectivity by moving the router closer or reducing signal interference.
What should I do if my DVR is not recording footage properly?
First, verify the hardware has sufficient storage space and isn’t full. Check the recording schedule and motion detection settings in the DVR menu. Ensure the power supply to the DVR is stable and that all video cables from the cameras are firmly connected to the correct channels.
When is it time to call a professional for CCTV repair in Singapore?
Contact a local security expert like Cisco or Panasonic for complex hardware failures, major network reconfiguration, or if solutions like rebooting and checking connections don’t resolve the problem. Professional installation and support prevent recurring issues and ensure your surveillance system meets local standards.


