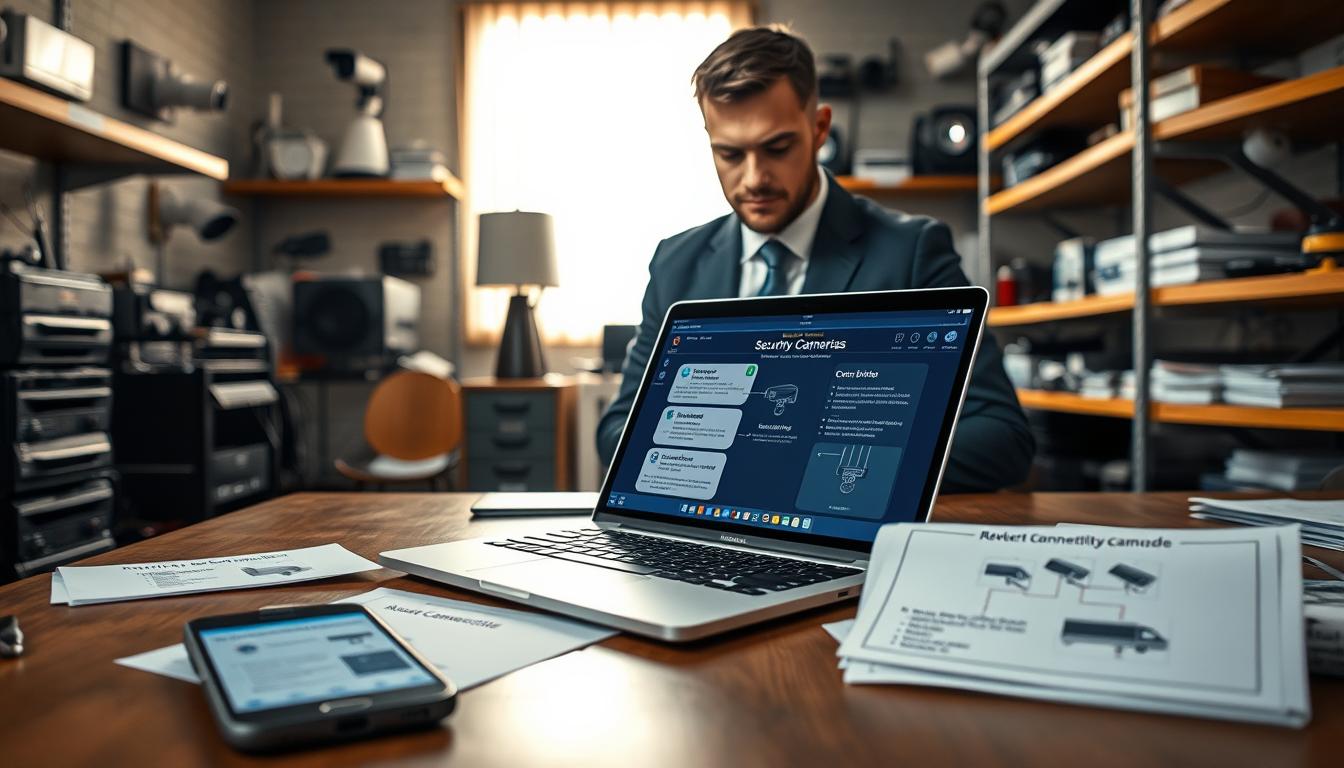
Troubleshooting: Why can’t I see my security cameras on my phone?
Remote access to your surveillance system is a cornerstone of modern property protection. It offers peace of mind from anywhere. But when the live feed disappears from your mobile device, that confidence can vanish.
This interruption in monitoring is a common headache for homeowners and businesses. The root causes are often simple to diagnose and fix. Problems can range from a glitchy application to unstable internet connectivity.
Our guide provides a clear, step-by-step path to restore your view. We focus on practical solutions you can implement yourself. This saves time and avoids unnecessary service calls.
The instructions are tailored for users in Singapore and similar environments. We account for local network setups and common device configurations. Regaining control of your security system is the ultimate goal.
Key Takeaways
- A failed mobile connection to your security camera is usually a solvable network or app issue.
- Systematic troubleshooting starts with checking basic device power and connection status.
- Your home Wi-Fi strength is critical for stable remote monitoring.
- Regular updates for your camera’s app and firmware prevent many common problems.
- Rebooting your camera, router, and phone can resolve temporary glitches.
- Incorrect login credentials or camera settings are frequent culprits for access issues.
- This guide offers actionable steps to diagnose and fix the problem without professional help.
Understanding Security Camera Connectivity to Your Phone
Contemporary property protection relies on a digital bridge connecting physical cameras to your smartphone. This link allows for real-time monitoring from any location. Grasping how this connection works is the first step toward fixing it when it fails.
How Remote Viewing is Supposed to Work
Modern security cameras, especially IP models, are designed to pair with a dedicated app. You download this software from your phone’s official store. Brands like Google Nest, Ring, and Reolink provide their own applications.
The correct workflow is straightforward. First, install the manufacturer’s app and create a secure account. Use a strong, unique password for this account. Next, add your camera to the app, usually by scanning a QR code.
Once set up, the camera captures footage and encodes it into a digital stream. This data travels over your home network to the internet. You can then access the live feed through the app on your mobile device.
A critical point is initial setup. Your phone and the camera must be on the same local Wi-Fi during this phase. This ensures they can communicate properly and establish a secure connection.
The Role of Your Wi-Fi Network and Router
Your local Wi-Fi is the backbone of the entire system. A weak or unstable signal at the camera’s location is a primary point of failure. Walls, distance, and interference can break the connection.
The router acts as the traffic controller for your security data. It manages the stream between the camera, the internet, and your phone. Its configuration and health are paramount for reliable monitoring.
Most systems use a cloud service. The camera uploads its stream to a remote server. Your phone then pulls the video from this cloud. Your home internet upload speed directly impacts the quality and reliability of this feed.
Using the official manufacturer app is non-negotiable. Third-party applications can lead to compatibility issues and security vulnerabilities. The official software is built for your specific camera model.
Understanding this flow helps pinpoint connection issues. Is the problem with the camera, the app, the local network, or the internet? This foundational knowledge makes troubleshooting much more effective.
Common Reasons for Camera Access Issues on Mobile
Multiple technical factors can interrupt the vital link between your property’s eyes and your pocket device. When the live feed disappears, it’s rarely a single catastrophic failure. Instead, a series of common, fixable problems are usually at play.
Statistics show most remote viewing failures connect to Wi-Fi. Weak signals, network congestion, and household interference cause over 70% of these connection issues. Understanding these frequent culprits creates an effective diagnostic checklist.
This knowledge helps eliminate obvious causes quickly. You can then focus on more specific troubleshooting steps. Let’s explore the primary technical hurdles.
Network Configuration Errors and IP Conflicts
Your security camera must communicate perfectly with your home network. Even a small configuration error breaks this communication. An incorrect Wi-Fi password entered during setup is a classic example.
The security protocol must also match. Using WPA2 when your router requires WPA3 creates instant failure. Similarly, if you change your Wi-Fi password later, the camera cannot reconnect without updated credentials.
Internet Protocol (IP) conflicts present another hurdle. Most home networks use dynamic IP addresses. Sometimes, two devices receive the same address. This confuses your router and can knock your camera offline.
Environmental factors worsen network problems. Thick concrete walls, common in Singaporean homes, block Wi-Fi signals. Metal structures and large appliances cause similar obstruction.
Radio frequency interference is another concern. Many household devices use the 2.4GHz band. Microwaves, cordless phones, and baby monitors can disrupt your camera’s signal. This leads to choppy footage or complete disconnection.
Network congestion chokes bandwidth. Modern homes have many connected devices. Smartphones, laptops, and streaming TVs all compete for data. Your security camera feed may stall when the network is overloaded.
Insufficient Power Supply to the Camera
A camera without stable electricity cannot function. This obvious point is often overlooked during troubleshooting. The device might appear dead or stuck in a boot loop.
Check the power adapter first. Ensure it’s firmly plugged into both the wall and the camera. Loose connections are a frequent culprit. The adapter itself could be faulty or incompatible.
Inspect the power cable for damage. Frayed wires or bent connectors interrupt the flow. Also verify the wall outlet is working. Try plugging in a different device to test it.
Power strips and extension cords can cause issues. They may not provide consistent voltage. For critical security cameras, use a dedicated wall outlet whenever possible.
Software-related reasons also cause access failures. Outdated camera firmware may contain bugs. These bugs can crash the stream or prevent connection. Your mobile app needs regular updates too.
Incorrect app permissions on your phone block access. The software might lack permission for your location or network. Always check these settings after an operating system update.
By methodically checking these common areas, you solve most access problems. Start with power and network basics before exploring complex solutions. This systematic approach saves time and frustration.
Why Can’t I See My Security Cameras on My Phone? The Core Question
Isolating the cause of a failed mobile connection starts with inspecting the most fundamental components. Many apparent connection issues have surprisingly simple solutions. A methodical approach quickly identifies the problem area.
This proactive troubleshooting method solves a large percentage of common problems. You can often restore access within minutes. Complex technical knowledge is not required for these initial steps.
Quick Checklist: The First Steps to Diagnose
Follow this logical sequence of checks. It is designed to catch the most frequent culprits first. Begin with physical verification before moving to software or network settings.
- Confirm Physical Power to the Camera
Look for status LED lights on the device. A dark camera usually indicates a power problem. Check that the adapter is plugged in firmly at both ends and the outlet is functional. - Verify Your Phone’s Internet Connection
Ensure your mobile device is connected to Wi-Fi, not cellular data. Both your phone and the security camera must operate on the same local network for initial setup and often for reliable access. - Check the Camera’s Status in the App
Open the manufacturer’s dedicated application. Look for your camera in the device list. Its status should be “Online” or “Connected,” not “Offline.” This gives a quick system health report. - Reboot the Entire Chain
Power cycling clears temporary glitches. Turn off the camera, your router, and your modem. Wait 30 seconds, then power them on in reverse order: modem, router, then camera. This refreshes all connections. - Validate Your App Login Credentials
An expired session or incorrect password can mimic a connectivity failure. Log out of the app completely and log back in using your confirmed credentials. Ensure the software itself is updated to the latest version.
Completing this checklist resolves many basic issues. If the monitoring feed is still unavailable, the problem may lie in more specific settings or signal strength. The next sections will guide you through those advanced troubleshooting tips.
Step-by-Step Mobile App Setup and Verification
Establishing a reliable mobile connection to your surveillance system begins with proper software configuration. Many access failures stem from incorrect initial setup rather than complex hardware faults. This section provides a meticulous walkthrough for establishing that vital software link.
Following these verified steps ensures your foundation is solid. You can then troubleshoot other potential issues with confidence. Proper setup prevents countless future headaches.
Downloading the Correct Manufacturer App
Always obtain the official application from your camera’s maker. Search for brands like “Google Home” for Nest devices or “Ring” for Ring cameras. Download exclusively from the Apple App Store or Google Play Store.
Third-party applications lack essential security updates and key features. They often suffer from compatibility problems with newer firmware. Official software is engineered specifically for your camera model.
Generic apps may not support critical functions like motion alerts or two-way audio. They can also pose significant security risks to your entire network. Stick with the manufacturer’s recommended solution.
Creating and Securing Your Account
Create a dedicated account within the official application. Avoid using Facebook or Google login shortcuts for this purpose. A separate account provides better isolation and control.
Use a strong, unique password combining letters, numbers, and symbols. Never reuse passwords from other online services. This practice protects your surveillance feed from unauthorized access.
“Your security system is only as strong as its weakest authentication point. A dedicated, password-protected account is non-negotiable for modern digital safety.”
Enable two-factor authentication if the app supports this feature. This adds an extra verification layer beyond your password. Regular password updates further enhance your system’s defense.
Properly Adding and Pairing Your Camera
Initiate the process by selecting “Add Device” within your application. Follow the on-screen instructions precisely. Have your Wi-Fi network name and password ready.
Most modern cameras use QR code scanning for pairing. Locate this code on the camera body or its packaging. Hold your phone steadily about 6-8 inches from the code for accurate scanning.
Ensure your mobile device connects to the correct Wi-Fi band during setup. Many cameras only support 2.4GHz networks, not 5GHz. Check your camera’s specifications to avoid this common pitfall.
Enter your Wi-Fi credentials carefully. A single typo in the password will prevent connection. The camera should indicate successful pairing with a light signal or audio cue.
For existing cameras that have stopped working, consider re-adding the device. This process often resolves persistent software glitches. It essentially performs a soft reset of the communication link.
Complete the setup by naming your camera logically, like “Front Door” or “Backyard.” This organization helps when managing multiple devices. Test the live feed immediately to confirm successful pairing.
Fixing Mobile App Connection and Glitches
Glitches within the camera app itself are a frequent source of failed remote monitoring. The software on your phone is the vital interface for your entire security system. When it malfunctions, your view disappears regardless of your network health.
This section provides targeted solutions for problems originating on your mobile device. We focus on app health, settings, and compatibility. Restoring a stable connection often requires adjusting these elements.
Checking for App Updates and Compatibility
An outdated application is a leading cause of connection issues. Developers release updates to fix bugs and ensure compatibility with new phone operating systems. Running old software can break critical features.
Manually check your device’s app store weekly. Search for your camera brand’s official app. If an update is available, install it immediately.
For long-term stability, enable automatic updates in your store’s settings. This ensures your security app always has the latest patches. It prevents future compatibility problems with your phone.
Resolving Memory Conflicts and Reinstalling the App
If the app crashes or freezes, corrupted temporary files may be the culprit. Clearing the app’s cache often resolves this. On Android devices, find this option in your phone’s settings under “Apps” or “Application Manager.”
For more persistent glitches, a fresh install is the most effective troubleshooting step. First, uninstall the camera application from your device. Then, restart your smartphone.
Finally, re-download the official app from the store and log back in. This process clears all corrupted data and resets the software. It provides a clean slate for the connection.
Verifying App Permissions and Background Data
Your phone’s operating system controls what an app can do. Incorrect permissions block essential functions. Navigate to your phone’s settings and find the camera app’s permission menu.
Ensure the app has access to your local network. This is critical for discovering cameras on your Wi-Fi. Also, grant permission for notifications to receive motion alerts.
Background data restrictions are another common hurdle. Your phone may limit the app’s activity to save battery. You must disable this restriction for your security camera app.
Find “Battery Optimization” or “Background Data” settings for the app. Ensure it is set to “Don’t Optimize” or “Allow background data usage.” This permits live streams and alerts to function at all time.
Proactive app maintenance is key for reliable monitoring. These steps ensure your mobile device remains a trustworthy window to your security system.
Solving Wi-Fi and Network Connection Problems
Wireless signal quality at your camera’s location makes or breaks remote viewing capability. Most access failures originate from inadequate network conditions rather than camera hardware faults. This section provides actionable methods to strengthen your wireless foundation.
We focus on three core areas: measuring signal strength, eliminating interference, and managing bandwidth. Each solution builds toward a more reliable surveillance connection. Implementing these strategies often resolves persistent streaming problems.
Checking Wi-Fi Signal Strength at the Camera
A weak wireless signal causes video dropouts and failed connections. Your security camera needs consistent communication with your router. Signal strength below 2-3 bars typically indicates trouble.
Test this using free Wi-Fi analyzer applications on your smartphone. Walk to the camera’s mounting point and check the signal reading. Many camera software settings menus also display connection quality.
For weak signals, consider repositioning the device closer to your router. Even a few feet can dramatically improve coverage. Thick concrete walls in Singaporean homes particularly challenge signal range.
When relocation isn’t possible, use Wi-Fi range extenders or mesh network systems. These devices amplify your wireless coverage throughout the property. Powerline Ethernet adapters offer another solution by creating wired backhaul through electrical outlets.
Reducing Interference from Other Household Devices
Many common appliances disrupt the 2.4GHz band used by most security cameras. Microwaves, baby monitors, and Bluetooth speakers create wireless interference. This competition degrades your surveillance footage quality.
Identify and relocate these interference sources away from your camera and router. Maintain at least 3-4 feet of separation from large metal objects and appliances. Cordless phones and wireless gaming controllers also contribute to signal problems.
Consider switching your camera to a less congested Wi-Fi channel. Most routers allow channel selection in their administration settings. Channels 1, 6, and 11 typically experience less overlap and interference.
If your equipment supports it, utilize the 5GHz band instead. This frequency offers faster speeds with significantly less household interference. However, 5GHz has shorter range through walls compared to 2.4GHz.
Strategies to Ease Network Congestion
Modern homes contain numerous connected devices competing for bandwidth. Streaming televisions, smartphones, and laptops can overwhelm your network. This congestion starves your security system of necessary data.
Schedule large downloads and updates for off-peak hours. Late-night or early-morning transfers reduce daytime network strain. This simple timing adjustment maintains monitoring consistency during active hours.
Configure Quality of Service (QoS) rules on your router if available. These settings prioritize traffic from your security cameras over other devices. Your surveillance feed receives bandwidth priority for smoother streaming.
Create a separate guest network specifically for Internet of Things devices. Isolate cameras, smart lights, and other appliances from your main devices. This segmentation prevents one problematic device from affecting your entire network.
For persistent congestion issues, consider upgrading your internet plan. Higher upload speeds particularly benefit cloud-based surveillance systems. Many connection issues disappear with adequate bandwidth provisioning.
Regular maintenance of your network infrastructure prevents future problems. For comprehensive guidance on maintaining reliable access, explore our detailed security camera troubleshooting resource.
Addressing Router Issues That Block Remote View
Network configuration at the router level frequently determines whether remote access succeeds or fails completely. This central networking device manages all data flow between your security cameras and the internet. When it malfunctions or has incorrect settings, your entire surveillance system becomes inaccessible from mobile devices.
Router-related problems often manifest as persistent “offline” statuses in your monitoring app. The device itself might be functioning perfectly. Yet the connection pathway through your home network remains broken.
Effective troubleshooting requires examining this critical component. We will explore firmware updates, configuration checks, and when external support becomes necessary. These steps restore the vital link to your property’s security.
Updating Your Router’s Firmware
Outdated router firmware creates compatibility and security issues. Manufacturers release periodic updates to fix bugs and patch vulnerabilities. An old version may not properly handle streaming data from modern cameras.
Access your router’s administration panel to check for updates. Open a web browser on a connected computer or phone. Type the default gateway address into the address bar.
Common addresses include 192.168.1.1 or 192.168.0.1. Consult your router’s manual for the exact address and login credentials. Once logged in, navigate to the administration or firmware section.
Look for a “Check for Updates” or similar button. The router will connect to the manufacturer’s servers. If an update is available, follow the prompts to install it.
Never interrupt power during a firmware update. This can permanently damage the device. The process typically takes a few minutes and requires a reboot. Updated software often resolves mysterious connectivity problems.
Checking Router Settings and Port Forwarding
Incorrect router settings can silently block your camera’s external connection. Overly restrictive firewalls might prevent necessary communication. Disabled features can also interrupt the data pathway.
Universal Plug and Play (UPnP) assists devices like security cameras. This feature automatically opens required ports in your firewall. Ensure UPnP is enabled in your router’s settings menu.
For advanced users with DVR or NVR cctv systems, port forwarding may be necessary. This manually directs external requests to your recording device. It requires knowing your camera system’s specific port numbers.
Configure port forwarding cautiously. Incorrect rules create security vulnerabilities in your home network. Consider this a last-resort solution after trying other fixes.
Always document any changes made to router configurations. This helps reverse modifications if they cause additional issues. Proper settings maintenance ensures consistent access to live footage.
When to Contact Your Internet Service Provider (ISP)
Some connection problems originate outside your control. Your Internet Service Provider manages the infrastructure beyond your router. Widespread service outages affect entire neighborhoods.
Contact your ISP if you’ve eliminated home network issues. Check their service status page or social media first. Many providers post real-time outage information publicly.
Carrier-Grade NAT (CG-NAT) complicates direct remote connections. Some ISPs use this technology to conserve IPv4 addresses. It can prevent standard port forwarding from working effectively.
Prepare specific information before calling technical support. Have your account number, modem model, and camera MAC address ready. Describe the troubleshooting steps you’ve already completed.
Ask about static IP address options if CG-NAT is causing issues. Some providers offer this for an additional fee. A static IP provides a consistent address for remote surveillance access.
ISP technicians can check for line signal degradation or account blocks. They may identify problems with your modem’s firmware or configuration. Professional support solves external connectivity hurdles.
What to Do When Your Camera Shows “Offline”
A camera that appears dead to your network requires targeted troubleshooting focused on both hardware and configuration. The “offline” status indicates a complete breakdown in communication between your device and the monitoring application. This section provides a precise action plan to restore functionality.
Follow these procedures in order when faced with persistent disconnection alerts. Each step addresses a different potential failure point in your security system. Methodical execution often resurrects cameras that seem completely unresponsive.
Rebooting Your Camera, Router, and Modem
A systematic power cycle clears temporary glitches in the communication chain. This process refreshes all connections between components. Execute the reboot sequence in this specific order for best results.
- Unplug both your modem and router from their power sources. Wait a full 60 seconds to ensure all residual power dissipates. This complete shutdown is crucial for clearing memory caches.
- Plug in the modem first and wait for all status lights to stabilize. Most modems display solid green lights for power, internet, and connectivity. This typically takes 1-2 minutes.
- Power on your router next and allow it to fully boot. Wait until the Wi-Fi indicator lights become steady. Your home network should now be active and ready.
- Finally, restart your security camera. Unplug its power adapter for 30 seconds, then reconnect it. Listen for startup sounds or watch for indicator lights.
This ordered approach ensures each device re-establishes proper communication with the next in line. Many persistent connection issues resolve after this complete reset.

Reconnecting the Camera to the Wi-Fi Network
If rebooting fails, the camera may have lost its stored Wi-Fi settings. Network password changes or corrupted memory can cause this. The re-pairing process forces the device to re-establish its wireless link.
Access your camera manufacturer’s mobile app to begin reconnection. Navigate to the device management or settings section. Look for an option labeled “Wi-Fi Setup” or “Reconnect to Network.”
Select the option to make your camera forget its current network. The device will enter pairing mode, usually indicated by a blinking light. Your phone will prompt you to select your home Wi-Fi network from a list.
Enter your Wi-Fi password carefully during this step. Double-check for typos or incorrect characters. The camera should confirm successful connection with a solid light or audible tone.
This fresh connection often solves authentication problems. It provides a clean slate for wireless communication within your security infrastructure.
Checking Physical Cables and Power Adapters
Physical hardware failures cause many offline situations. Cables and adapters degrade over time, especially in humid environments. A thorough inspection identifies these tangible problems.
Begin with the power adapter at the wall outlet. Ensure it’s firmly plugged in without looseness. Test the outlet with another device to verify electrical supply.
Inspect the entire length of the power cable. Look for fraying, cuts, or damage to the insulation. Check both ends for bent pins or corrosion. These defects interrupt consistent power delivery.
For wired cameras or Power over Ethernet setups, examine network cables. Ensure Ethernet connectors click securely into ports. Loose connections disrupt both data and power transmission.
Try using a known-working power adapter if available. Swap cables between cameras to test functionality. Isolating the faulty component is key to restoring monitoring capability.
Physical verification completes the troubleshooting process. Combined with digital resets, it addresses both visible and invisible failure points. Your surveillance footage quality depends on this comprehensive approach.
Optimizing Camera and Streaming Performance
Achieving consistently smooth remote viewing requires fine-tuning both your camera’s settings and its physical environment. This proactive approach moves beyond basic fixes to enhance reliability and video quality. These optimization strategies transform a working connection into an efficient monitoring experience.
Fine-tuning involves adjusting digital parameters and physical placement. Each change contributes to overall system stability. The goal is reliable, high-quality surveillance footage accessible from anywhere.
Adjusting Video Resolution for Your Bandwidth
Video resolution directly impacts network bandwidth consumption. Higher resolutions like 4K demand more data than 1080p or 720p streams. Lowering this setting can reduce bandwidth use by up to 40%.
This reduction prevents buffering on slower internet connections. It is especially helpful when viewing over mobile data. The trade-off is between image clarity and network stability.
Access your camera application’s video settings menu. Look for options labeled “Resolution,” “Quality,” or “Stream Settings.” Select a lower resolution like 1080p or 720p for daily monitoring.
Also consider adjusting the frame rate and bitrate. Lower frame rates (15fps instead of 30fps) further decrease data usage. Many apps offer a “Low Bandwidth” mode for mobile viewing.
Enable this feature when using cellular networks. It automatically reduces video quality to match your connection speed. This ensures continuous monitoring without constant buffering interruptions.
Positioning Your Camera for a Better Signal
Strategic physical placement significantly improves wireless stability. Even moving a device a few feet closer to the router can enhance signal strength. Ensure a clear line of sight between your camera and the wireless access point.
Avoid positioning cameras behind thick concrete walls or large metal objects. These materials block Wi-Fi signals dramatically. Singaporean homes often feature concrete construction that challenges wireless coverage.
Consider environmental factors during installation. Avoid direct backlight from windows or bright lights. This prevents washed-out footage during daytime monitoring.
Minimize infrared reflection from glass surfaces at night. Position cameras away from windows to reduce false motion alerts. Proper placement ensures accurate surveillance coverage.
Test different locations before permanent mounting. Use your phone to check Wi-Fi signal strength at each potential spot. Optimal placement balances visibility with network connectivity.
The Importance of Regular Firmware Updates
Manufacturers regularly release firmware updates for security cameras. These updates fix connectivity bugs and improve system efficiency. They often include critical security patches against new vulnerabilities.
Check for updates within your camera manufacturer’s application monthly. Navigate to the device settings or system information section. Look for a “Check for Updates” or “Firmware” option.
“Firmware updates are essential maintenance for any connected security device. They address known issues and enhance performance, often resolving problems before users encounter them.”
Enable automatic updates if your system supports this feature. This ensures your cameras receive improvements without manual intervention. Updated firmware typically offers better compatibility with mobile applications.
These updates can add new features to existing hardware. Motion detection algorithms might improve over time. Night vision performance often enhances through software optimization.
Additional optimization strategies further refine your surveillance system. Schedule camera activity to conserve bandwidth and storage space. Set recordings only during motion events or specific hours.
Configure the application for optimal mobile use. Adjust preview quality to match your current connection speed. Disable unnecessary features that consume background data.
These adjustments create a balanced security ecosystem. They maintain reliable access while managing network resources effectively. Your monitoring experience becomes smoother and more dependable over time.
Advanced Troubleshooting and Compatibility Checks
To conclusively rule out a device-specific fault, you need to test your surveillance system from an alternative smartphone. This advanced diagnostic step moves beyond your primary device’s configuration. It isolates the problem to either a single phone or your entire security setup.
Compatibility between your mobile software, operating system, and camera firmware is critical. A mismatch here can cause persistent access issues that resist basic fixes. The following steps provide a clear path for this technical verification.
Testing the Camera App on a Different Smartphone
This test delivers definitive evidence. Install the official manufacturer app on another mobile device, like a family member’s phone. Use your exact account credentials to log in and attempt to view the live feed.
If the feed loads perfectly on the second phone, the problem is isolated to your primary device. This points to local settings, corrupted data, or a software conflict. Your camera system and network are functioning correctly.
A failed connection on both devices indicates a wider system-wide issue. The fault likely lies with the camera, your home network, or your account. This eliminates your personal phone as the culprit.
This simple cross-test is a powerful diagnostic tool. It provides concrete facts before seeking professional support or filing a warranty claim. Document the results for reference.
Verifying Device and Operating System Compatibility
Formal compatibility lists are published by camera manufacturers. Visit their official support website. Search for your specific camera model and its supported mobile devices.
Check your phone’s current operating system version in its settings menu. Compare this version (e.g., iOS 17, Android 14) against the manufacturer’s list. An unsupported OS is a common source of new problems.
“Operating system updates can temporarily break app functionality. There’s often a lag before developers release a compatible patch.”
Discovering your phone or OS is no longer supported requires a decision. Workarounds include using an older tablet or dedicated device for monitoring. The most reliable solution may be upgrading your hardware to a supported model.
The reverse scenario also occurs. An older camera model may not support the latest app versions or modern security protocols. Its firmware might be permanently outdated.
This creates a different troubleshooting path. You might need to use an older version of the app or consider upgrading your security cameras. Compatibility is a two-way street between device and software.
This process of elimination is crucial for advanced diagnostics. It moves you from guessing to knowing the exact cause of your viewing issues.
When to Seek Professional Assistance and Support
There comes a point in every troubleshooting journey when expert intervention becomes the most efficient path forward. Exhausting all self-help solutions without success indicates a deeper problem. Recognizing this transition saves valuable time and frustration.
Clear signs demand professional support. A persistent offline status despite complete reboots suggests hardware failure. Complex network configuration needs often exceed typical homeowner expertise.
Suspected physical damage to your security camera requires technical assessment. Recurring connection drops after all software updates point to systemic issues. These scenarios justify contacting specialists.
Contacting the Camera Manufacturer for Warranty Help
Your first external resource should be the camera manufacturer’s customer support team. They possess specific knowledge about your device’s design and common problems. Warranty coverage typically includes manufacturing defects and premature hardware failure.
Preparation streamlines this process. Gather your camera’s model number, serial number, and original purchase details. Document specific error messages and their frequency. Create a timeline of the issue from first occurrence.
Most manufacturers offer multiple contact methods. Phone support provides immediate interaction for urgent problems. Email allows detailed documentation with screenshots attached. Live chat offers a balanced approach for technical discussions.
During the call, describe your troubleshooting steps comprehensively. This demonstrates due diligence and helps technicians diagnose faster. They may request access logs or specific settings configurations.
Warranty assistance can include software patches, replacement parts, or entire unit exchanges. Some companies provide advanced replacement services to minimize your surveillance downtime. Always confirm warranty status before expecting free repairs.
Consulting with a Local Security Technician in Singapore
For hands-on solutions in Singapore, engage a local security technician. These professionals understand regional infrastructure challenges. They account for Singapore’s unique building materials and network environments.
Local experts provide on-site diagnosis unavailable remotely. They can test power supplies at the outlet and inspect physical cabling. Wiring issues within walls require professional assessment and repair.
Singapore-based technicians ensure proper system integration with your specific home network. They configure routers for optimal cctv performance. Complex setups involving multiple access points benefit from professional installation.
These specialists often recommend more robust solutions. Wired Power over Ethernet (PoE) cameras eliminate Wi-Fi reliability concerns entirely. They provide stable power and data through a single cable.
Professional installers enhance overall security coverage. They position cameras for maximum range and minimal blind spots. Proper installation improves footage quality and motion alerts accuracy.
Knowing when to call professionals prevents wasted effort on unsolvable DIY challenges. It restores your surveillance system to reliable operation faster. Your peace of mind returns with functional remote monitoring.
Regaining Reliable Remote Access to Your Security System
A functional security system delivers peace of mind through consistent remote monitoring capability. This guide has walked you from identifying the initial problem to implementing layered solutions.
The methodical approach proves most effective. Start with basic power and network checks. Then address application and software updates. Finally, optimize your router settings and signal strength.
Regular maintenance keeps your surveillance ecosystem healthy. Schedule firmware updates and check router health periodically. These simple habits prevent most common connection issues.
You now possess the knowledge to troubleshoot future problems confidently. Your property remains visible from anywhere, providing true security assurance.
FAQ
What is the first thing I should check if my camera feed won’t load?
Start by restarting your entire system. Power cycle the camera, your home router, and your modem. This simple step resolves many common glitches by refreshing the network connections and clearing temporary software errors.
Could my home Wi-Fi be causing the problem?
Absolutely. Weak signal strength at the camera’s location is a frequent culprit. Check the signal bars in your camera’s app settings. Other devices, like microwaves or baby monitors, can also cause wireless interference that disrupts the video stream.
How do I know if the issue is with the app or the camera itself?
Try accessing your surveillance system from a different mobile device. If it works, the problem is likely with your original phone’s app or settings. If it fails on all devices, the issue is probably with the camera, its power, or your home network configuration.
Why does my camera keep going "offline" in the app?
An “offline” status often points to a lost connection. This can be due to an unstable Wi-Fi signal, a router that needs a firmware update, or even a faulty power adapter. Ensure all physical cables are secure and that your router is running the latest software from its manufacturer.
Do I need to adjust settings on my router for remote viewing?
Sometimes, yes. Features like strict firewall settings or incorrect port forwarding can block the connection. For most modern systems using P2P technology, this isn’t required. However, checking your router’s basic settings for any blocks on the camera’s data is a good troubleshooting step.
When should I contact the camera company for support?
Reach out to their technical support if you’ve tried basic troubleshooting—like rebooting and reinstalling the app—without success. They can help with account-specific issues, check for known bugs, and advise if a firmware update for your specific model is available to fix the problem.


