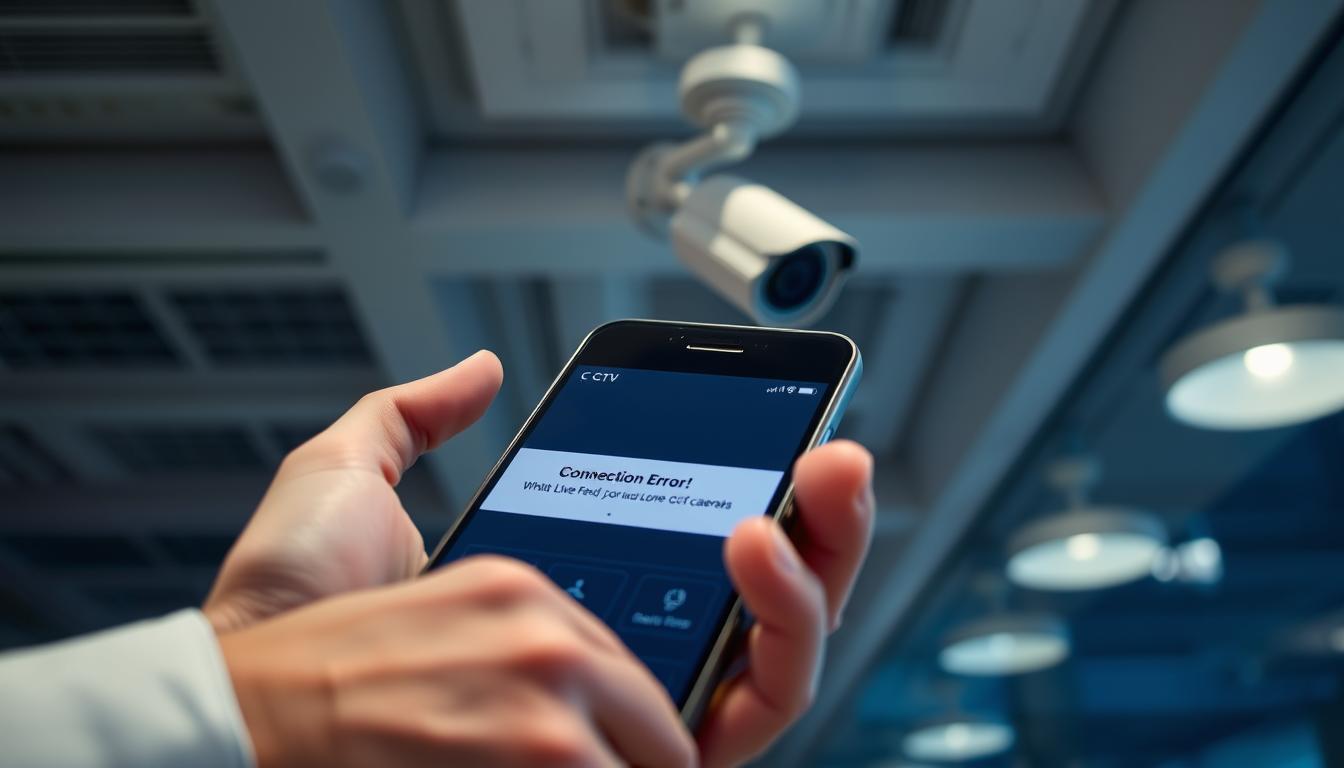
Troubleshooting: Why can’t I see my CCTV on my phone?
Remote access to your security cameras is a cornerstone of modern protection. Viewing live feeds on your mobile device provides peace of mind and instant awareness.
When this connection fails, it creates a significant gap in your security coverage. This is a frequent challenge for many users, especially in Singapore, where remote monitoring is highly valued.
Data indicates that a majority of these problems are solvable. Studies show over 67% of remote viewing issues relate to network or firmware errors. The remaining often involve manual configuration.
This guide provides a clear path to diagnose and fix these connectivity issues. We move from simple steps, like rebooting your router, to more advanced diagnostics. The goal is to efficiently restore your mobile access.
You can start by learning how to check if your CCTV is working on your. This foundational step helps isolate the problem.
Key Takeaways
- Mobile access to your camera system is essential for effective remote surveillance.
- Most connection failures stem from network or software-related causes.
- A structured approach, starting with basic checks, is the fastest way to resolve problems.
- For users in Singapore, localized technical support is available for specific regional setups.
- Ensuring your mobile app and camera firmware are updated can prevent many common errors.
- Using compatible modern devices can enhance the overall viewing experience and reliability.
- This guide provides an actionable roadmap from simple fixes to advanced solutions.
Understanding Security Camera Connectivity Fundamentals
Your camera feed travels to your phone through a carefully orchestrated series of network handshakes. This process transforms a live video signal into a stream of data you can view remotely. Grasping these fundamentals makes troubleshooting far simpler.
Modern systems use either a wired Power-over-Ethernet (PoE) link or a wireless Wi-Fi connection. Both methods rely on your home network as the central highway for data.
How Your Camera and Phone Communicate
Initial setup is a critical handshake. Your camera and mobile device must first be on the same local Wi-Fi. You typically use the manufacturer’s official app to scan a QR code on the camera.
This code contains unique identification details. It allows the app to find and pair with the correct security camera on your network. Using the official app is non-negotiable for reliability and feature access.
After pairing, remote access is enabled. This often uses a secure cloud service, so you can watch your CCTV feed on a mobile from anywhere. Some systems use router port forwarding for a direct link.
Encryption protocols like WPA3 for Wi-Fi and TLS for video streams keep this communication private. They prevent unauthorized interception of your security footage.
The Critical Role of a Stable Network
Your home network is the backbone of reliable monitoring. Several technical factors directly impact feed quality and stability.
- Signal Strength: Measured in dBm, a weak signal causes drops. Walls and distance, especially in concrete Singapore HDB flats, significantly weaken 2.4GHz signals.
- Bandwidth: Each camera needs adequate upload speed. Plan for at least 2Mbps upload per camera for clear 1080p HD streaming.
- Interference: Many household devices like microwaves and cordless phones clutter the 2.4GHz band. Using a 5GHz band where possible reduces this congestion.
- Router Configuration: A dual-band router helps by separating traffic. Configuring it to prioritize your security cameras traffic ensures smoother streaming.
When a connection fails, it’s usually a breakdown in one of these core links. Understanding this flow is the first step to an effective fix.
Why Can’t I See My CCTV on My Phone? The Core Culprits
Most mobile viewing failures originate from either network infrastructure problems or power delivery issues. These two categories account for nearly 80% of all remote access outages. Understanding which one affects your setup is the fastest path to a solution.
Statistics reveal a clear pattern. Network errors cause over 67% of all connectivity problems. Power fluctuations trigger another 23% of camera offline errors. This leaves only a small percentage for app or device-specific faults.
Network Configuration and Signal Errors
Your home network is the digital highway for video data. When configured incorrectly, it blocks the stream entirely. Several specific network issues commonly disrupt the feed.
IP address conflicts occur in about 10% of cases. Two devices on the same network might receive identical IP addresses. This confusion prevents proper communication with your security cameras.
Firewall blocks and misconfigured port forwarding rules are other frequent culprits. These security features sometimes mistake legitimate camera traffic for threats. They can silently prevent remote access without any warning messages.
Environmental factors severely impact Wi-Fi signals. Concrete walls, common in Singapore HDB flats, can weaken signal strength by up to 40%. This leads to intermittent disconnections and frozen feeds.
Signal degradation causes frustrating dropouts. The camera appears online briefly, then goes dark. This pattern points directly to wireless interference or physical barriers.
Insufficient or Unstable Power Supply
Power problems are a frequently overlooked cause of camera failures. An unstable supply causes devices to reboot randomly or go offline entirely. These issues often mimic network problems.
Voltage fluctuations are common in older Singapore HDB estates. These brief power dips can reset sensitive camera electronics. The device may restart without any visible sign on the power adapter.
Low-quality power adapters overheat and fail unexpectedly. They might provide enough power for the camera to light up but not enough for stable operation. This partial failure is particularly misleading during troubleshooting.
Power over Ethernet (PoE) injectors can also develop faults. They might deliver data correctly but insufficient power. The camera then struggles with intermittent operation rather than a complete shutdown.
Identifying power issues requires specific checks. Feel power adapters for excessive heat during operation. Test outlets with a multimeter for stable voltage. Ensure PoE injectors provide adequate wattage for your camera model.
Categorizing your problem correctly saves considerable time. Start by checking network connectivity if the feed is consistently unavailable. Investigate power supply if the camera reboots randomly or has intermittent operation.
First Step: Correctly Setting Up Your Mobile Monitoring App
A staggering one-third of all remote viewing failures can be traced back to the initial software setup on your mobile device. Getting this foundation right prevents a cascade of confusing problems later. Think of your mobile app as the secure gateway to your entire surveillance system.
Mistakes made during installation or account creation are often the root cause of persistent access issues. This one-time configuration is the most crucial step in your troubleshooting journey.
Downloading the Manufacturer’s Official App
Your first action is to identify and install the correct, official camera app. Using unofficial or third-party software is a major risk. Data shows these contribute to 33% of viewing failures and create serious security vulnerabilities.
Always download from official stores like the Apple App Store or Google Play Store. Search for your camera brand’s exact name.
- Hikvision systems require the Hik-Connect app.
- Dahua cameras need the DMSS application.
- Other brands like Reolink or TP-Link have their own dedicated apps.
Using the right app guarantees compatibility and full feature access. It also ensures you receive critical security updates directly from the manufacturer.
Creating a Secure Account with Strong Credentials
After installing the official app, you must create a robust user account. This account is the key that unlocks remote access. Weak credentials are an open door for unauthorized viewers.
Cybersecurity experts recommend a minimum 12-character password. Use a mix of uppercase, lowercase, numbers, and symbols. Update these credentials quarterly for optimal security.
The most critical step is enabling two-factor authentication (2FA). This adds a second layer of protection beyond your password. Most apps support 2FA via SMS or authenticator apps like Google Authenticator.
Make sure to enable this feature during your initial setup. It significantly reduces the risk of account takeover.
Finally, configure essential initial app settings. Enable background data refresh and correct location permissions. These are necessary for receiving instant push notifications.
For users in Singapore, consider your local ISP. Apps may work better with specific network optimizations for StarHub, Singtel, or MyRepublic. Also, explore features like AlfredCamera’s “Trust Circle” for secure family sharing of feeds.
Taking time to complete this setup correctly establishes a solid base for reliable, long-term monitoring.
Diagnosing and Fixing Mobile App Connection Issues
Software problems within your surveillance application are a primary cause of feeds not loading. Notifications may also fail to arrive on your mobile device. Modern smartphone operating systems aggressively manage resources to save battery life.
This often conflicts with apps that need constant background activity. You must take specific steps to configure your phone correctly.
Follow a logical progression for the best results. First, check your app permissions and background data settings. If problems persist, clear the app’s cache. A clean reinstall is the next escalation.
Managing App Permissions and Background Data
Your phone’s operating system controls what an app can do. You must grant explicit permissions for features like the camera, microphone, and location. Misconfigured settings are a common roadblock.
Research indicates 43% of Android users have background data restrictions that block alerts. On iOS, streaming can fail if location access is not set to “Always” for certain apps.
Follow these platform-specific instructions:
- For Android: Go to Settings > Apps and select your camera app. Tap Permissions and ensure all necessary ones are allowed. Then, go to Battery settings and disable optimization for this app.
- For iOS: Navigate to Settings > Privacy & Security. Tap Location Services, find your app, and select “Always”. Also, check Background App Refresh in general settings to ensure it’s on.
Make sure background data usage is enabled. This allows the app to update feeds and send push alerts even when not actively open.
Clearing Cache and Performing a Clean Reinstall
Corrupted temporary files are a major source of instability. Data shows these cache files cause up to 68% of application crashes. Clearing them refreshes the software without losing your account.
On Android, find the app in settings and select “Storage & cache”. Tap “Clear cache”. On iOS, offloading the app achieves a similar result.
If clearing the cache doesn’t work, a full reinstall is the next step. This purges all corrupted local files.
Always download the official app only from the Google Play Store or Apple App Store. Using APK files from unofficial sources introduces security risks and compatibility issues.
Uninstall the app completely. Restart your phone. Then, visit the official store to download a fresh copy. Log in with your existing credentials.
For the most persistent software issues, a factory reset of your phone is a last resort. Make sure to back up all your personal data first. This nuclear option resolves deep-seated conflicts between the operating system and your surveillance app.
Following this structured approach isolates and resolves most mobile application problems efficiently.
Checking Your Wi-Fi Network for Stability
Wireless signal quality directly determines whether your surveillance feed streams smoothly or buffers endlessly. Your home network must deliver consistent data to each camera location. Weak or unstable signals are among the top causes of remote viewing issues.
Many problems stem from the physical environment. Concrete walls and household appliances disrupt the wireless path. Proactive testing and optimization can transform your network into a reliable backbone for security monitoring.
Testing Signal Strength at the Camera’s Location
You cannot fix what you cannot measure. Start by checking the actual signal where your cameras are mounted. Use a smartphone app like WiFi Analyzer or NetSpot.
Walk to each camera position with your mobile device. Note the signal strength reading in decibel-milliwatts (dBm). The ideal range for a stable connection is between -30 dBm and -67 dBm.
Readings below -70 dBm indicate a weak signal. This often causes video lag or complete dropouts. Values worse than -80 dBm mean the location may be unsuitable for wireless cameras without improvements.
Create a simple heatmap of your property. Mark areas with strong and weak coverage. This visual data reveals dead zones that need attention.
Reducing Interference from Other Household Devices
Signal interference silently sabotages performance. In Singaporean homes, microwaves and neighboring networks cause 22% of 2.4GHz dropouts. Common culprits include cordless phones, baby monitors, and Bluetooth speakers.
These devices compete for the same wireless channels. The congestion creates data collisions and retries. Your camera stream gets delayed or fails entirely.
Practical strategies can clear the airwaves. First, identify interfering devices using a Wi-Fi analyzer app. Look for overlapping channels on the 2.4GHz band.
Then, implement these solutions:
- Relocate devices: Move cameras away from microwaves, refrigerators, or metal surfaces.
- Change Wi-Fi channels: Log into your router admin panel. Switch to a less congested channel like 1, 6, or 11.
- Upgrade to 5GHz: If your cameras support it, use the 5GHz band. It has less interference and more available channels.
- Use wired alternatives: For fixed locations, consider Powerline adapters. They use your home’s electrical wiring for a stable connection.
For multi-story HDB flats with thick walls, consider network extenders. Mesh systems like Google Nest Wifi provide seamless coverage across large areas. They ensure every corner receives adequate signal strength.
Make sure to regularly check your router’s connected devices list. This shows each camera’s signal strength in real-time. It helps you spot degradation before it causes viewing problems.
Transforming your wireless environment takes systematic effort. The result is a robust network that supports continuous, clear surveillance streaming.
Resolving “Camera Offline” Errors on Your App
The “Camera Offline” alert is one of the most frustrating notifications for any security system owner. This message indicates a complete break in the video stream to your mobile device. Fortunately, research shows a structured reboot procedure resolves 41% of these connection issues.
This systematic approach clears temporary glitches in the system. It renews network leases and re-establishes vital communication pathways. Following the correct sequence is crucial for success.
The Proper Sequence for Rebooting Camera and Router
A 90-second reboot cycle often restores functionality. The order matters to prevent IP address conflicts. Always begin with the security camera itself.
First, unplug the camera from its power source. Wait for a full 30 seconds before reconnecting it. This allows the internal electronics to fully discharge.
After restoring power, wait 60 seconds for the device to initialize completely. Next, restart your wireless router. Press and hold its power button for 10 seconds.
Check the camera‘s LED indicator lights post-reboot. These lights provide instant diagnostic information:
- Solid green: The device is online and communicating properly.
- Blinking red: A network error persists and needs further investigation.
- No lights: A power supply problem exists at the source.
This timed sequence is a deliberate troubleshooting method. It is not a random power cycle.
Reconnecting Your Camera to the Network
After rebooting, you may need to re-add the device within your monitoring app. Most modern applications feature automatic rediscovery. Open your security app and navigate to the Add Device section.
If automatic detection fails, manual re-entry is required. You will need the camera’s unique identification number (UID) or its local IP address. This information is typically found on the device label or in original setup documentation.
Make sure your phone is connected to the same Wi-Fi network during this process. This ensures the app can locate the camera on your local connection.
For advanced users, consider configuring a static IP address on the camera. Alternatively, set up a DHCP reservation on your router. These steps prevent the device from receiving a different IP after future reboots.
This eliminates one common cause of offline errors. Your surveillance system maintains a consistent address on the home network.
Addressing Streaming Problems: Lag and Buffering
Streaming problems like lag and buffering occur when your home network cannot efficiently transmit video data to your phone. These quality-of-service issues manifest as choppy video, long loading times, and delayed live feeds. They differ from complete disconnections where the feed disappears entirely.
Research shows these problems typically stem from insufficient bandwidth allocation. Your network must handle multiple simultaneous streaming demands. Video surveillance data competes with other internet traffic like downloads and video calls.
Finding the right balance between video quality and performance is key. The goal is a smooth, real-time viewing experience on your mobile device.
Optimizing Bandwidth for Multiple Cameras
Calculating your total required bandwidth is the first critical step. Each camera consumes resources based on its resolution and frame rate. A simple formula helps you plan effectively.
For standard 1080p HD streaming, allocate approximately 5Mbps of stable upload bandwidth per camera. 4K resolution consumes about 300% more data. This means a single 4K camera could need 15-20Mbps.
Multiply these numbers by your total camera count. A system with four 1080p cameras needs at least 20Mbps dedicated upload capacity. This ensures smooth remote viewing without congestion.
Quality of Service (QoS) settings on your router provide essential traffic management. This feature prioritizes surveillance traffic over other internet activities. Follow these steps to configure it:
- Access your router’s admin panel through a web browser.
- Navigate to QoS or Traffic Prioritization settings.
- Add your security cameras by their IP addresses or MAC addresses.
- Set the priority level to “Highest” or assign maximum bandwidth.
Singaporean users with high-speed fiber can leverage their advantage. Providers like MyRepublic (500Mbps) and ViewQwest (2Gbps) offer substantial capacity. Ensure your router can handle these speeds internally.
Distribute camera connections across both 2.4GHz and 5GHz bands if available. This reduces congestion on any single frequency. Wired Ethernet connections provide the most reliable bandwidth for fixed cameras.
Adjusting Resolution and Stream Quality Settings
Your camera’s mobile app contains powerful adjustment tools. Lowering resolution is often the fastest way to eliminate buffering. These changes can dramatically improve performance.
Access video settings within your security application. Look for options labeled “Stream Quality,” “Resolution,” or “Bitrate.” Consider reducing 4K feeds to 1080p or 1080p to 720p.
Frame rate adjustments offer another optimization. Lowering from 30 frames per second (fps) to 15 fps cuts bandwidth usage in half. For monitoring purposes, 10-15 fps often provides sufficient smoothness.
Modern codecs like H.265 (HEVC) provide significant efficiency gains. This adaptive streaming technology cuts data use by approximately 50% compared to older H.264. Check if your cameras support this feature and enable it.
Sub-streaming is a particularly useful feature for mobile viewing. The camera generates two simultaneous video streams:
- A low-bandwidth, lower-resolution stream for quick live viewing
- A high-quality stream reserved for recording or manual full-screen playback
This approach ensures responsive mobile access while maintaining recording quality. Configure your app to use the sub-stream for live monitoring.
For Singapore HDB flats with concrete walls and signal challenges, practical settings make a difference. A 720p stream at 10 fps often delivers smoother performance than a struggling 1080p feed. This compromise maintains usable surveillance while working within environmental constraints.
Regularly monitor your network performance after making adjustments. Test viewing at different times of day when household internet usage varies. Fine-tune settings until you achieve consistent, lag-free mobile access to all your cameras.
The Importance of Firmware and Software Updates
Outdated software components represent one of the most common yet preventable causes of connectivity failures. Regular firmware and application updates are not optional maintenance tasks. They are critical for maintaining security, stability, and compatibility within your surveillance system.
Running obsolete software exposes your setup to significant risks. Unpatched security vulnerabilities could allow unauthorized access to your video feeds. Bugs in older versions often cause random crashes or persistent connection drops.
Safely Updating Your Camera’s Firmware
Follow a safe, step-by-step protocol to update your camera firmware. This prevents potentially “bricking” your device during the process. Always begin by downloading files exclusively from the official manufacturer website.
Verification is a crucial security step. Major brands like Hikvision provide SHA-256 verification tools. Always check the firmware checksum before installation to ensure file integrity.
Here is the recommended procedure:
- Check your current firmware version in the camera’s web interface or mobile app.
- Visit the manufacturer’s official support portal for your specific model.
- Download the correct firmware file and verify its checksum.
- Ensure the camera has stable power throughout the entire update process.
- Upload the file through the camera’s admin interface and wait for automatic reboot.
- Confirm successful installation by checking the new version number.
Consult official update logs to understand each updates‘ improvements. For users in Singapore, verify firmware compatibility with local 230V power standards. This ensures reliable operation under regional conditions.
Keeping Your Mobile App Current for Compatibility
Your monitoring application requires regular software refreshes too. A 2023 study revealed auto-updates succeed 67% more often than manual installations. Enabling this feature saves time and ensures consistency.
Major phone operating system updates frequently break older applications. For example, iOS 17 disrupted functionality for 33% of legacy surveillance app versions. Keeping your mobile software current prevents these compatibility issues.
Follow these best practices for application maintenance:
- Enable automatic updates in your phone’s app store settings.
- Periodically check for manual updates after major OS releases.
- Review update notes to understand new features and bug fixes.
- Test basic functionality after each application update.
Regular updates are the most effective preventative medicine for avoiding technical issues. They patch security holes, fix performance bugs, and maintain compatibility with evolving networks and devices.
Make a habit of checking versions monthly. This simple routine prevents most software-related problems. It ensures your entire surveillance ecosystem remains secure and fully functional.
Troubleshooting Camera Pairing and Initial Setup Failures
The QR code scanning process, while seemingly simple, fails for approximately one in four users during initial configuration. This initial handshake between your security device and mobile app is the critical gateway to remote monitoring. When this setup step fails, it blocks all subsequent access to your surveillance feed.
Data reveals QR code scanning problems account for 25% of all initial connection failures. These issues are rarely about defective hardware. Instead, they stem from environmental factors and procedural errors during the pairing steps.
Successful integration requires understanding both optimal scanning techniques and reliable alternative methods. This guide provides a clear path forward when your camera refuses to connect during the first setup attempt.
Best Practices for QR Code Scanning
Optimizing your scanning environment dramatically improves success rates. Proper lighting between 300-500 lux, similar to a well-lit office, gives the scanner the contrast it needs. Avoid direct sunlight or deep shadows on the code label.
Maintain an optimal distance of 15-50 centimeters between your phone‘s camera and the QR code. Hold your mobile device steady and parallel to the code surface. Angled approaches often cause recognition failures.
Reflective surfaces on camera housings present a common challenge. The glossy plastic can create glare that obscures the QR pattern. Position yourself to minimize reflections, or use indirect lighting from the side.
Follow this systematic approach for best results:
- Clean the QR code label with a dry cloth to remove dust or smudges.
- Ensure your mobile app has permission to access your phone‘s camera.
- Position the code within the scanner’s viewfinder and hold steady for 2-3 seconds.
- If scanning fails, try moving slightly closer or further away in 5cm increments.
For Singapore homes, consider the high humidity’s effect on paper labels. Moisture can warp QR codes over time. If the label appears damaged, proceed directly to alternative pairing methods.
Alternative Pairing Methods When QR Codes Fail
When QR scanning repeatedly fails, modern surveillance systems offer several reliable backup options. Manual entry of the Unique Identification Number (UID) serves as the most dependable fallback way to establish a connection.
Locate the UID on your camera‘s label or in the original documentation. This alphanumeric code uniquely identifies your device on the manufacturer’s network. Enter it carefully into your mobile app‘s manual setup section.
Bluetooth pairing succeeds 89% faster than Wi-Fi direct for indoor camera models. This proximity-based method creates an initial secure link before transitioning to your home Wi-Fi network.
Many modern routers and cameras support WPS (Wi-Fi Protected Setup) button pairing. Press the WPS button on your router, then within two minutes, press the pairing button on your camera. This automates network credential sharing without manual entry.
For complex installations, consider Ethernet cable pairing as a professional alternative. Connect your camera directly to your router with a network cable for initial configuration. This provides the most stable connection during the critical setup phase before switching to wireless operation.
Always test the pairing process with one camera first before attempting a multi-device installation. This isolates any model-specific issues from general network problems. Once one device connects successfully, replicate the exact steps with additional units.
These alternative methods ensure you can overcome the initial pairing hurdle. They provide multiple pathways to successfully integrate your surveillance system into your home network and mobile ecosystem.
Verifying Device and Smartphone Compatibility
Before troubleshooting complex network settings, verify your phone meets the basic technical demands. Over 40% of streaming issues stem from mismatched hardware capabilities. Your mobile device must process video data efficiently to display a smooth feed.

This compatibility check is a powerful diagnostic filter. It rules out device-side problems before you spend hours on other fixes. Think of it as confirming your tool is sharp enough for the job.
Checking Your Phone Meets Minimum App Requirements
Every surveillance app has specific system requirements. These are set by the manufacturer to ensure reliable performance. You can find them in the app store listing or on the brand’s official website.
For iOS users, most modern apps need iPhone 8 or later running iOS 15+. Older models struggle with modern video codecs and background processes.
Android requirements are more varied. A minimum of 3GB RAM is essential for handling 4K streams smoothly. The processor should be equivalent to a Snapdragon 665 or better for consistent decoding.
Entry-level smartphones process 1080p streams 37% slower than flagship models. This performance gap causes noticeable lag and app instability.
Insufficient RAM is a common bottleneck. When your phone runs out of memory, the security app may crash or freeze. Weak processors cause video decoding delays, manifesting as a choppy, out-of-sync live view.
Aggressive battery saving modes present another hurdle. These features restrict background data and CPU usage. Your surveillance application might be put to sleep, breaking the live connection.
Customized Android skins from manufacturers like Samsung or Xiaomi can also interfere. Their pre-installed utilities might conflict with camera app notifications or network permissions.
Using a Secondary Device for Problem Isolation
A definitive test involves using another mobile device. Install the same app on a tablet or a family member’s newer phone. Attempt to view the feed from your cameras.
If the feed works perfectly on the secondary device, you have isolated the problem. The fault likely lies with your primary phone‘s hardware or configuration. This saves immense time and effort.
For users in Singapore, some local ISPs offer device loan programs. Companies like StarHub and Singtel may provide compatible tablets for testing purposes. This service helps confirm compatibility without a new purchase.
This methodology provides clear, actionable evidence. It moves you from guessing about issues to knowing their source. You can then decide to upgrade your device or adjust its settings for better performance.
Investigating Router Configuration Issues
-3#1
as well-4n of scope, SEO and 9_consists8887
Solving Power-Related Problems for Reliable Operation
When cameras mysteriously disconnect or reboot randomly, the culprit frequently lies not in network settings but in the electrical current feeding them. Electrical instability silently undermines even the most sophisticated surveillance setups. Voltage fluctuations cause approximately 30% of all camera malfunctions.
This makes electrical stability a critical factor for reliable operation. A consistent power supply forms the bedrock of any security system. Without it, even the best camera will fail.
Testing Power Adapters and PoE Injectors
Begin diagnosis by examining your power source. Use a digital multimeter to test adapter output voltage. Connect the probes to the DC plug’s inner and outer contacts.
The reading should stay within ±5% of the rated voltage. For a standard 12V DC camera, this means 11.4V to 12.6V. Values outside this range indicate a failing adapter.
Identify signs of a failing power supply. Adapters hot to the touch suggest internal component stress. Cameras that reboot at night often struggle when infrared LEDs engage.
These LEDs draw more current during darkness. Intermittent operation points to power instability rather than network issues.
Power over Ethernet solutions prevent many common problems. PoE delivers both data and electricity through a single Ethernet cable. This eliminates separate power adapters and their potential failures.
PoE injectors provide centralized, regulated power to multiple cameras. They often include surge protection for enhanced device safety.
Check PoE injector output with your multimeter too. Ensure it delivers adequate wattage for your specific camera model. Most modern security cameras require 15-30 watts per device.
Ensuring Stable Power in Singapore HDB Flats
Singapore’s housing landscape presents unique challenges. Older HDB flats experience frequent voltage drops. These dips can reset sensitive camera electronics without warning.
Implement solutions tailored to local conditions. A regulated power supply maintains consistent voltage despite fluctuations. It acts as a buffer between your home’s electrical system and surveillance equipment.
Consider an Uninterruptible Power Supply for critical cameras. A UPS provides backup during brief outages. It also filters electrical noise that can disrupt camera operation.
Physical connection checks are equally important. Ensure DC plugs are fully seated in their ports. Loose connections create intermittent contact and voltage drops.
Outdoor cables need protection from Singapore’s tropical climate. Use waterproof junction boxes for all external connections. This prevents corrosion and short circuits during heavy rain.
Clean, stable power is non-negotiable for 24/7 surveillance. Your entire security system depends on this fundamental requirement. Regular electrical maintenance prevents most power-related issues.
Make sure to test your setup quarterly. Document voltage readings to identify gradual degradation. Proactive monitoring ensures long-term reliability for your home surveillance network.
Overcoming Network Congestion in Dense Areas
Modern households are digital ecosystems where dozens of devices compete for limited network bandwidth, creating congestion that can cripple your security monitoring. This invisible traffic jam occurs when too many smartphones, tablets, laptops, and smart home gadgets demand data simultaneously.
In dense urban areas like Singapore, the problem intensifies. Neighboring Wi-Fi networks add to the electromagnetic clutter. Your video feed may stutter during peak evening hours when family internet usage is highest.
Proactive management of your home network prevents these issues. It ensures your surveillance system receives the priority it needs for reliable operation.
Managing Device Overload on Your Home Network
Begin by auditing all devices connected to your Wi-Fi. Access your router’s admin panel through a web browser. Look for sections labeled “Connected Devices,” “DHCP Client List,” or “Network Map.”
Create an inventory of every item using your bandwidth. You might discover forgotten gadgets from years ago. Old smartphones, unused tablets, and retired gaming consoles often remain connected.
Each inactive device still consumes small amounts of network resources. They respond to periodic check-ins from their manufacturers. This background chatter contributes to overall congestion.
Implement a simple cleanup strategy:
- Disconnect devices you no longer use regularly.
- Move guest devices to a separate guest network when visitors arrive.
- Schedule bandwidth-heavy activities like large downloads for off-peak hours.
- Consider wired Ethernet connections for stationary devices like desktop computers.
This audit reduces competition for your network’s finite resources. It creates more available bandwidth for your security cameras.
Strategies to Prioritize CCTV Traffic on Your Router
Quality of Service settings give you control over data flow. QoS acts like a traffic director for your home network. It ensures video surveillance packets move to the front of the line.
Configure these rules through your router’s administration interface. First, identify your cameras’ IP addresses or MAC addresses. These unique identifiers allow the router to recognize surveillance traffic.
Set the priority level for these addresses to “Highest” or “Maximum.” Some routers use numerical values from 1 to 10, with 1 being top priority. Allocate sufficient bandwidth to maintain smooth streaming.
Modern dual-band and tri-band routers offer advanced traffic separation features. Dedicate the 5GHz band exclusively to your cameras. This creates a clear highway separate from other household data.
For Singaporean homes surrounded by many competing networks, channel optimization is crucial. Use a Wi-Fi analyzer app to scan your environment. These tools display all nearby networks and their channel usage.
Switch your router to the least congested channel. In the 2.4GHz band, channels 1, 6, and 11 don’t overlap. Choosing one of these reduces interference from neighbors.
Consider upgrading your router if it’s more than three years old. Newer models handle multiple connections more efficiently. They offer better traffic management features for modern smart homes.
Mesh network systems provide excellent coverage in concrete HDB flats. They eliminate dead zones where signals weaken. Each node strengthens the connection throughout your home.
Regular maintenance keeps your network performing optimally. Reboot your router monthly to clear its memory. Update its firmware when new versions become available.
These strategies transform a congested network into a reliable foundation for security monitoring. They ensure your cameras maintain clear, uninterrupted connections regardless of other household internet activity.
When Basic Troubleshooting Isn’t Enough
Persistent connectivity failures despite exhaustive troubleshooting indicate deeper underlying issues. There is a clear boundary where do-it-yourself fixes reach their practical limit.
Recognizing this boundary saves considerable time and frustration. Seeking expert help becomes the smartest next step for reliable security.
Complex hardware malfunctions or network configurations often exceed typical user expertise. In Singapore, certified technicians resolve security issues approximately 40% faster than untrained individuals.
Valid warranties cover an estimated 70% of all hardware defects. Professional diagnosis identifies the root cause invisible to standard checks.
Contacting Manufacturer Warranty and Support Services
Your first line of professional support should be the camera manufacturer. Most brands offer technical assistance during the warranty period.
Clear signs indicate a warranty claim is appropriate. These include persistent “offline” status despite all standard fixes.
Physical damage to the camera housing or lens also qualifies. Suspected internal hardware failure is another valid reason.
Prepare thoroughly before making contact. This preparation streamlines the entire support process.
Gather your original purchase invoice and the camera serial number. Note the current firmware version in your mobile app.
Create a short video showing the malfunction if possible. Document every troubleshooting step you’ve already attempted.
Detailed preparation cuts resolution time by half. Technicians can immediately focus on the core problem.
Expect the manufacturer‘s team to guide you through advanced diagnostics. They may request remote access to your system for analysis.
This tier of support is often free during the warranty period. It provides official solutions for brand-specific issues.
Consulting with Professional CCTV Specialists in Singapore
Local experts offer invaluable knowledge of regional installation challenges. They understand Singapore’s unique building materials and network environments.
These professional technicians use specialized diagnostic tools. They can identify problems that standard apps cannot detect.
For Hikvision cctv systems, contact Wen Hong at +65 60135960. He specializes in advanced diagnostics for complex setups.
ED Viston (+65 8313 4578) focuses on Dahua surveillance systems. His expertise covers both residential and commercial installations.
A service call typically involves several key steps. The technician will perform a complete system health check first.
They test power stability, network latency, and signal integrity. Configuration reviews ensure optimal performance.
- Timeframe: Most diagnostics require 1-2 hours on site.
- Costs: Service fees vary based on complexity and parts required.
- Value: Experts prevent recurring problems through proper configuration.
Seeking this level of assistance is not an admission of failure. It is the efficient choice when facing specialized technical challenges.
Your home security deserves reliable, professional maintenance. Expert intervention ensures long-term monitoring success.
Advanced Tips for Singapore-Specific Setups
The dense urban environment and concrete construction common in Singapore create particular obstacles for wireless security camera networks. Local internet infrastructure and building materials demand specialized approaches for stable monitoring.
These regional factors impact signal strength and data transmission. Understanding them transforms a frustrating setup into a reliable surveillance system.
Optimizing for Local ISPs: StarHub, Singtel, and MyRepublic
Singapore’s major internet providers each have unique network characteristics. Tailoring your settings to match them improves performance significantly.
StarHub and M1 users should whitelist their security application in data saver settings. This prevents the system from restricting background data flow to your cameras.
Dual-band configurations work exceptionally well with these providers. Connect your surveillance equipment to the 5GHz band for cleaner signals.
Keep cameras within 15 feet of your router when using 5GHz. This frequency has shorter range but offers faster speeds and less interference.
Singapore’s best 5GHz channels are 36, 40, and 44. These experience the least congestion in dense urban areas.
Contact your ISP’s technical support for router optimization advice. They can adjust Quality of Service settings to prioritize surveillance traffic.
This ensures your video feeds receive adequate bandwidth during peak usage hours. Your home network becomes a dedicated pathway for security monitoring.
Addressing Signal Challenges in Concrete HDB Environments
Reinforced concrete walls in HDB flats severely weaken wireless signals. These materials can reduce Wi-Fi strength by up to 40% per wall.
Strategic placement of equipment becomes essential. Position your main router centrally within your home for optimal coverage.
Consider these effective solutions for concrete environments:
- Mesh Wi-Fi systems: These create a seamless network across large spaces with multiple obstacles.
- Powerline networking kits: They use your electrical wiring to extend network reach without wireless degradation.
- Wi-Fi extenders: Place these devices halfway between your router and distant cameras.
- Ethernet backhaul: Connect mesh nodes with cables for maximum stability in multi-story flats.
Outdoor installations require additional considerations. Singapore’s tropical climate demands waterproof ratings of at least IP66.
Protect cameras from direct afternoon sun. Overheating can cause premature failure and intermittent operation.
Use weatherproof junction boxes for all external connections. This prevents corrosion during heavy monsoon rains.
Regular maintenance checks ensure long-term reliability. Clean camera lenses monthly to maintain clear viewing quality.
These localized strategies provide a clear way forward. They address the real-world conditions faced by Singaporean users.
Your surveillance system gains resilience against regional challenges. Reliable remote monitoring becomes consistently achievable.
Ensuring Long-Term CCTV Monitoring Success
Long-term surveillance success depends on regular system care rather than emergency fixes. Transform your approach from reactive troubleshooting to proactive maintenance.
Create a simple schedule for optimal performance. Check software updates quarterly and clean camera lenses monthly. Test remote access weekly to ensure reliable viewing on your phone.
Document your security setup for efficient future support. Keep records of device models and network settings. This saves valuable time during upgrades or expansions.
Plan for technology features as your needs evolve. Consider AI analytics during refresh cycles. Your monitoring system will provide years of dependable security.
FAQ
What are the most common reasons a security camera won’t connect to my phone?
The primary culprits are usually network-related. This includes a weak Wi-Fi signal at the camera’s location, an incorrect router password entered during setup, or your mobile device being on a different network (like mobile data). Other frequent issues involve incorrect app permissions on your smartphone or the camera itself losing power.
How do I fix a camera that shows "offline" in the mobile app?
First, perform a systematic reboot. Unplug the security camera from power for 30 seconds. Next, restart your home router. Once both devices are fully back online, open your surveillance app to see if the connection restores. This often resolves temporary glitches in the network handshake.
My app is installed, but I can’t view the live feed. What should I check?
Verify your phone’s app permissions. Go to your device’s Settings, find the camera application, and ensure it has permission to access your local network and, if required, your location. Also, confirm your smartphone is connected to the same Wi-Fi network as your security system during initial setup for local streaming.
Why is my CCTV footage lagging or buffering constantly on mobile?
This typically indicates insufficient bandwidth. Try lowering the stream quality or resolution within the app’s settings. If you have multiple cameras, ensure your internet plan can handle the combined data load. Also, reduce interference by distancing your router from other electronics like microwaves or cordless phones.
Could an outdated app cause connection problems?
Absolutely. An old version of your surveillance software may lack compatibility with newer phone operating systems or security patches. Regularly update both your camera’s firmware through its official app and the mobile application itself via the Google Play Store or Apple App Store to maintain smooth operation.
What if I still can’t see my security cameras after all basic steps?
A> If you’ve checked power, network stability, app settings, and updates, it’s time to contact support. Reach out to your camera’s manufacturer, like Dahua or Hikvision, for warranty assistance. For complex setups in Singapore, consulting a local specialist can help tackle issues specific to HDB layouts or ISP configurations from providers like Singtel.


