How do I troubleshoot my CCTV camera? Solutions
A reliable security system is essential for protecting your property. When a camera malfunctions, it can leave you exposed.
This guide provides a comprehensive resource for resolving common and complex issues with your CCTV system. We offer a step-by-step methodology.
We outline a systematic approach to troubleshooting. It starts with the most frequent problems: power and connections. Then it moves to software and environmental factors.
Industry data shows power issues cause 30% of failures. Network problems account for another 25%. Understanding these statistics helps you focus your efforts.
For homeowners in Singapore, the humid climate presents a unique challenge. We include specific maintenance solutions for long-term reliability.
You will learn to identify if a problem is hardware, software, network, or environment related. We also reference specific models known for durability, like the Reolink Altas PT Ultra.
Local experts, including Wen Hong (+65 60135960) and ED Viston (+65 8313 4578), provide direct support. This guide aims to reduce your security risks.
By the end, you will be able to apply the correct fixes. You can ensure your surveillance operates optimally time.
Key Takeaways
- This guide provides a step-by-step method for fixing CCTV problems.
- Learn a systematic approach to diagnosis, starting with power and connections.
- Understand how Singapore’s humid climate affects your security equipment.
- Get data on common failure points, like power issues causing 30% of problems.
- Find references to reliable hardware models and local expert contacts.
- Identify whether an issue is hardware, software, network, or environment related.
- Implement maintenance practices for long-term reliability.
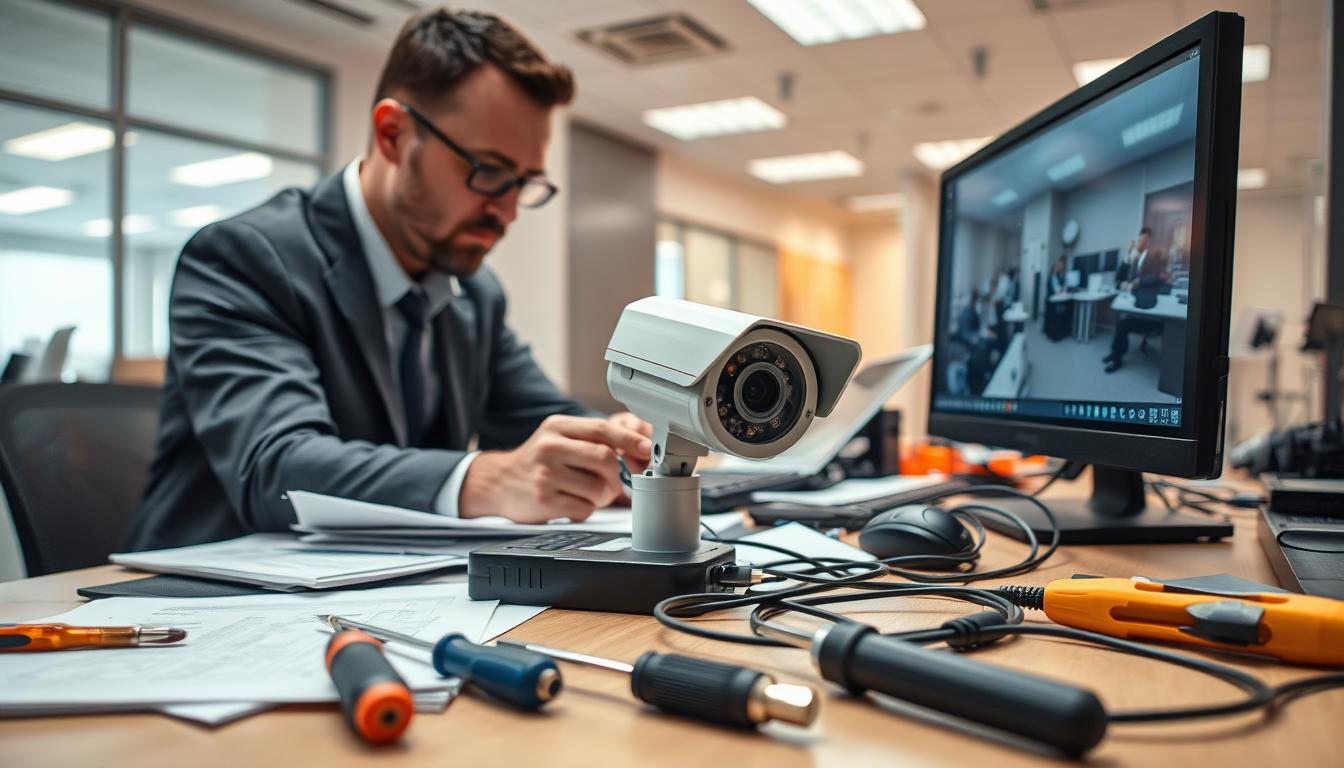
Begin Your CCTV Troubleshooting with a Systematic Approach
A methodical framework is your best tool for solving monitoring equipment problems. Jumping straight into advanced settings often wastes time. Following a logical sequence saves effort and gets results faster.
Start with a thorough physical inspection of your security setup. Verify all power connections are secure. Check each cable for visible damage or wear.
Industry data reveals a critical insight. Approximately 80% of surveillance failures originate from power supply faults or cable damage. This makes physical checks your most productive first action.
Isolate each component during your diagnosis. Test one camera before suspecting the entire network video recorder. Document specific symptoms like video loss or blurry footage.
This organized process prevents a common error. People often adjust software or reboot their system unnecessarily. The real issue might be a loose plug or tripped breaker.
A systematic checklist ensures you cover every potential cause. It guides you from basic power verification to environmental factors in Singapore. This approach reduces stress and avoids unnecessary technician costs.
You can resolve many issues yourself with the right methodology. Your security system will return to optimal operation quickly. A structured plan turns frustration into effective solutions.
How Do I Troubleshoot My CCTV Camera? Start With Power
Before diving into complex software settings, examine the most fundamental element: electricity. Statistics reveal that power-related faults cause 30% to 70% of all surveillance malfunctions. This makes verifying your power supply the single most effective diagnostic step.
A failed electrical connection instantly disables your entire security feed. Begin your investigation with these three critical areas of the power chain.
Inspecting the Power Cord and Connections
Start with a visual examination of all cables and adapters. Look for obvious damage like fraying, cuts, or chew marks from pests. Pay special attention to connectors, which are vulnerable points.
In Singapore’s humid climate, metal contacts corrode quickly. Greenish discoloration on terminals is a clear sign of moisture damage. When found, clean contacts with isopropyl alcohol and consider applying dielectric grease before reconnection.
Data shows that 66% of power supply failures stem from faulty cables or loose connections. Ensure every plug is fully seated. This includes the DC jack at the camera housing and the connection at your Power over Ethernet switch or outlet.
Loose wiring is the silent killer of surveillance systems. A connection that seems secure can still interrupt the steady current needed for reliable operation.
Testing Outlet Functionality and Voltage
Rule out a dead wall socket before blaming your equipment. Plug a working device like a lamp into the same outlet. If it doesn’t turn on, you’ve found the issue: a tripped circuit breaker or faulty socket.
For a precise diagnosis, use a digital multimeter. Test the output voltage at your power adapter or directly at the camera’s terminals. Most systems require a stable 12V DC current.
- Acceptable Range: 10.8V to 13.2V (12V ±10%)
- Unstable Reading: Indicates a failing adapter or bad wiring
- No Reading: Confirms a complete power failure
This simple test takes seconds but provides definitive evidence about your power supply health.
Checking Battery Health for Wireless Models
Battery-powered models introduce another variable. Performance issues like random reboots or shortened recording sessions often point to cell degradation.
Research indicates a sharp drop in efficiency. Batteries lose about 40% of their capability once charge falls below 20%. In Singapore’s heat, this degradation accelerates.
Establish a replacement schedule every 12 to 18 months for optimal performance. For cameras in sunny locations, consider upgrading to solar-powered power supply units. They provide sustainable energy and eliminate battery anxiety.
By methodically checking power sources, you resolve the majority of surveillance problems. Stable electricity is the non-negotiable foundation of a working security system.
Verify Network Connectivity and IP Conflicts
When live video disappears or alerts stop, the network is often the silent culprit behind security failures. Statistics show connectivity problems cause nearly 25% of all surveillance system malfunctions. These issues disrupt remote viewing and notification services.
Your monitoring equipment depends on stable data transmission. A weak signal or address conflict can blind your entire security setup. Begin diagnosis by examining both wired and wireless pathways.
Testing Wired and Wireless Connection Strength
Physical inspection comes first for Ethernet-based systems. Check each RJ45 cable for cuts or crimps that might interrupt data flow. Ensure network switches and NVR ports show active link lights.
Wireless cameras face different challenges. Concrete structures in Singapore’s HDB blocks often weaken Wi-Fi signals. Use a smartphone app like Fing to measure strength at each camera location.
A reading below -70 dBm indicates poor connectivity. Consider Wi-Fi extenders or mesh networks for reliable coverage. Power over Ethernet setups eliminate wireless variables entirely.
Signal degradation in dense urban environments remains a primary cause of intermittent video loss. Prioritizing wired connections ensures consistent performance.
Pinging Your Camera’s IP Address
This basic command reveals your camera’s network status. First, locate its IP address in your router’s DHCP client list or NVR settings. Open Command Prompt on a computer connected to the same network.
Type ping [IP address] and press Enter. A successful response confirms communication. Look for reply times under 100 milliseconds for smooth HD streaming.
“Request timed out” messages indicate the device is offline. This could mean power failure, cable damage, or configuration errors. Consistent timeouts require further investigation.
Resolving IP Address Conflicts in Your Router
Conflicts occur when two devices share the same IP. This causes cameras to drop off the network erratically. Symptoms include random disconnections and failed login attempts.
Access your router’s admin panel to check the DHCP client list. Look for duplicate addresses assigned to different devices. Free tools like Angry IP Scanner can also detect conflicts.
Assign static IP addresses to critical security cameras. Most routers allow DHCP reservations for specific MAC addresses. This prevents the router from reassigning the same IP to another device.
In bandwidth-congested areas, configure Quality of Service settings. Prioritize traffic from your surveillance system to ensure smooth video feeds. This is especially useful in multi-device households.
When problems persist, power-cycle your networking equipment. Turn off the router, modem, and switches for 30 seconds. This clears temporary glitches and refreshes connections.
Regular network maintenance prevents most connectivity issues. Schedule monthly checks of IP assignments and signal strength. Your security system will maintain reliable operation with consistent oversight.
Examine Physical Cables and Components for Damage
Visible damage to cables and connectors represents one of the most common yet overlooked causes of surveillance system failure. Industry data reveals a startling fact. Faulty wiring and compromised components account for approximately 80% of all signal failures.
This makes a hands-on inspection your most valuable diagnostic tool. You can often spot the problem with your eyes before touching any software. A systematic check of physical hardware restores video feeds quickly.
Identifying Frayed or Corroded Cables
Begin with a slow, methodical walk along your entire cable run. Look closely at every inch of exposed wiring. Pay special attention to points where cables bend or rub against surfaces.
Cracked insulation is a major red flag. It exposes the delicate copper wires inside to moisture and air. This degradation directly causes poor video quality and complete signal loss.
In Singapore’s climate, corrosion attacks metal contacts aggressively. Look for a greenish-blue powder on connector pins. This verdigris forms when copper reacts with humid air and salt.
A corroded BNC connector on an analog CCTV system can degrade the signal so severely that the image becomes unusable, even if the camera itself is perfectly functional.
Use a bright light to examine hard-to-see areas. Check where cables enter walls or junction boxes. These entry points suffer the most stress and environmental exposure.
Securing Loose BNC or RJ45 Connections
Loose fittings cause intermittent problems that frustrate diagnosis. Your feed may flicker, show rolling lines, or drop out randomly. Simply tightening connections solves many issues instantly.
For analog systems, ensure each BNC connector is finger-tight on its port. These bayonet-style connectors are prone to working loose over time. In tropical environments, they fail three times more often than RJ45 types.
Modern IP systems use RJ45 Ethernet connectors. Confirm each clip clicks firmly into place. A loose data connection disrupts both power and video transmission in PoE setups.
Consider applying a small amount of dielectric grease before reconnecting. This compound creates a moisture-resistant seal. It significantly extends the lifespan of electrical contacts in humid conditions.
Checking for Weather-Related Damage in Singapore’s Climate
Singapore’s unique environment tests security equipment relentlessly. High humidity penetrates seemingly sealed enclosures. Frequent heavy rain exposes installation weaknesses.
Local SS 589 standards mandate proper waterproof seals for outdoor installations. Verify all junction boxes are intact and sealed. Ensure conduit entries have waterproof grommets.
Ultraviolet radiation from constant sun exposure breaks down plastic cable jackets. Look for brittleness, cracking, or discoloration on outdoor runs. Use UV-resistant sleeves or conduit for protection.
Coastal areas present an additional challenge. Salt spray accelerates metallic corrosion exponentially. Inspect all metal components, including mounting brackets and screw heads, for rust.
Schedule quarterly visual inspections of all outdoor security camera installations. Document any changes in cable condition or connector appearance. Proactive maintenance prevents most physical failures.
For long cable runs, a basic continuity tester provides peace of mind. It identifies breaks in wires that aren’t visible externally. This tool is invaluable for diagnosing mysterious signal loss.
Your surveillance system’s reliability hinges on its physical integrity. Regular inspection of cables and connectors ensures consistent performance. This simple habit protects your property monitoring year-round.
Reset Your Camera to Factory Default Settings
When all other fixes fail, restoring factory defaults can resolve deep-seated software glitches. This process wipes the camera’s memory clean. It removes any corrupted configurations causing erratic behavior.
Think of it as a master reboot for your device’s operating software. It is a definitive step for login failures or incorrect settings you cannot undo. Use this method after checking power, network, and physical connections.
Restoring default settings eliminates conflicts between the firmware and your custom setup. It is a powerful solution for a stubborn problem. Always consider it a last resort within the software troubleshooting phase.
Locating and Using the Physical Reset Button
Most surveillance units have a small, recessed reset button. You typically find it near the power port or SD card slot. It is designed to prevent accidental presses.
You will need a thin tool like a paperclip or pin. For example, Hikvision models require holding the button for 30 seconds. Always consult your specific model’s manual for the exact duration.
The device usually indicates a reset with LED flashes or a sound. Release the button only after the specified time. The camera will then reboot into its original state.
A factory reset is the digital equivalent of a fresh start. It clears the clutter that accumulates from updates and configuration changes, often restoring perfect operation.
Understanding What Settings Will Be Cleared
This action returns the unit to its out-of-box condition. All user-configured parameters are erased. You must be prepared to rebuild your setup from scratch.
You will lose several critical configurations. These include Wi-Fi network passwords and static IP addresses. Motion detection zones and recording schedules are also wiped clean.
Custom user accounts and admin passwords revert to factory defaults. Any linkage to your network video recorder or mobile app is severed. This complete wipe is what makes the reset so effective for a complex issue.
Therefore, note down or screenshot your important network settings beforehand if possible. This preparation makes reconfiguration much faster and more accurate.
Reconfiguring Basic Parameters After Reset
After the reset, treat the device as if it were new. First, re-establish its connection to your local network. You must set a new, strong admin password immediately for security.
One of the most crucial steps is adjusting the date and time. Correct timestamps are vital for lawful evidence and reviewing footage. Set the proper time zone and disable daylight saving if not applicable in Singapore.
Finally, reconnect the camera to your NVR or surveillance mobile app. Recreate any motion zones or recording schedules you need. Your security system should now function without the previous glitches.
This process resolves problems caused by bad firmware updates or forgotten passwords. It provides a clean slate for your monitoring equipment’s software.
Update Firmware and Surveillance Software
Digital vulnerabilities in monitoring systems often stem from neglected software maintenance cycles. Research indicates outdated firmware exposes surveillance equipment to 67% of known cyber breaches. Regular updates patch these weaknesses while enhancing performance.
Manufacturers release patches to fix bugs, improve night vision algorithms, and counter new threats. These updates also add compatibility with modern features. Keeping your entire system current is a fundamental security practice.
Checking Your Current Firmware Version
Begin by accessing your device’s web interface through a browser. Log in with your administrator credentials. Navigate to the configuration or maintenance section.
Locate the firmware information panel. Compare the installed version against the latest release on the manufacturer’s support site. Note any significant version gaps that might indicate missed critical patches.
Firmware acts as the embedded software controlling your camera’s hardware. An outdated version can contain unpatched vulnerabilities that hackers actively exploit.
Document your current version before proceeding. This provides a rollback point if needed. Check both individual devices and your network video recorder for consistency.
Safely Downloading and Installing Manufacturer Updates
Always obtain firmware files directly from official manufacturer portals. Third-party sites may host corrupted or malicious files. These can permanently damage your equipment.
Before updating, read the release notes thoroughly. Ensure compatibility with your specific model and connected NVR. Note any special instructions for the installation sequence.
Critical preparation prevents update failures. Use an uninterruptible power supply during the process. Statistics show 33% of firmware installation problems result from power loss mid-update.
- Ensure stable network connectivity throughout
- Do not reboot or disconnect the device
- Allow the process to complete without interference
- Follow the manufacturer’s recommended steps exactly
Post-Update Verification and Testing
After installation, the device typically reboots automatically. Verify the new firmware version appears correctly in the settings. This confirmation ensures the update applied successfully.
Conduct comprehensive functional testing. Check live viewing, motion detection alerts, and night vision performance. Test recording capabilities and playback functions.
Allocate sufficient time for this verification phase. Thorough testing identifies any compatibility issues early. It also confirms all security patches are active.
Finally, update your surveillance software and mobile viewing applications. Maintain version synchronization across all components. This holistic approach ensures optimal protection and performance.
Solve Common CCTV Image Quality Problems
The value of a security system collapses when captured images lack essential details. Blurry or discolored video fails to identify faces, license plates, or suspicious activities. This renders your surveillance investment ineffective.
Poor video quality compromises protection by obscuring critical visual evidence. Research indicates that 80% of image complaints stem from correctable issues. These include incorrect color balance, dirty lenses, and poor positioning.
Addressing these factors restores clarity to your monitoring feed. You can achieve professional-grade footage with systematic adjustments. The following methods target the most frequent image degradation sources.
Adjusting White Balance and Color Settings
Incorrect color reproduction makes scenes look unnatural. They may appear too blue under artificial lights or too orange in daylight. This distortion hides important details in the recorded video.
Manual white balance correction improves color accuracy by 90%. Access your device’s settings menu through its web interface. Select the preset matching your primary light source: daylight, fluorescent, or incandescent.
Singapore’s environment presents unique challenges. Bright skies contrast sharply with deep building shadows. Enable Wide Dynamic Range mode to balance exposure across these extremes.
Proper color calibration transforms washed-out footage into evidence-grade imagery. It ensures red cars appear red and green foliage appears green, not murky grays.
For indoor installations, match the setting to your lighting type. Offices with fluorescent tubes need different correction than homes with LED bulbs. Regular checks maintain consistent video quality as lighting conditions change.
Cleaning Camera Lenses Properly
Dust, rain spots, and spider webs degrade image clarity significantly. These contaminants scatter light before it reaches the sensor. The result is a hazy, low-contrast picture that lacks definition.
Use a soft microfiber cloth designed for optical surfaces. Apply a small amount of lens cleaning solution to the cloth, not directly on the glass. Gently wipe in a circular motion from the center outward.
Never use paper towels or clothing fabrics. They contain abrasive fibers that scratch delicate lens coatings. These microscopic scratches permanently reduce quality and cause light flare.
Dome-style units require additional attention. Condensation often forms inside the housing in Singapore’s humidity. Carefully open the housing according to manufacturer instructions to clean interior surfaces.
Schedule monthly visual inspections of all outdoor lenses. Tropical environments accelerate dirt accumulation. A clean optical path is the simplest guarantee of sharp video quality.
Optimizing Camera Positioning for Lighting Conditions
Placement drastically affects what your camera captures. Avoid pointing lenses directly at light sources like the sun or streetlamps. This causes severe overexposure that washes out entire sections of the frame.
Angle pan-tilt-zoom models away from the sun’s daily path. Morning or evening glare can blind a camera for hours each day. Position units to capture critical areas without excessive backlight.
Check for new obstructions regularly. Growing vegetation, signage, or construction can block the field of view. Adjust the angle to maintain an unobstructed sightline to monitored zones.
Verify your device operates at its highest supported resolution. Some systems default to lower quality to conserve bandwidth or storage space. Higher resolution captures finer details essential for identification.
Finally, check the focus on varifocal lens models. Physical bumps or vibration can shift the focus ring slightly. Manual recalibration restores pin-sharp imagery to your security monitoring.
Address Specific Night Vision Issues
Darkness should not mean blindness for your property monitoring system. When night vision fails, critical surveillance gaps emerge during the most vulnerable hours. These issues leave your property exposed when visibility is naturally limited.
Common complaints include completely black screens, grainy images, or severely shortened effective range. These symptoms undermine the core purpose of 24-hour security. Data reveals that faulty infrared components cause approximately 50% of all night vision failures.

A systematic approach resolves most infrared performance problems. The process involves checking mechanical filters, clearing light paths, and adjusting software settings. Each step restores clarity to your nighttime footage.
Verifying IR Filter Operation and LED Function
The infrared-cut filter is a mechanical component that switches in front of the image sensor at dusk. When functional, it allows infrared light to reach the sensor while blocking visible spectrum during the day. A stuck filter renders the camera blind to infrared illumination.
Test this component by covering the light sensor with your hand. Listen carefully for a faint clicking sound. This audible confirmation indicates the filter is moving properly between day and night vision modes.
Next, check the infrared LED array surrounding the lens. These small lights emit invisible illumination for the sensor to capture. For common 850nm wavelength systems, a visible red glow confirms activation.
No red glow from the LED array indicates either a power supply issue to the infrared circuit or complete LED unit failure. This is often mistaken for total camera malfunction.
Inspect each individual LED for physical damage. Use your smartphone camera to view them directly, as some infrared wavelengths are partially visible to digital sensors. Replace any units showing inconsistent brightness.
Clearing Obstructions from Infrared Light Paths
Infrared illumination is easily blocked by even minor obstructions. In Singapore’s tropical climate, spider webs present a major challenge. Research shows silk buildup can reduce infrared effectiveness by up to 70%.
These nearly invisible threads scatter and absorb the precious light needed for clear night vision. Monthly cleaning with compressed air prevents significant accumulation. Focus the spray around the lens and LED housing areas.
Also examine the camera’s field of view for reflective surfaces. Glass windows, white walls, or shiny metal can bounce infrared illumination back to the sensor. This creates overexposure or “whiteout” effects that obscure details.
Reposition units angled toward problematic surfaces. Consider adding matte finishes or strategic shading to prevent reflection. These adjustments ensure infrared light illuminates the scene rather than blinding the sensor.
Trim vegetation regularly that might encroach on the monitored area. Leaves and branches absorb infrared wavelengths, creating dark shadows in your night vision footage. Maintain a clear zone around critical surveillance points.
Calibrating Night Mode Sensitivity and Range
Software adjustments optimize how your system uses available infrared illumination. Access the settings menu through the device’s web interface or mobile app. Look for “Night Mode,” “IR Sensitivity,” or similar controls.
Adjust these parameters carefully. Setting sensitivity too high over-illuminates nearby objects while leaving distant areas dark. Too low leaves the entire scene underlit and unclear.
- Enable Smart IR: This feature automatically adjusts LED intensity based on subject distance.
- Check rated distance: A 30-meter camera cannot clearly illuminate objects 50 meters away.
- Consider supplemental illuminators: Add external infrared lights for large coverage areas.
- Review lux rating: Lower lux values indicate better low-light performance.
For persistent issues, evaluate your equipment’s fundamental capabilities. Older CCTV models may lack modern starlight sensor technology. These advanced sensors capture more ambient moonlight and starlight.
Upgrading to units with superior low-light performance might be necessary for challenging locations. Modern security cameras with enhanced night vision provide clearer imagery with less grain and noise.
Regular testing ensures your nighttime monitoring remains reliable. Conduct weekly checks after sunset to verify image quality. Document any degradation and address it promptly to maintain continuous protection.
Fix Recording and Storage Failures
A silent recording failure can leave your property completely unprotected without any warning signs. Your surveillance equipment may appear operational with live feeds active. Yet it captures no evidence when incidents occur.
This renders your entire security investment ineffective. The primary purpose of monitoring is to preserve video evidence. Storage issues defeat this fundamental goal.
Verifying DVR/NVR Storage Device Capacity
Hard drive capacity determines how much history your system retains. Most users underestimate how quickly storage fills. A 1TB drive recording continuously at 1080p holds approximately 30 days of footage.
Regularly check available space through your NVR interface. Look for percentage indicators or remaining days displayed. Full drives automatically stop recording to prevent data corruption.
Calculate your actual storage needs based on multiple factors. Consider camera count, resolution quality, and frame rates. Add your required retention period for complete coverage.
A full hard drive is the leading cause of recording stoppages. Proactive monitoring prevents this common issue before evidence loss occurs.
Singapore’s Personal Data Protection Act often mandates 30-day retention for commercial systems. Configure automatic overwrite rules to maintain compliance. New recordings replace the oldest files once capacity limits approach.
Checking and Adjusting Recording Schedule Settings
Incorrect scheduling creates dangerous surveillance gaps. Your system might record only during business hours accidentally. Nights and weekends would then remain unmonitored.
Verify your recording schedule matches actual security needs. Access the settings menu in your DVR or NVR interface. Confirm recording activates during all vulnerable periods.
Motion-activated recording conserves significant storage space. It saves approximately 60% compared to continuous capture. This extends your retention period without additional hardware investment.
Calibrate motion sensitivity carefully to avoid missed events. Test different detection zones and sensitivity levels. Adjust settings until the system reliably captures all relevant activity.
Review footage regularly to confirm recording quality. Ensure timestamps remain accurate for evidentiary value. Correct time settings are crucial for legal proceedings.
Formatting or Replacing Corrupted Storage Drives
Storage devices eventually fail from constant read-write cycles. Symptoms include choppy playback, missing files, or system error messages. These indicate potential drive corruption or mechanical failure.
Run diagnostic tools to assess drive health. Most modern NVR units include SMART status monitoring. This technology predicts failures before complete data loss.
Reformatting often resolves software-level corruption. Access the storage management section in your device’s menu. This process erases all existing footage but restores functionality.
- Backup critical footage before attempting reformatting
- Use the NVR’s built-in formatting tool for compatibility
- Consider RAID configurations for critical security systems
- Monitor drive temperatures in Singapore’s humid climate
RAID setups provide redundancy against single drive failures. RAID 1 mirrors data across two drives. RAID 5 offers both performance and fault tolerance for larger arrays.
Ensure proper ventilation around your recording hardware. Overheating accelerates drive degradation significantly. Install cooling fans if internal temperatures exceed 40°C.
Replace drives showing repeated errors or poor performance metrics. Choose surveillance-rated hard drives designed for 24/7 operation. These withstand the constant workload better than standard computer drives.
Maintaining reliable storage ensures your security system fulfills its evidentiary purpose. Regular checks prevent unexpected recording failures.
Reboot Your Entire CCTV System Correctly
Many intermittent surveillance problems vanish after executing a full system power cycle. This simple procedure clears temporary memory leaks and software conflicts. Research indicates structured restarts resolve approximately 60% of unexplained monitoring glitches.
Laggy video feeds and unresponsive controls often stem from accumulated digital clutter. A complete reboot provides a fresh operational state for your entire security network. This method is particularly effective for persistent issues that individual fixes cannot address.
Proper execution requires careful sequencing and verification. Rushing through the process can cause data corruption or configuration loss. Follow these structured steps to ensure your CCTV system returns to optimal performance.
Following a Proper Shutdown Sequence
Always power down components in reverse order of dependency. Begin with individual surveillance units, then your network video recorder. Finally, shut down network switches and your internet router.
This sequence prevents data corruption during the shutdown process. Each device relies on others for communication and recording functions. Disconnecting them systematically maintains system integrity.
Reverse-order shutdown mimics how these components interact during normal operation. It ensures no device tries to communicate with an already-powered-down partner, which can cause errors.
For installations with Pan-Tilt-Zoom capabilities, ensure cameras return to their home positions first. This prevents mechanical stress when power reapplies suddenly. Document any custom settings that might need restoration afterward.
Allowing a Full Power-Down Waiting Period
After shutting everything off, wait 30 to 60 seconds before restarting. This critical pause allows capacitors to discharge completely. It also clears volatile memory from all components.
Electronic components retain residual charge even after disconnection. Immediate restarting can cause incomplete initialization. The waiting period ensures a truly fresh start for your surveillance hardware.
- Capacitor discharge: 30 seconds minimum for smaller devices
- Memory clearing: 60 seconds recommended for NVRs with large buffers
- Network equipment: Allow full indicator light extinction before proceeding
During this time, visually confirm all power indicators turn off. Listen for cooling fans to stop spinning completely. This verification confirms the system is ready for controlled restart.
Verifying Normal Operation Post-Reboot
Restart components in the opposite sequence of shutdown. Begin with your router and network switches. Once they establish stable connections, power on your recording device.
Finally, activate individual surveillance units. Allow each device to boot fully before starting the next. This staggered approach prevents network congestion during initialization.
Conduct methodical operational checks once everything runs. Verify all units display power indicator lights. Confirm each appears in your NVR’s connected device list.
Test live video streaming from every camera angle. Walk through monitored areas to trigger motion detection alerts. Verify remote viewing functions correctly through your mobile application.
For installations with backup power supplies, ensure the reboot process doesn’t trigger unnecessary battery mode. Check that recording resumes automatically across all channels. Document any changes in performance for future reference.
Scheduling regular reboots during low-activity hours maintains system stability. Early morning restarts in Singapore minimize surveillance gaps. This proactive approach prevents accumulated software glitches from affecting your security coverage.
Inspect for Environmental Factors in Singapore
Singapore’s tropical climate presents distinctive challenges that can compromise surveillance system integrity over time. Intense sunlight, heavy rainfall, and constant humidity accelerate equipment degradation. These environmental issues demand specialized maintenance solutions for reliable operation.
Tropical conditions test outdoor security installations relentlessly. Direct sunlight can reduce image quality by 50% during peak hours. High humidity penetrates seemingly sealed enclosures, while insects are attracted to warmth and infrared lights.
Protecting Cameras Against Sun Glare and UV Damage
Sun glare washes out footage for several hours daily. This creates dangerous blind spots in your surveillance coverage. Position units strategically to mitigate this persistent issue.
Angle camera lenses away from the east-west sun path. Use solar loading calculations during installation planning. Built-in sunshades or external baffles provide additional protection against direct light.
Prolonged UV exposure bleaches and cracks plastic housings. Specify hardware with UV-resistant materials during purchase. Apply protective films to existing housings as a cost-effective upgrade.
Strategic positioning is more effective than post-installation fixes. Plan camera angles during design to avoid daily glare cycles that render footage useless.
Consider camera models with built-in glare reduction technology. These units automatically adjust exposure settings. They maintain usable image quality even during harsh midday conditions.
Shielding Equipment from Rain and High Humidity
Singapore’s monsoon seasons deliver powerful water jets that test waterproofing. Ensure all outdoor units carry a minimum IP66 rating. This certification guarantees protection against dust and powerful water jets.
Check cable entries and junction boxes quarterly. Replace degraded rubber gaskets during annual maintenance. Proper sealing prevents moisture ingress that causes internal corrosion.
Condensation inside dome camera housings is a common humidity-related issue. Use models with integrated heater and blower units. Sealed, nitrogen-filled housings offer superior protection in constantly humid environments.
- IP66 rating: Essential for monsoon rain protection
- Quarterly inspections: Check all seals and gaskets
- Coastal areas: Use marine-grade stainless steel brackets
- Cable management: Ensure drip loops prevent water travel along wiring
For coastal installations, specify additional salt-spray resistance. Standard cables and connectors corrode rapidly near the sea. Marine-grade materials extend equipment lifespan significantly.
Preventing Insect and Pest Interference
Insect nests and spider webs account for 30% of nighttime surveillance problems. These pests are attracted to warmth and infrared illumination. Their webs scatter light and create hazy, obscured images.
Schedule monthly exterior cleaning of all outdoor units. Use compressed air to remove webs from around lenses and LED arrays. Gentle brushing prevents damage to sensitive optical surfaces.
Consider non-toxic deterrents around mounting locations. Silicone-based barrier sprays create surfaces insects avoid. Ultrasonic pest repellers placed nearby reduce overall insect activity.
Regular maintenance prevents major infestations. Check for ant trails leading to electrical boxes. These insects can damage internal wiring and create short circuits.
Choose installation locations carefully. Avoid placing units near flowering plants or compost areas. These attract insects that subsequently build nests on your security equipment.
Environmental planning from the start ensures long-term reliability. Select hardware specifically rated for tropical use. Implement preventive maintenance schedules that address Singapore’s unique climate challenges.
Your CCTV system will deliver consistent performance with proper environmental management. These practices protect your security investment against accelerated tropical degradation.
Check Mobile App and Remote Viewing Setup
Remote access to your surveillance feeds transforms property protection into a mobile experience. You can monitor your premises from anywhere with an internet connection. This convenience defines modern security systems.
However, statistics reveal a significant challenge. Approximately 60% of remote viewing failures stem from network configuration errors. Port conflicts and misconfigured settings are the primary culprits.
When remote monitoring stops working, your entire security system loses its most valuable feature. The following solutions address the most common mobile access problems. They restore your ability to view live video remotely.
Verifying Port Forwarding and DDNS Settings
Port forwarding directs external internet traffic to your specific surveillance equipment. It creates a pathway through your router’s firewall. Without proper configuration, remote access requests cannot reach your CCTV system.
Access your router’s administration panel to check these settings. Look for the port forwarding section, often called “Virtual Server” or “Applications & Gaming.” Enter the correct port numbers used by your network video recorder or individual security camera.
Incorrect port numbers or firewall blocks account for 40% of remote access failures. Double-check manufacturer documentation for the exact ports required by your specific model.
Most residential internet plans provide dynamic IP addresses. These change periodically, breaking remote connections. A Dynamic DNS service solves this problem effectively.
DDNS maintains a consistent web address for your system. It automatically updates when your ISP assigns a new IP. Many CCTV manufacturers offer free DDNS services with their products.
For enhanced reliability, consider requesting a static IP from your internet provider. This permanent address eliminates DDNS dependency entirely. It provides the most stable foundation for remote monitoring.
Testing App Permissions and Notifications
Your mobile application needs specific permissions to function correctly. These enable critical features like push alerts and background data refresh. Without them, you might miss important security events.
Check your phone’s system settings for the surveillance app. Ensure location services are enabled if required for geofencing features. Grant permission for background data usage to receive alerts consistently.
Two-way audio functionality requires microphone and speaker access. Test this feature during daylight hours to confirm proper operation. Clear communication enhances your property’s security response capabilities.
Push notifications for motion detection represent a core benefit. If alerts stop arriving, investigate multiple potential causes. First, check the notification settings within the app itself.
Then verify your phone hasn’t silenced or blocked the app. Android and iOS both have system-level notification controls. Ensure your surveillance app has permission to send alerts.
Enable two-factor authentication whenever available. This additional security layer protects against unauthorized access. It ensures only you can view your property’s video feeds remotely.
Ensuring Proper Bandwidth Allocation for Streaming
High-definition streaming demands substantial upload bandwidth from your internet connection. Each security camera typically requires 2-4 Mbps for smooth remote viewing. Insufficient upload speed causes frustrating lag and buffering.
Test your current upload capacity using online speed test tools. Compare the results against your total surveillance requirements. Remember that other household activities also consume bandwidth simultaneously.
Quality of Service settings on your router provide an effective solution. QoS prioritizes network traffic from designated devices. Configure it to favor your CCTV system over less critical data.
This ensures your surveillance feeds receive necessary bandwidth even during peak usage. Streaming movies or large downloads won’t degrade your remote viewing experience.
Consider these bandwidth management strategies:
- Limit streaming resolution on mobile networks to conserve data
- Schedule automatic quality reduction during known high-usage periods
- Upgrade your internet plan if multiple HD cameras exceed current capacity
- Use wired connections for recording devices to free wireless bandwidth
Regular maintenance prevents sudden remote access failures. For comprehensive guidance on maintaining all aspects of your surveillance equipment, explore our detailed troubleshooting resource.
When you change internet providers or routers, reconfigure all remote access settings. Port forwarding rules and DDNS configurations don’t transfer automatically. Proactive management keeps your mobile monitoring operational year-round.
Knowing When to Seek Professional CCTV Support in Singapore
Certain technical challenges demand specialized expertise that goes beyond basic diagnostic checks. Complex hardware failures or persistent network issues often require professional help.
Certified technicians resolve 95% of technical failures quickly. They use advanced tools to find hidden faults in wiring or firmware. This protects your security investment.
Professional services ensure warranty compliance and proper system integration. Regular maintenance contracts can prevent 80% of critical failures. This maintains optimal monitoring quality.
For reliable solutions in Singapore, contact local experts. Wen Hong provides technical support at +65 60135960. ED Viston offers assistance at +65 8313 4578.
Recognizing when to engage a professional safeguards your property’s protection. It ensures long-term reliability for your surveillance system.
FAQ
What is the first thing I should check if my security camera has no video?
Always start with the power supply. Verify the power adapter is plugged in and the outlet is working. Check for a solid power indicator light on the camera and inspect all cables for secure connections. A simple reboot of the camera and your network video recorder can also resolve many temporary glitches.
Why is my night vision not working or showing poor quality?
Night vision problems often stem from obstructed infrared LEDs or a dirty lens. Clean the camera dome and ensure no spider webs or debris block the IR lights. Verify the IR cut filter is switching correctly by listening for a faint click at dusk. Also, check your camera’s settings to ensure night mode is enabled and sensitivity is properly calibrated.
How can I fix a blurry or distorted image from my surveillance system?
A> First, gently clean the external lens with a microfiber cloth. Next, log into your camera’s settings via its software or web interface. Adjust the focus manually if it’s a varifocal model. Review and correct settings like resolution, bitrate, and white balance. Poor video quality can also be caused by voltage drops from an inadequate power source.
What steps fix a camera that is offline or has no network connection?
A> Begin by power cycling the camera and your router. Test the network cable with another device if it’s a wired system. For wireless models, ensure the camera is within range and reconnect it to your Wi-Fi. Check for IP address conflicts in your router’s admin panel and verify that your network switches are functioning correctly.
When should I perform a factory reset on my CCTV equipment?
A> A factory reset is a last resort for persistent hardware issues that survive a basic reboot. Use it when you’ve lost login credentials, after a major firmware update fails, or if the camera exhibits erratic behavior unreachable through normal settings. Remember, this will erase all custom configurations, so note your settings first.
How do I address storage and recording failures on my DVR or NVR?
A> First, check the available capacity on your hard drive. A full drive will stop recording. Verify your motion detection or continuous recording schedule is active. If the system reports errors, try reformatting the drive through the recorder’s menu. For recurring problems, the storage drive may be corrupted and require replacement.
What environmental factors in Singapore commonly affect security cameras?
A> High humidity and frequent rain can cause condensation inside housings, leading to foggy footage. Persistent sun glare can wash out daytime images. Regular maintenance is key: use weatherproof housings rated IP66 or higher, install sun shades, and apply a water-repellent spray to the exterior dome to improve performance in tropical weather.


